 Case — Chelsea FC
2019–2020
Case — Chelsea FC
2019–2020
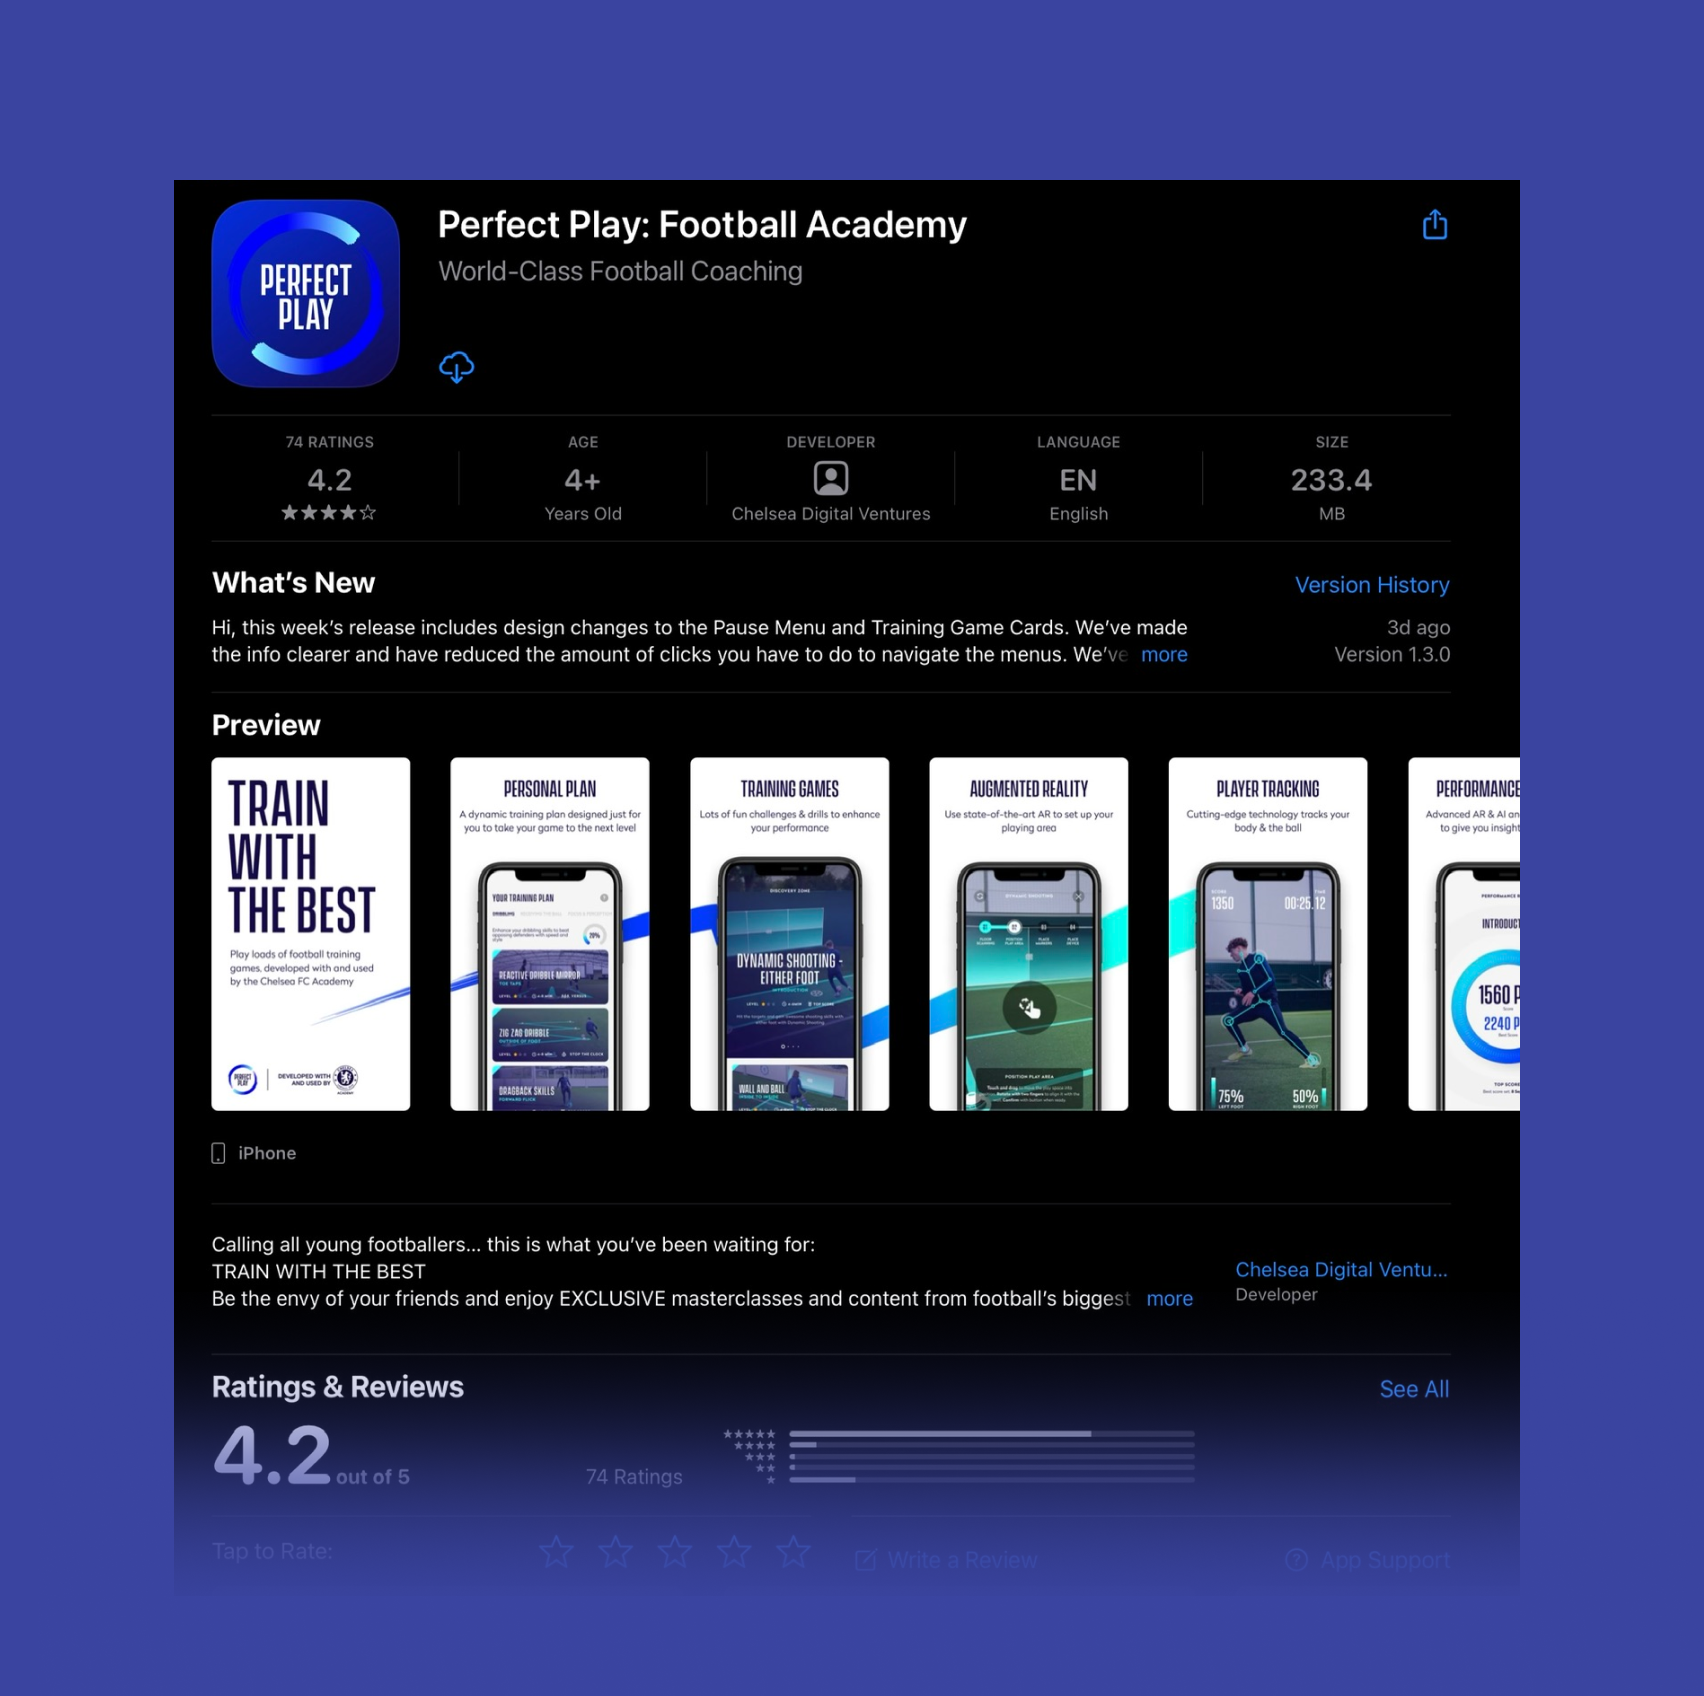
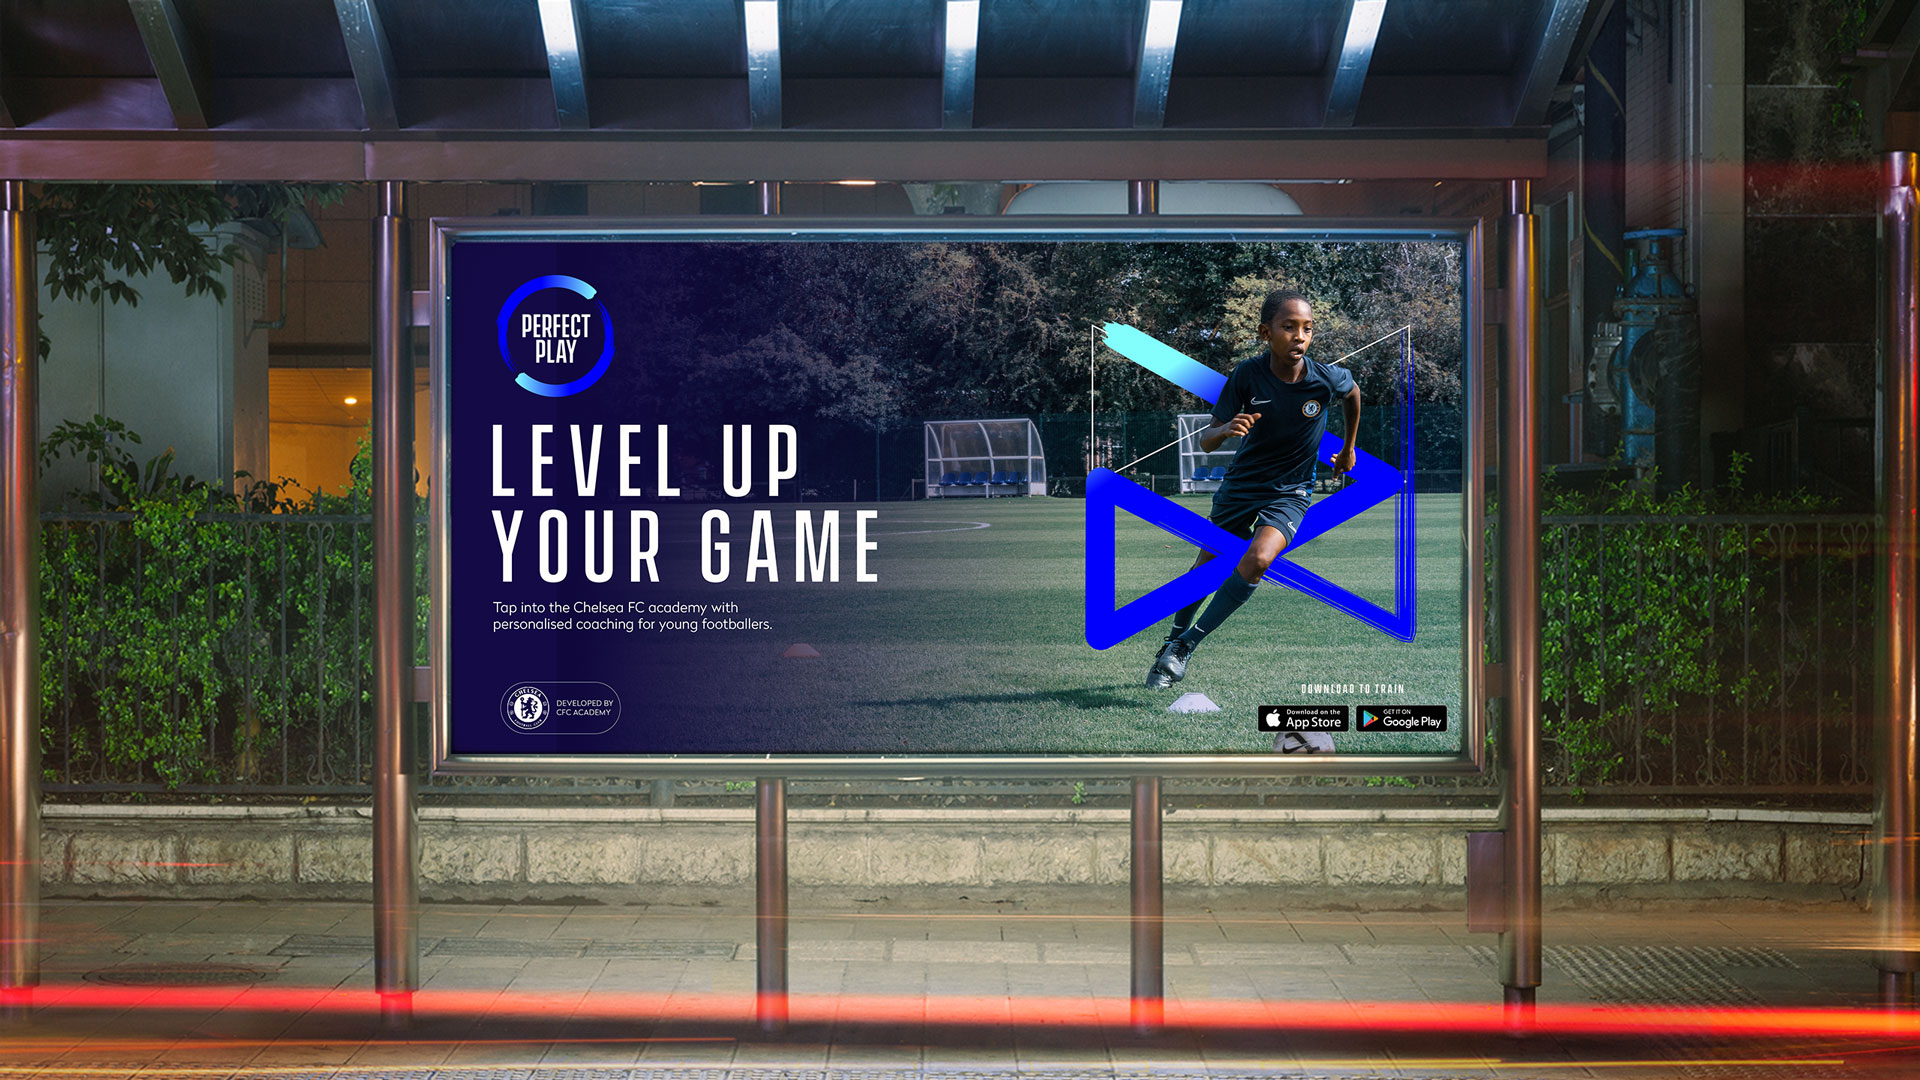
Perfect Play — Chelsea FC’s academy training method, redesigned as a consumer app.
Designed Perfect Play, a consumer-facing football training app developed with elite coaches and sports psychologists from Chelsea FC. Worked as Product Designer across UX, systems design, and prototyping to translate academy-level training into a personalised, scalable digital experience.
Led activity templating, onboarding, AR interactions, and performance mechanics to support adaptive training plans for players of different ages and skill levels.
ResultsOutcomes
What the work delivered, in plain terms — the app shipped and is already public.
Each with 3–6 difficulty levels, held by a single templating system rather than 75 bespoke flows.
Used by the Chelsea FC Academy itself and publicly endorsed at launch by Mason Mount, Christian Pulisic and Tammy Abraham — a first-team endorsement beats any download stat.
Premium subscription (£9.99/mo · $14.99 US) — the paywall flow I designed carried real recurring revenue.
Child-safety built in: partnership with SuperAwesome, world leaders in parental-consent tech, for the under-13 registration.
Covered at launch by Engadget, iMore and Coach.
Rebuilt the scanning flow to raise setup success for large 5m+ objects.
Blink · the whole case in seven bulletsIf you only have 40 seconds
- 2019–2020 — Product Designer on Perfect Play, Chelsea FC’s academy training method rebuilt as a consumer iOS app with elite coaches and sport psychologists.
- Scaled the academy method into a personalised plan: 75+ activities across Technical, Physical, Football Intelligence, Mental & Lifestyle, each with 3–6 levels.
- Solved “how to design 100+ activities” with a templating system — grouping activities, finding key screens, and breaking them into reusable atoms, molecules and organisms.
- Built onboarding including a COPPA-compliant kids’ flow (no data stored until a parent consents) and helped migrate the team from Sketch to Figma.
- Designed a bespoke AR setup for large 3D objects — placing a 7m football gate in ARKit cone-by-cone, with min/ideal/max ruler feedback (red→orange→blue) and haptics.
- Built the Dynamic Shooting computer-vision game: scan the space, set the gate, mount on a tripod, then play by voice and sound only — volume-gated so instructions are audible.
- Designed performance data, achievements (Bronze/Silver/Gold) & goals, a subscription/paywall strategy and offline downloads — tuned separately for kids vs parents.
Glance · 01What is Perfect Play?
Perfect Play is a consumer football-training app — a scaled-down version of Chelsea FC’s academy method, built with the club’s coaches and sport psychologists. It tailors challenge to each player’s age and ability to build a well-rounded individual across Technical, Physical, Football Intelligence, Mental Skills and Lifestyle, delivered through 75+ activities as a fully personal plan.
Glance · 02Designing 100+ activities
The big challenge was the sheer number of distinct activities. I built a templating system: group activities into categories, identify the 1–2 “key” activities that contain every screen, map and validate user journeys with the tech team, then break the wireframes into atoms, molecules and organisms that reuse across the app — a scalable design system rather than 100 bespoke flows.
Glance · 03Onboarding & COPPA
Registration had to work for adults and children. For US kids under 13 I designed a COPPA-compliant flow where no data is stored until a parent or guardian consents, plus routes to later retrieve, administer or modify those permissions — a legal constraint turned into a clean, unblocking journey.
Glance · 04AR & the Dynamic Shooting game
Placing a 7-metre AR football gate is nothing like dropping an IKEA chair, so I researched floor-plan and ruler apps and designed a cone-by-cone setup in ARKit (2019, no wall detection) with min/ideal/max ruler feedback and haptics. The Dynamic Shooting computer-vision game builds on it: scan, set the gate, mount on a tripod, and play guided entirely by voice and sound.
Glance · 05Motivation, data & the business model
Performance stats were designed twice — rewarding positives for kids, a holistic view for parents. Motivation runs on achievements (Bronze/Silver/Gold) and goals, while the subscription strategy borrowed premium patterns from YouTube and LinkedIn with well-timed, low-friction paywall prompts. Offline downloads and preloading (mapping the likeliest path) kept the React front end fast.
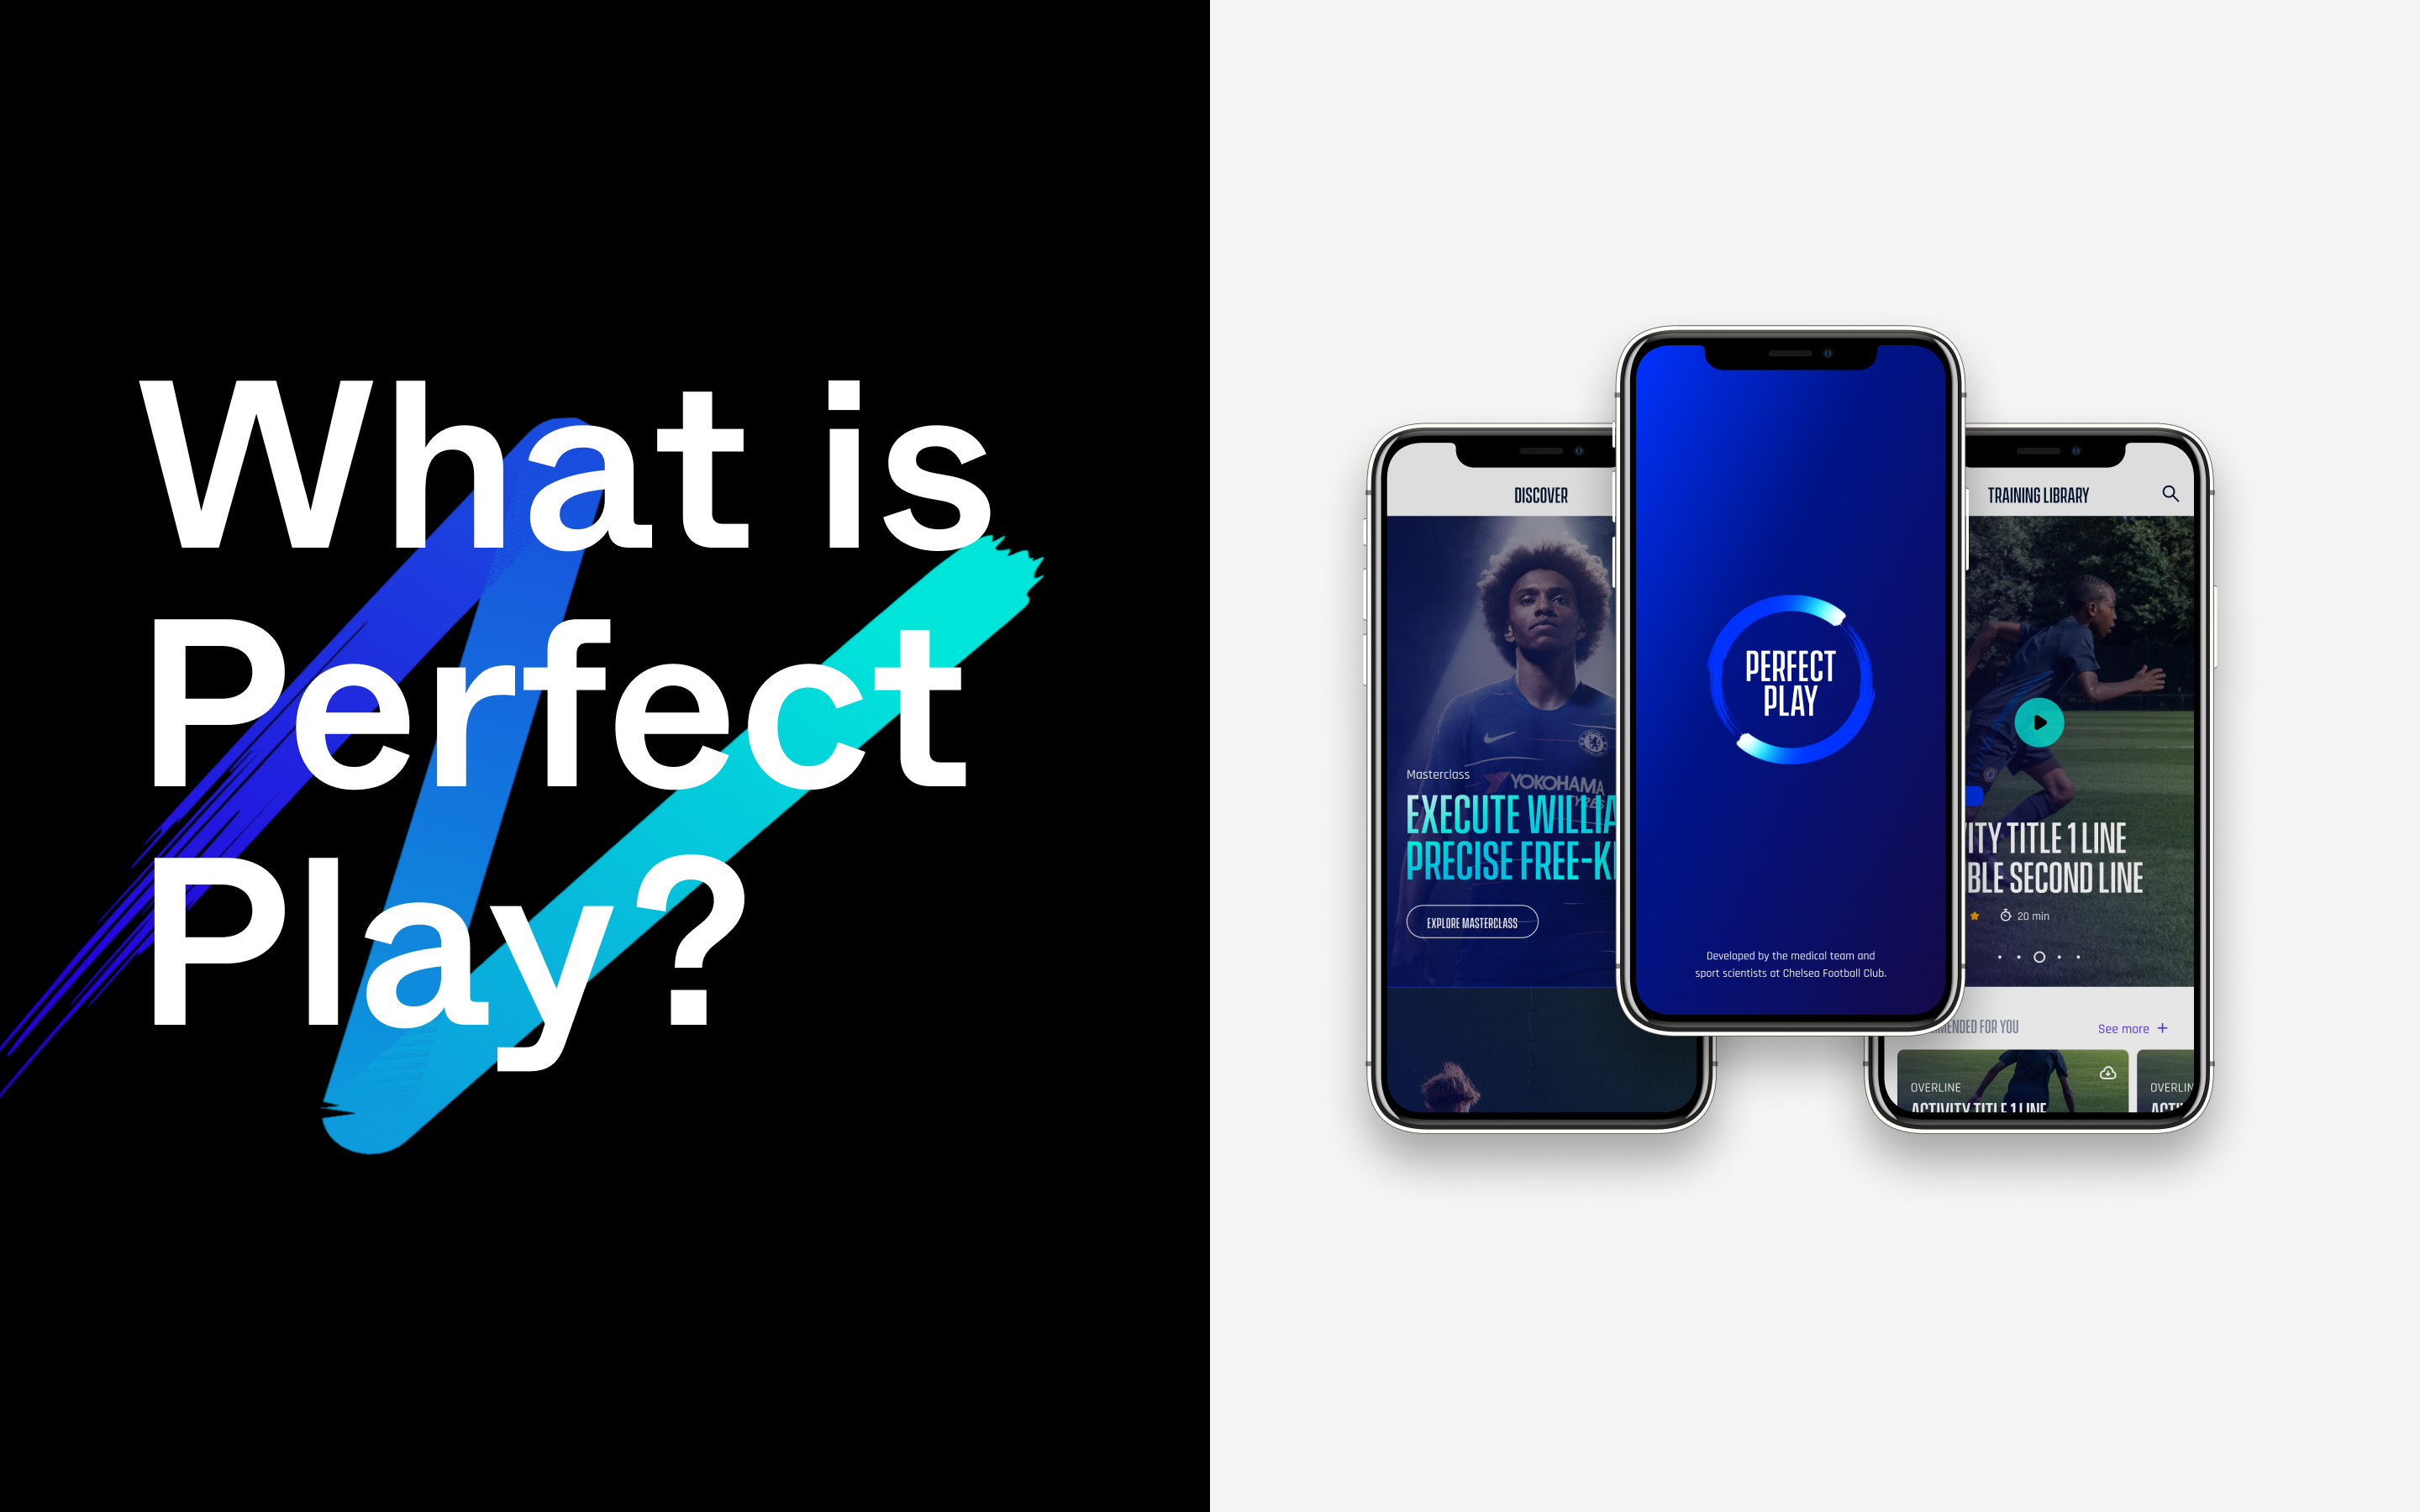
01 — OverviewWhat is Perfect Play?
World-class football coaching
Perfect Play is a training app designed for the consumer market, made together with some of the main football coaches and sport psychologists from Chelsea FC.
The app is in fact a scaled-down version of the official training method used at the academy; it is tailored to the age and experience of the user in order to bring the right mix of challenge and effort.
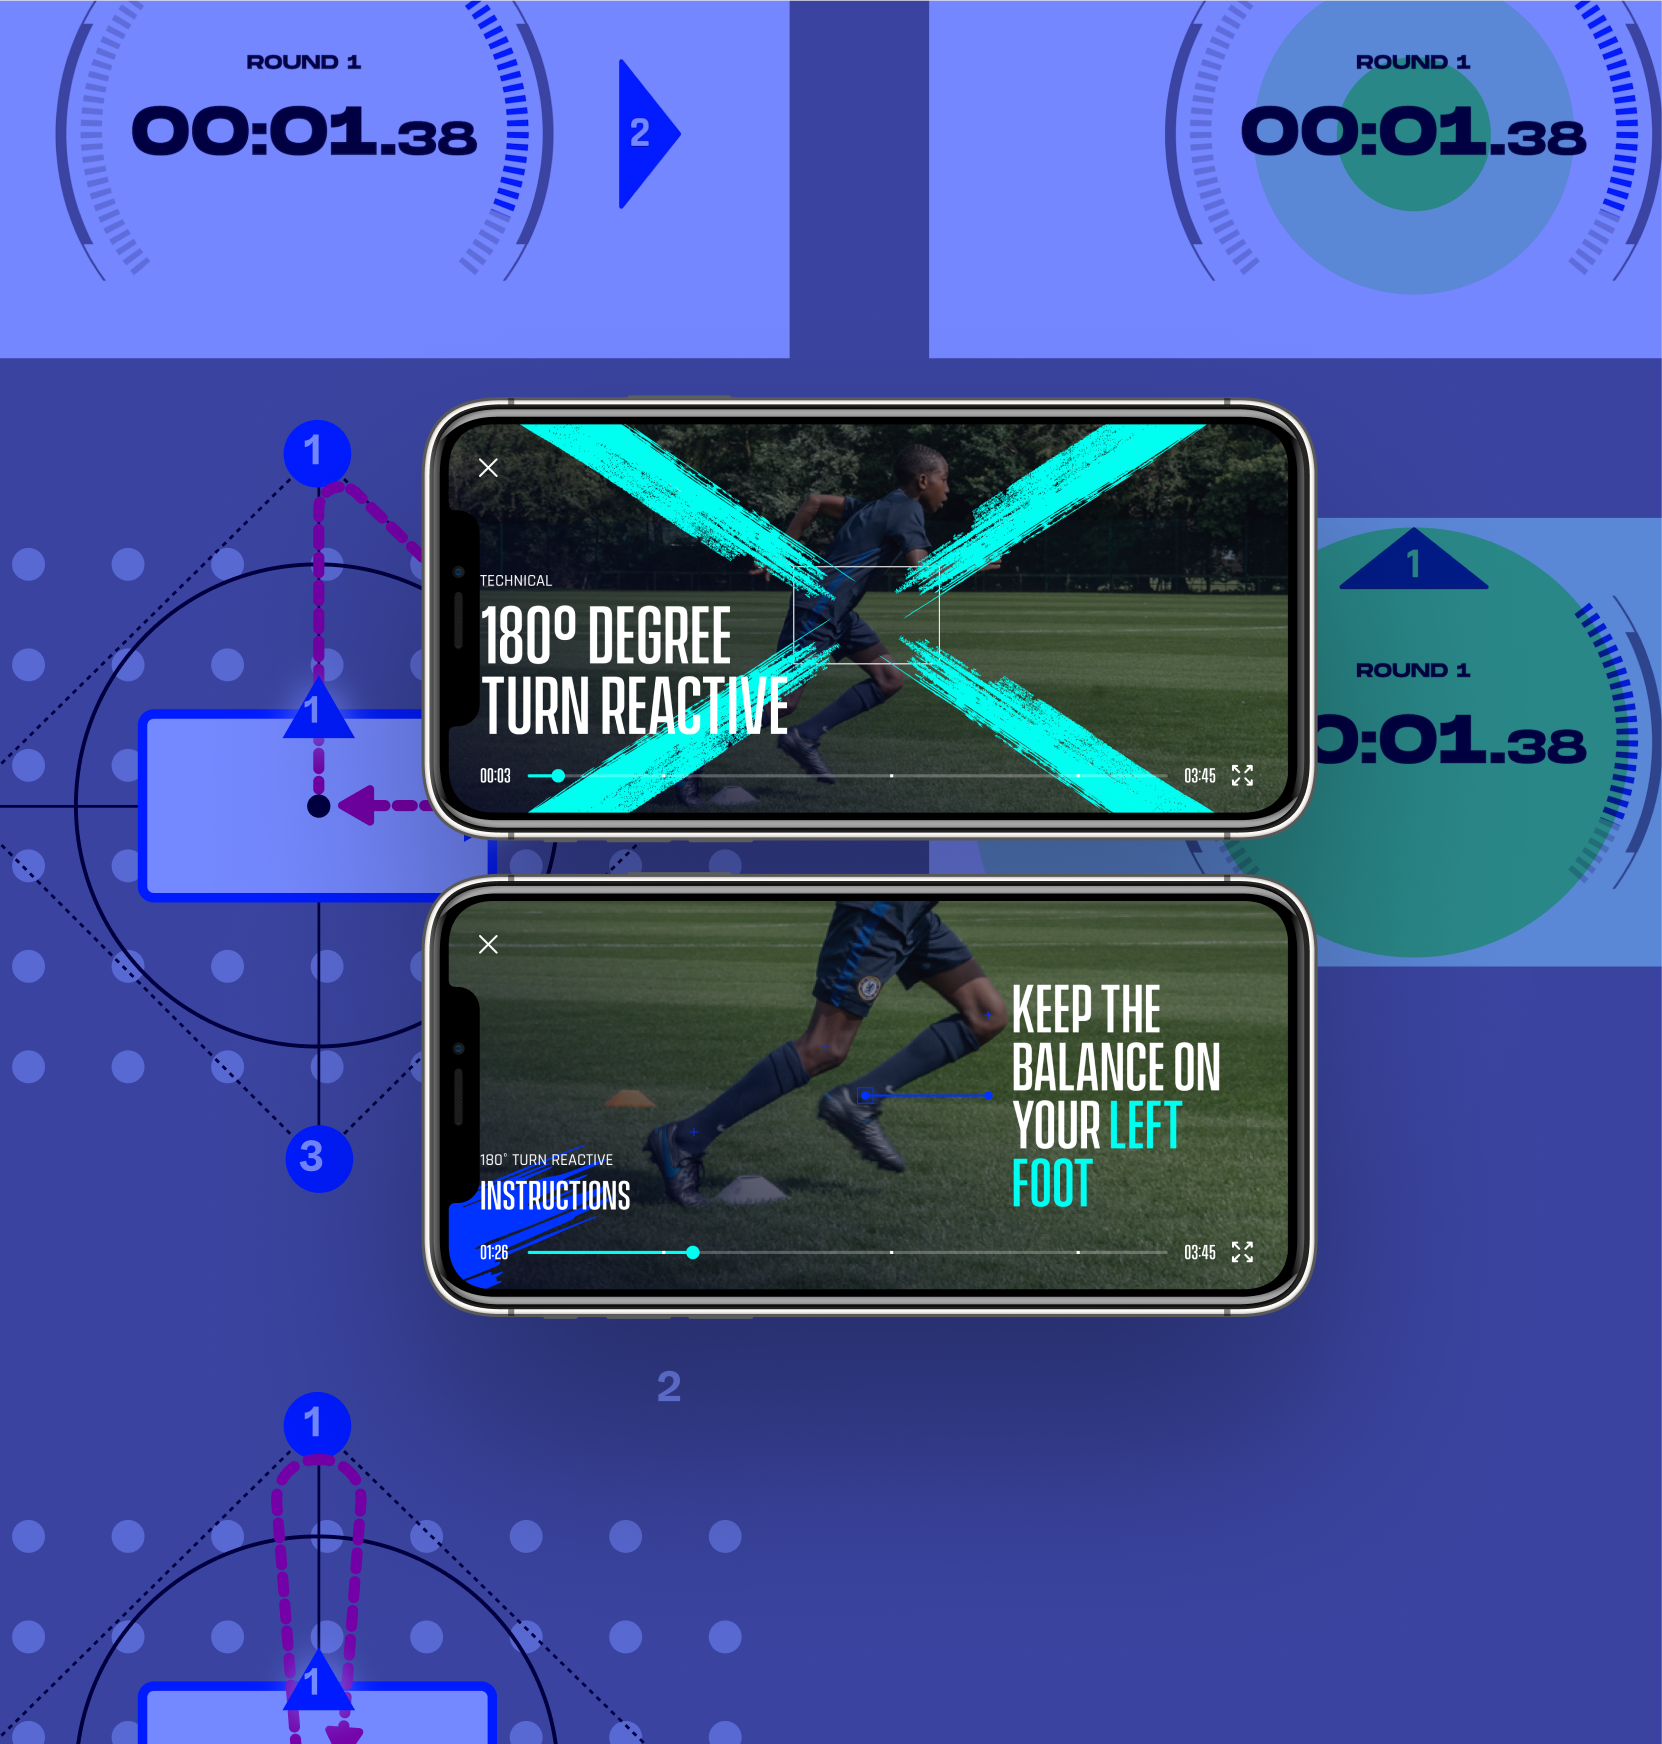
How does it work?
The main focus is to create a ‘well rounded’ individual, with skills ranging from Technical, Physical, Football Intelligence and Mental Skills to Lifestyle.
In order to achieve this the team prepared 75+ activities, each with 3–6 levels and stages, resulting in a fully personal training plan that challenges and improves your football skills.
Team structure
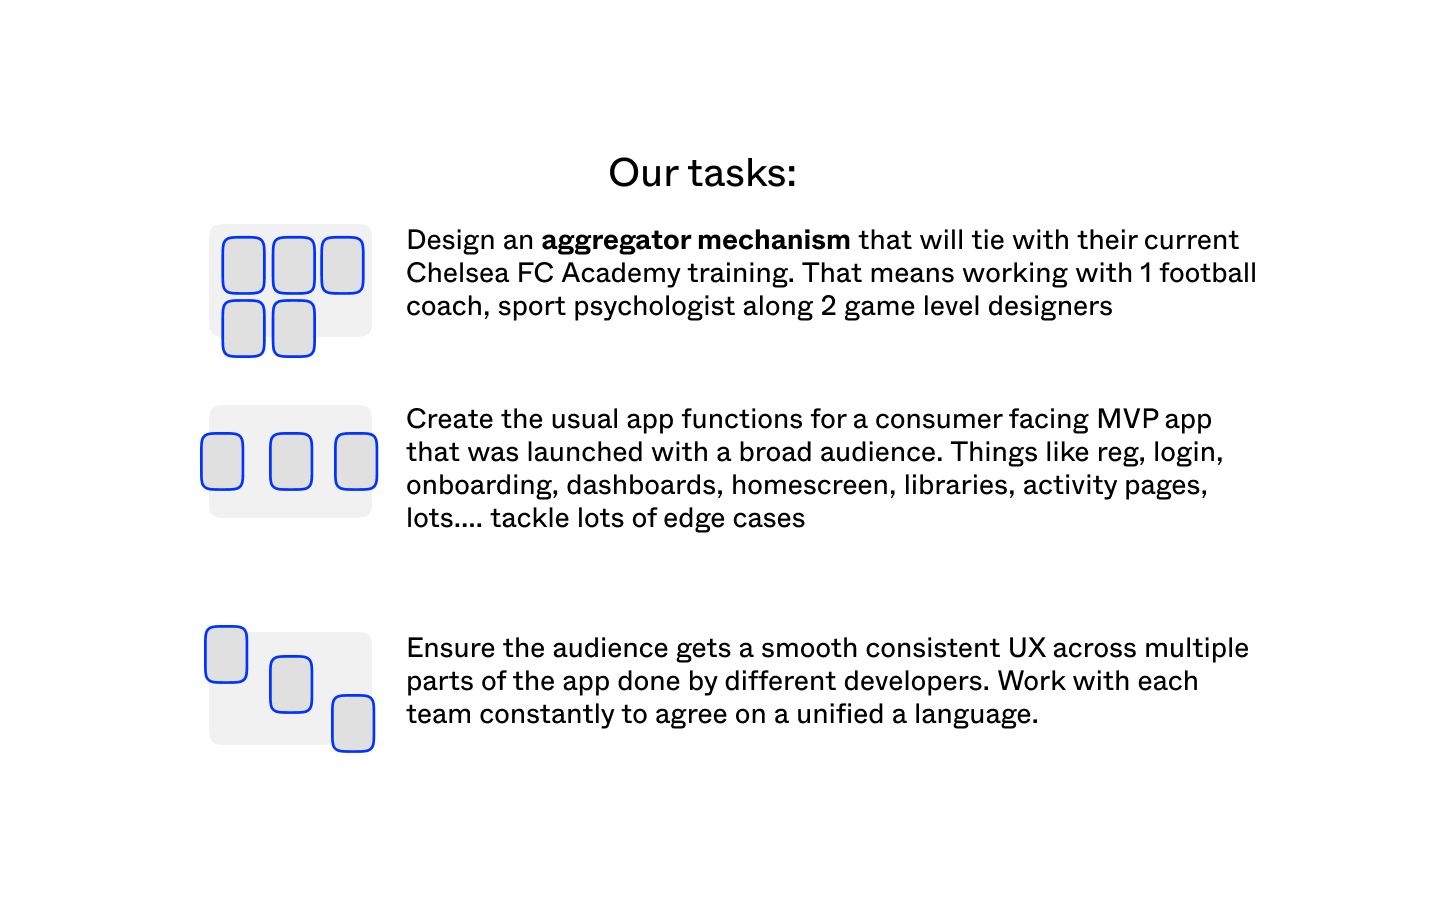
I’ve worked in the Product Team along:
- 2 Product Owners
- Project manager
- Juniors academy coach (part time, 2 days per week)
- Sport Psychologist (part time)
- Game designer
- Data Analyst
- Creative Director / Artworker
- Myself, Product Designer ×2
Our Product Team worked along Chelsea’s marketing team and video production among others.
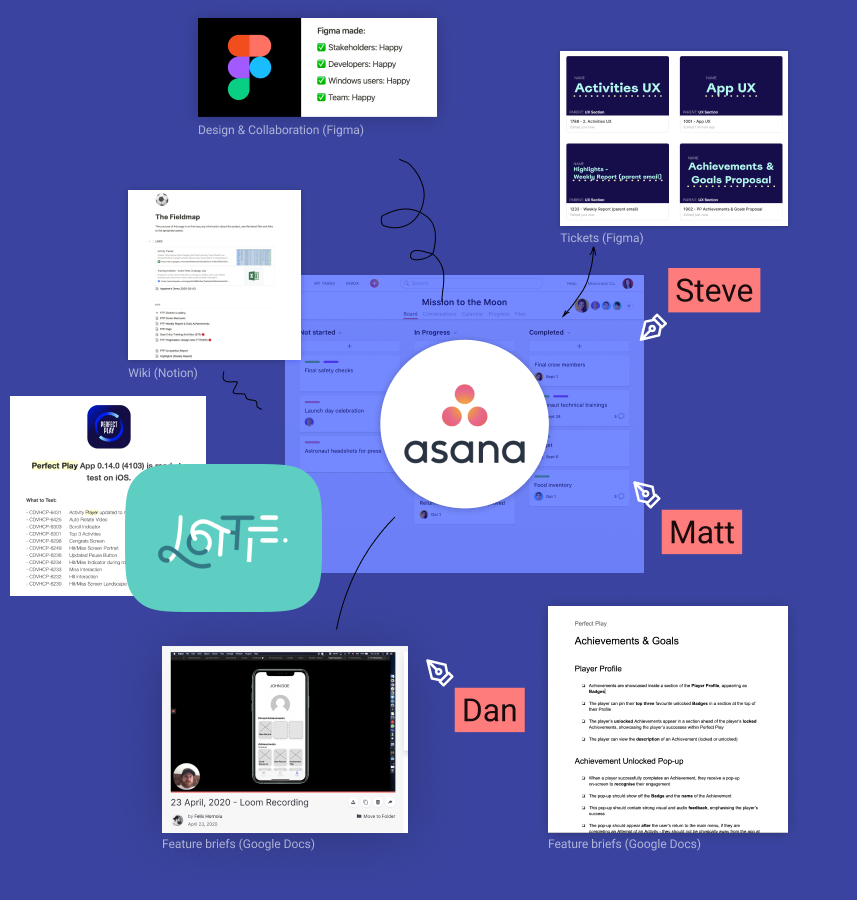
As a product team we were fortunate to use lots of new cool tools, and our mission was also to take time and help others learn the setup.
I’ve helped the team migrate from Sketch to Figma; this move helped us get closer with our developers and facilitate access to everyone to the designs.
Our management was in Asana, where we made tickets to Figma, Google Docs, Notion or Miro.
For user testing we used Lookback and for internal recording Loom.
We used Slack and Teams to communicate, along other tools that we tested on the way.
02 — Design SystemActivities Design System
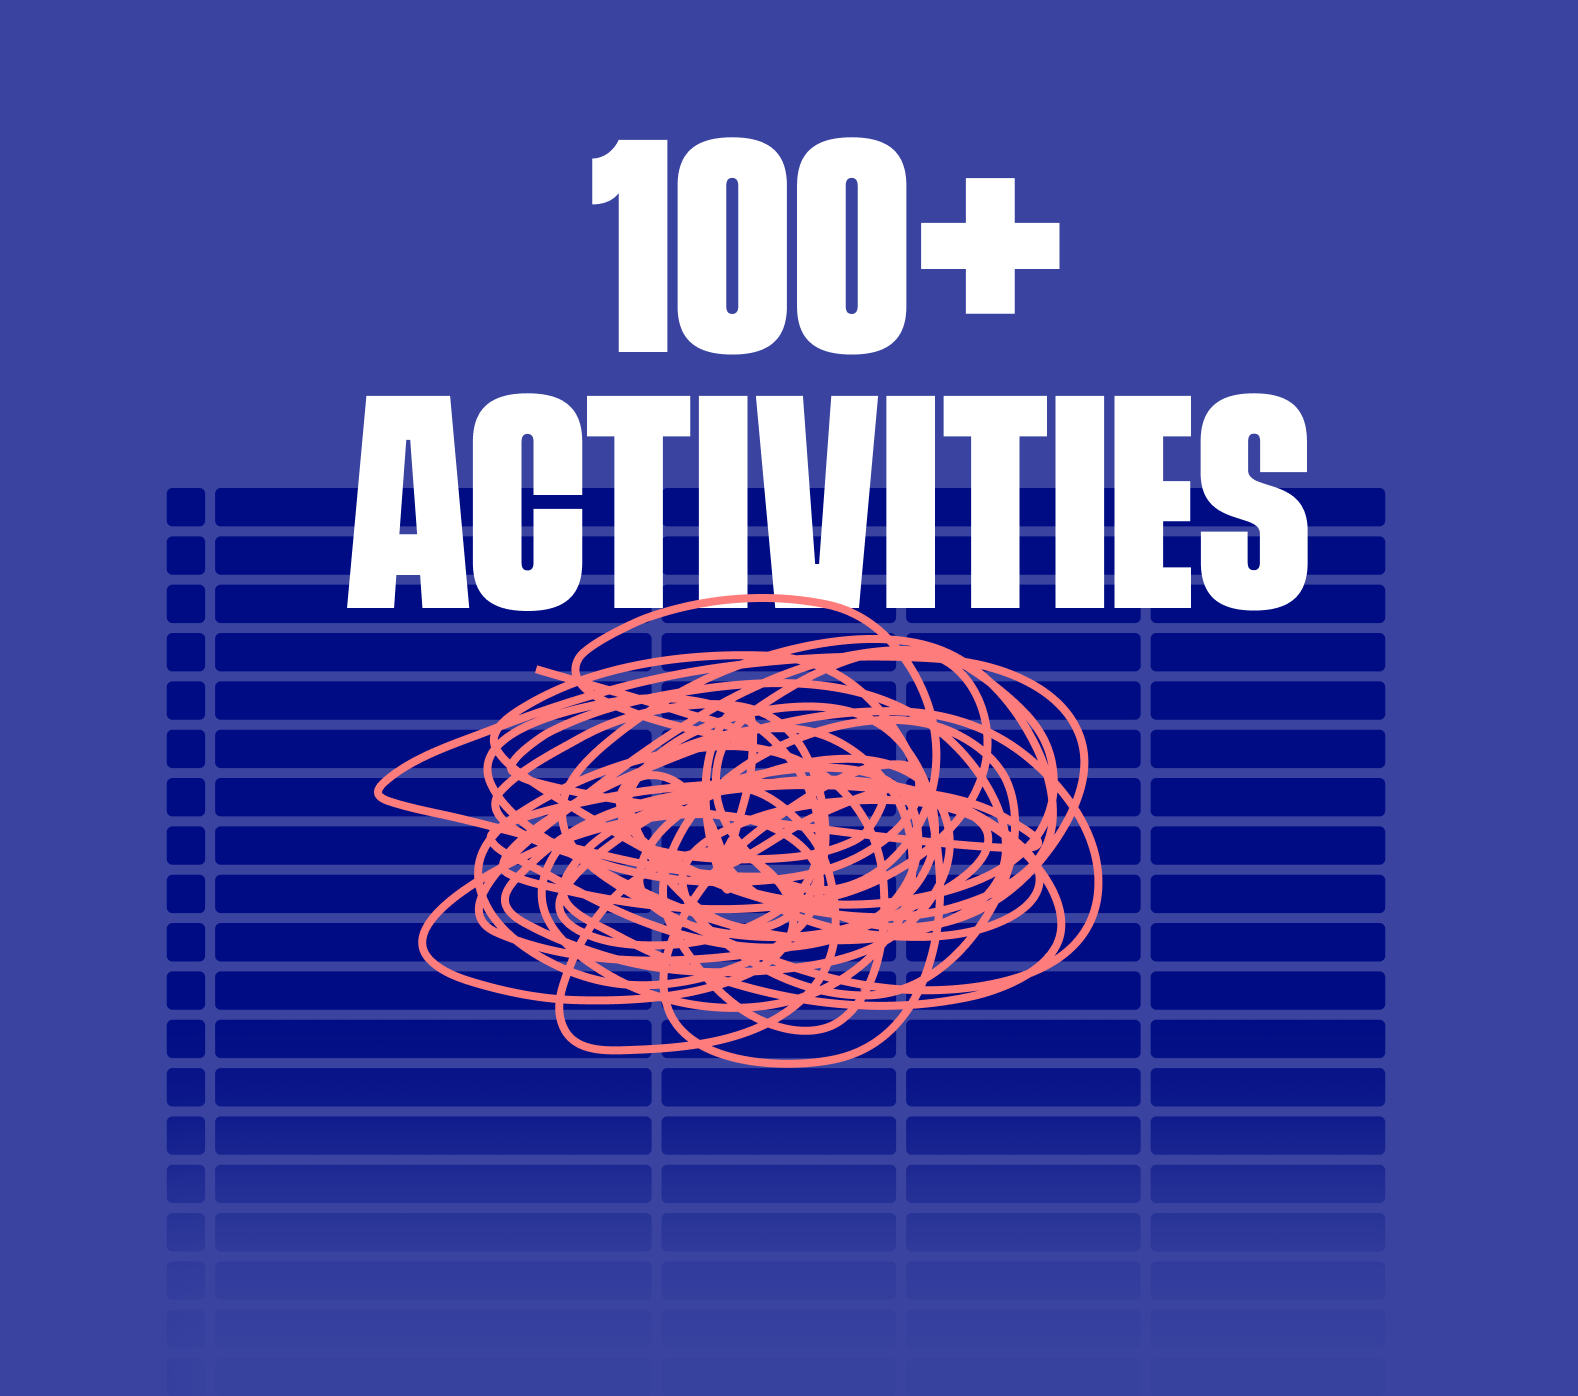
How to design 100+ activities?
One big elephant in the room when I started the project were all the different activities developed for the app.
Here is a short oversimplification of how we solved the problem by creating a templating system!
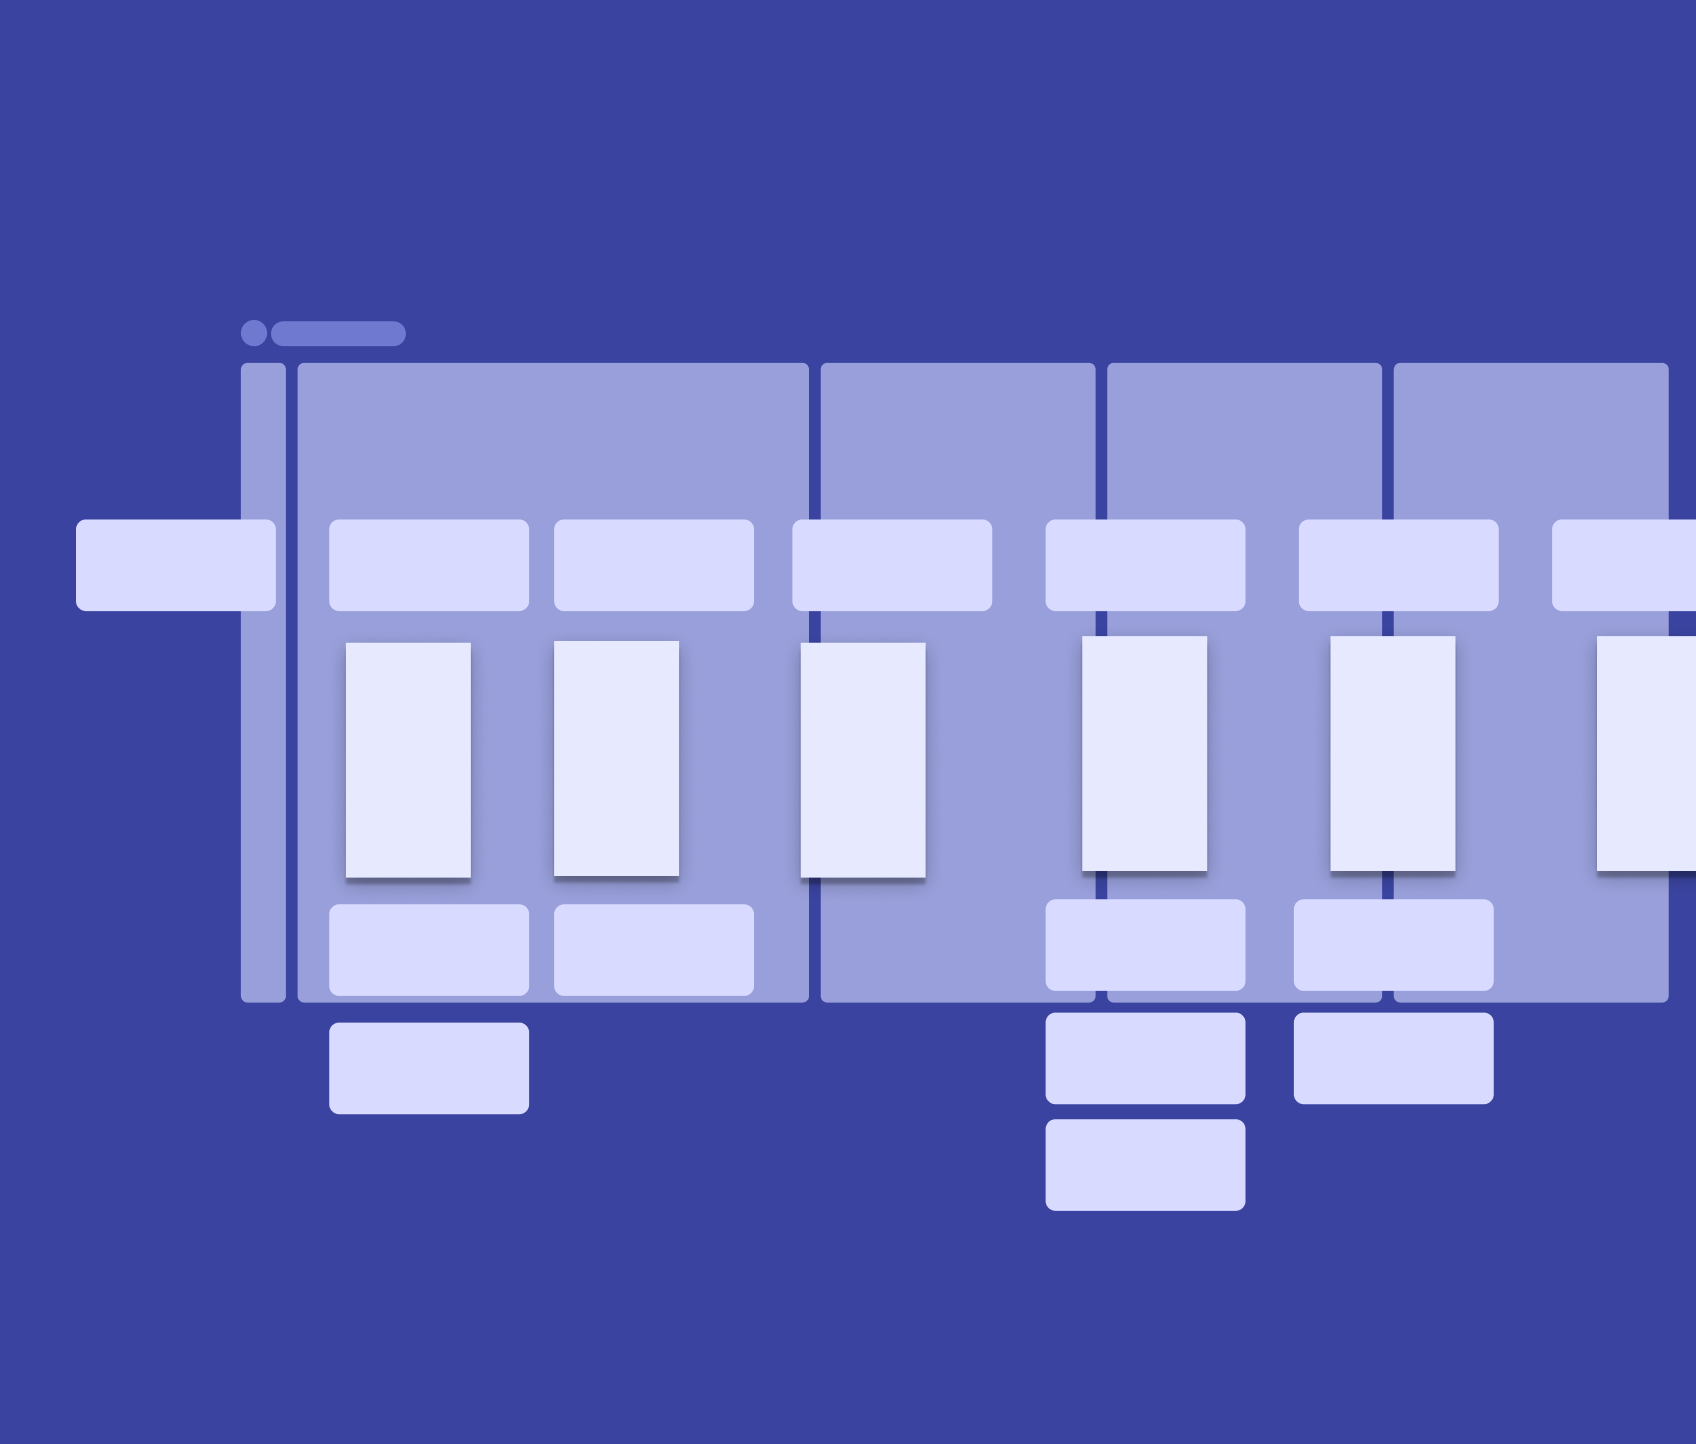
Grouping
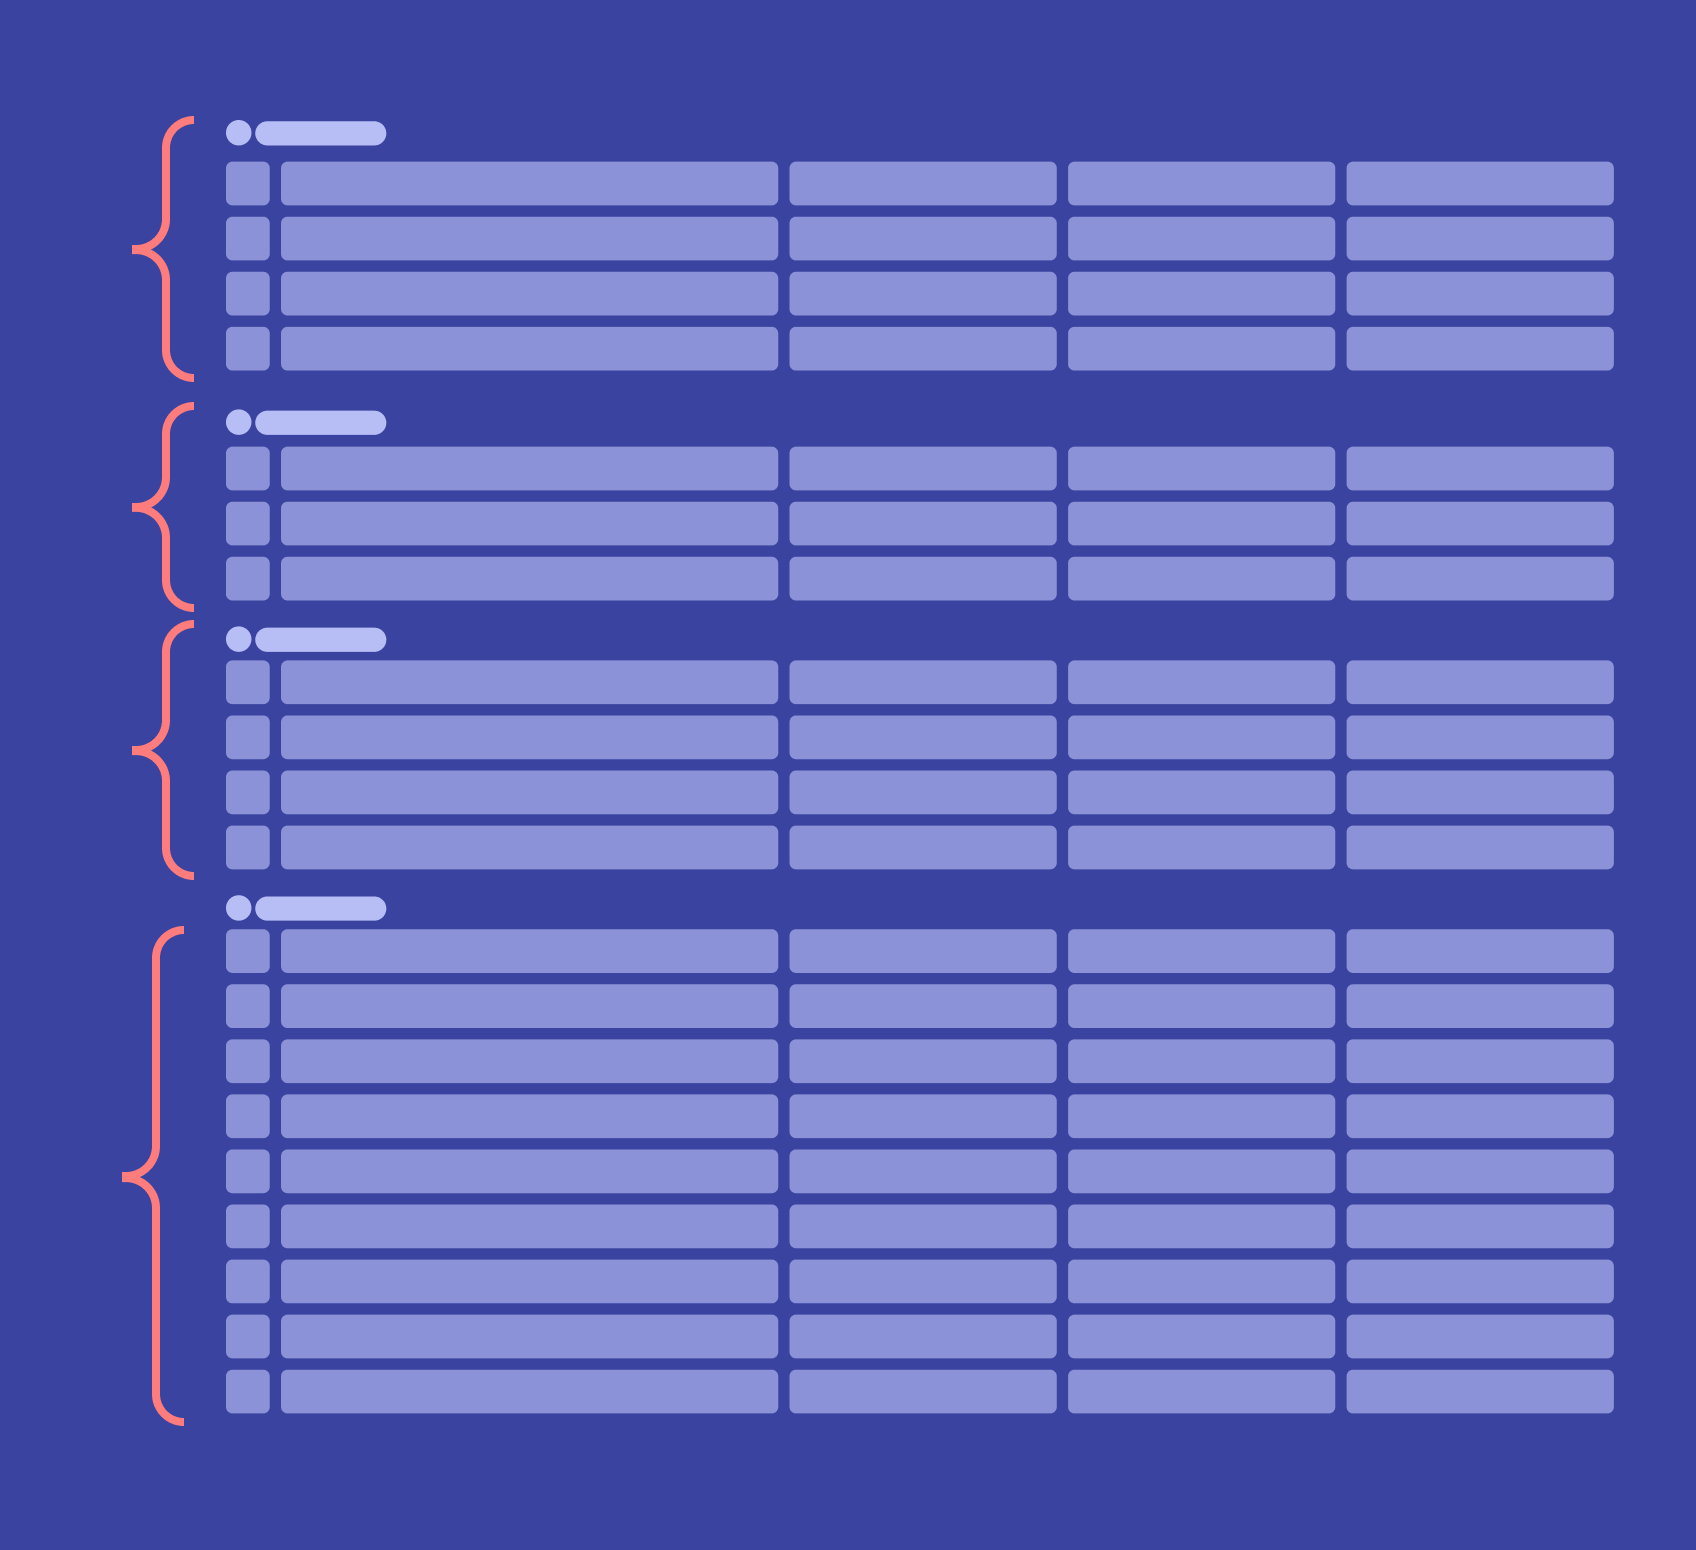
The first thing was to group activities and create the main categories based on similarities.
Key activities
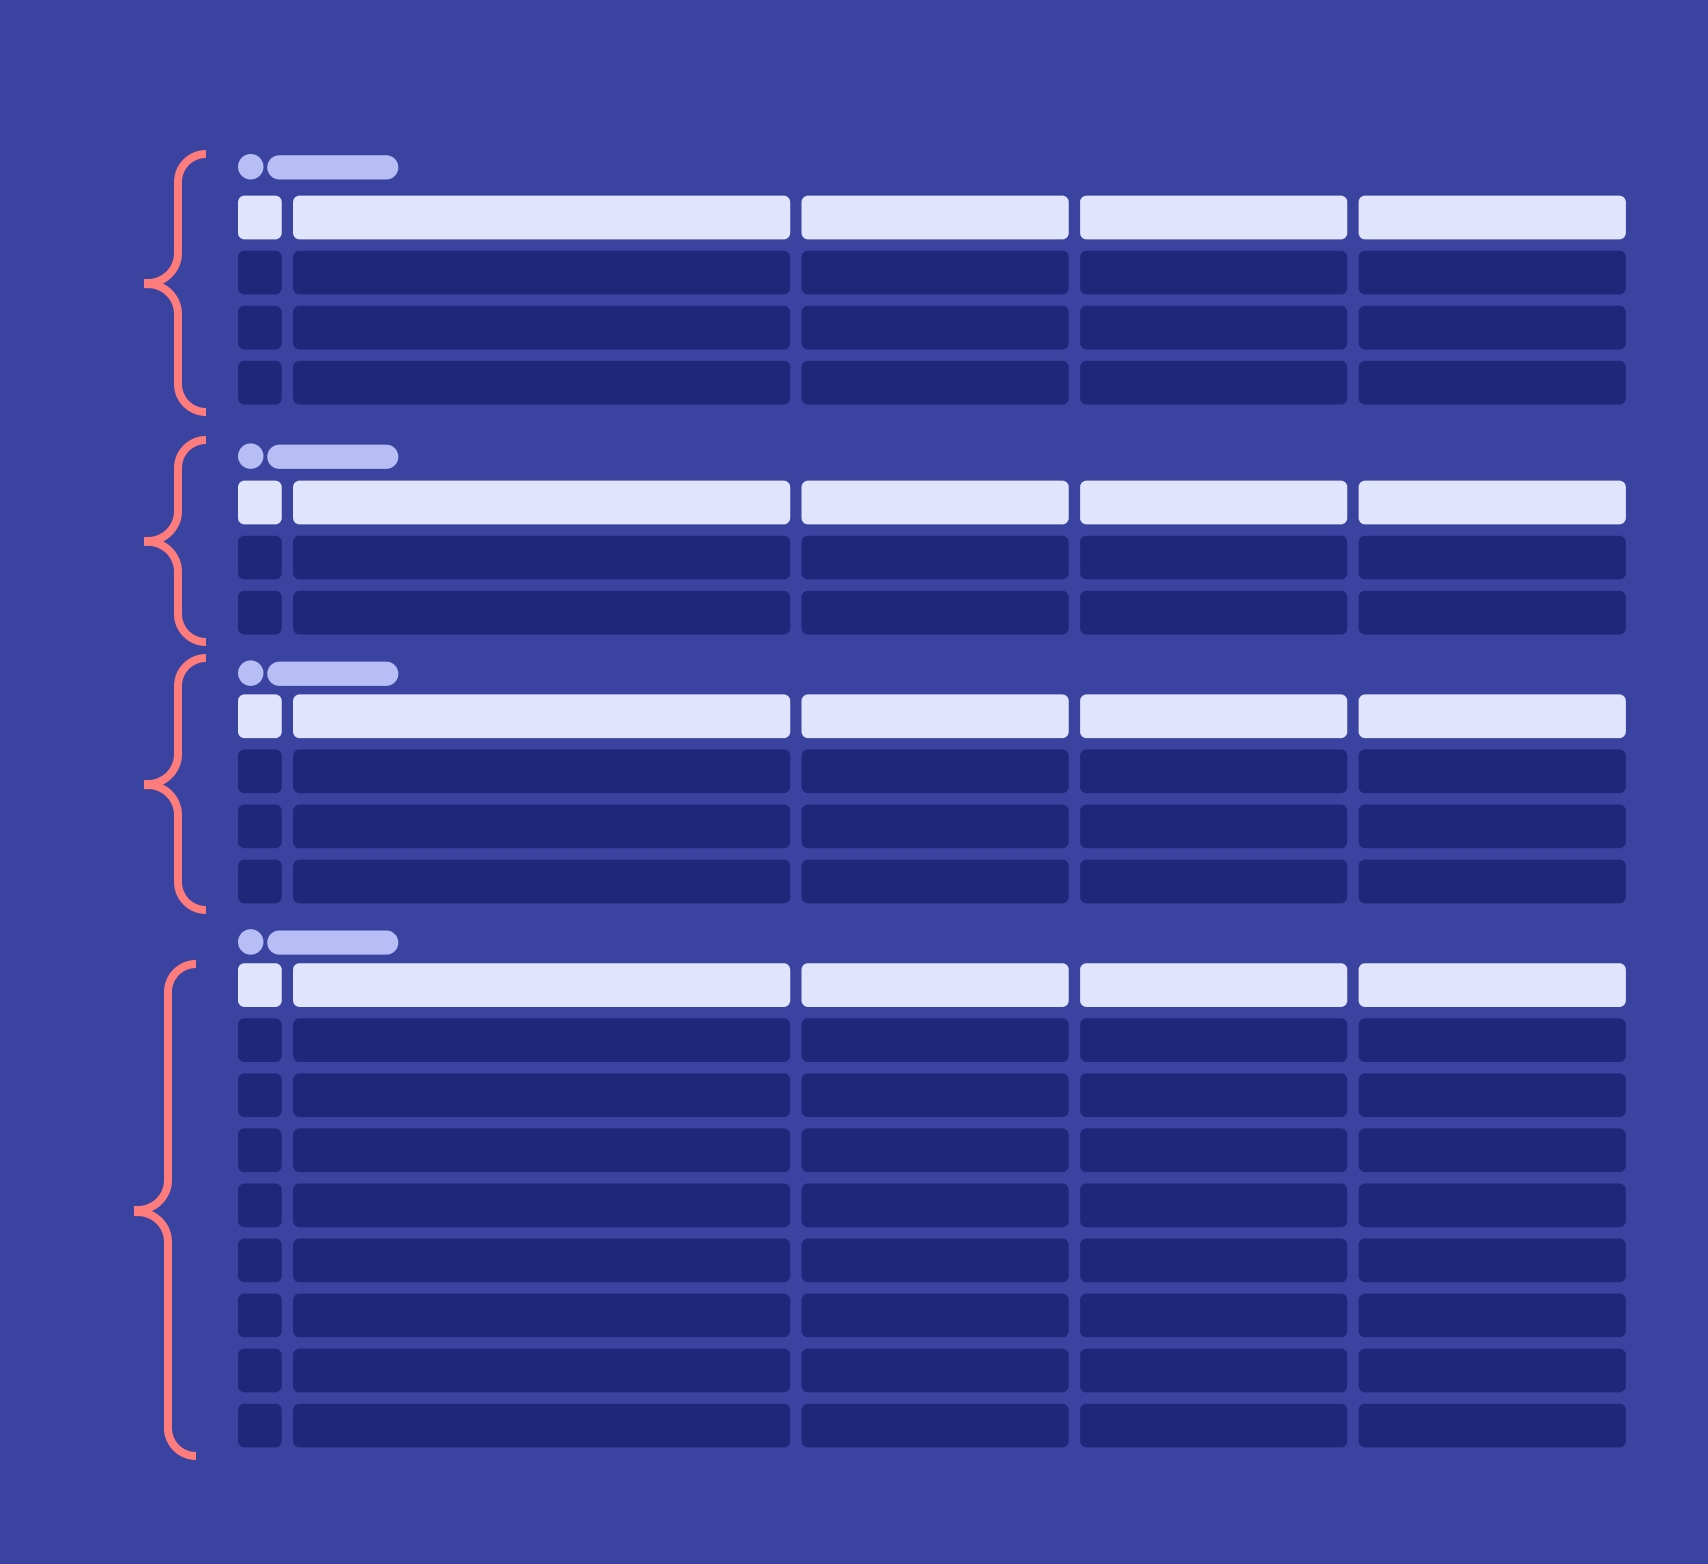
In every category we found that 1–2 activities would be more complex and always include all the screens that were in others.
User journeys
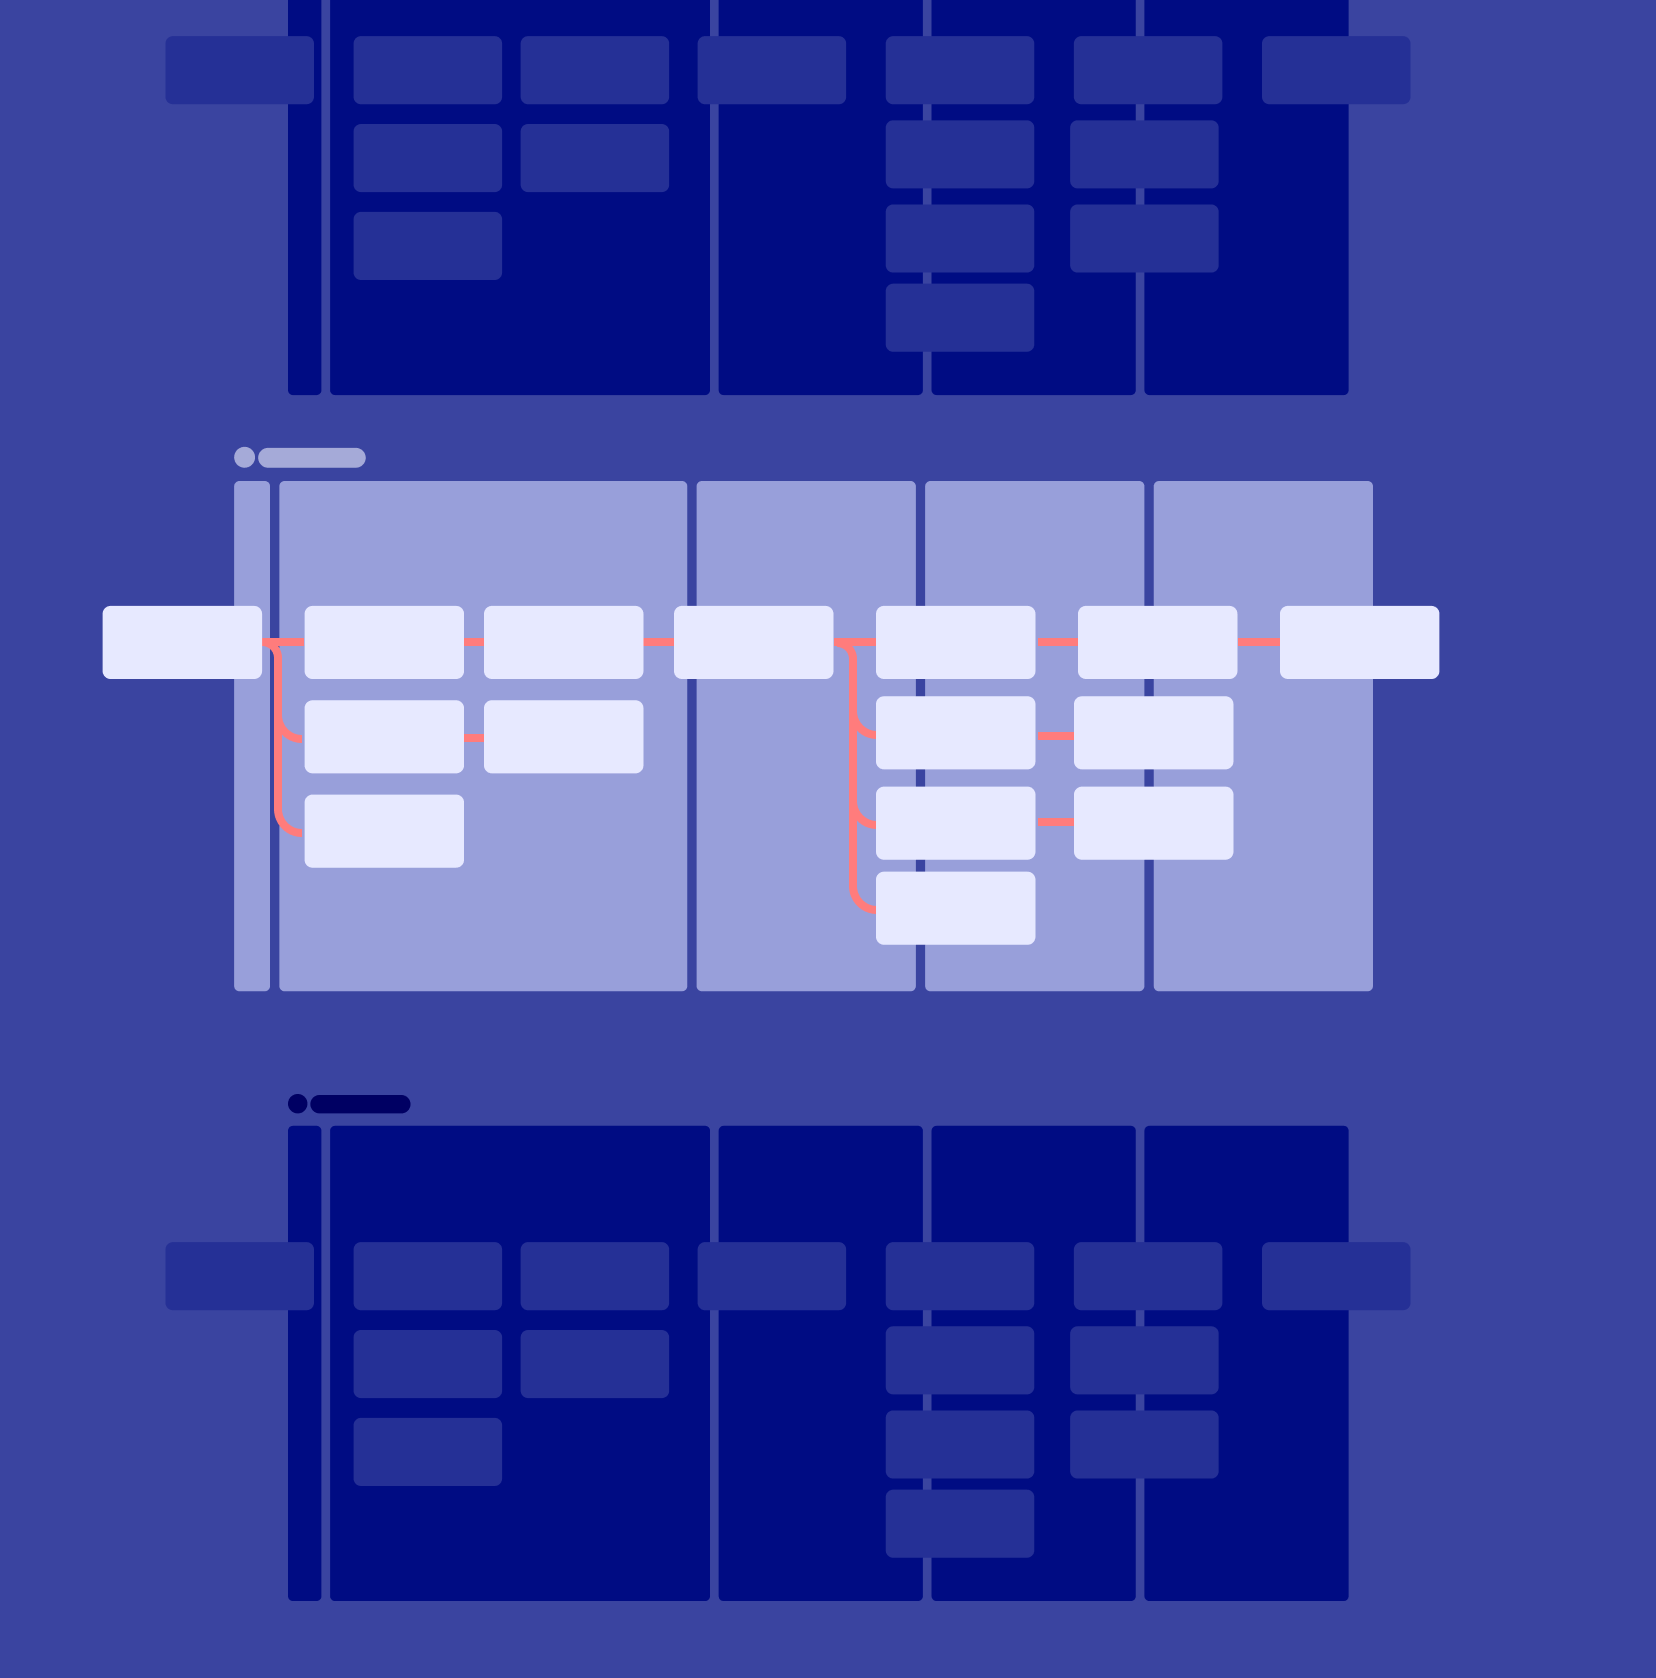
We created user journeys and validated them with the tech team to review the number of screens and data entries.
Wireframes
For each key screen we created wires.
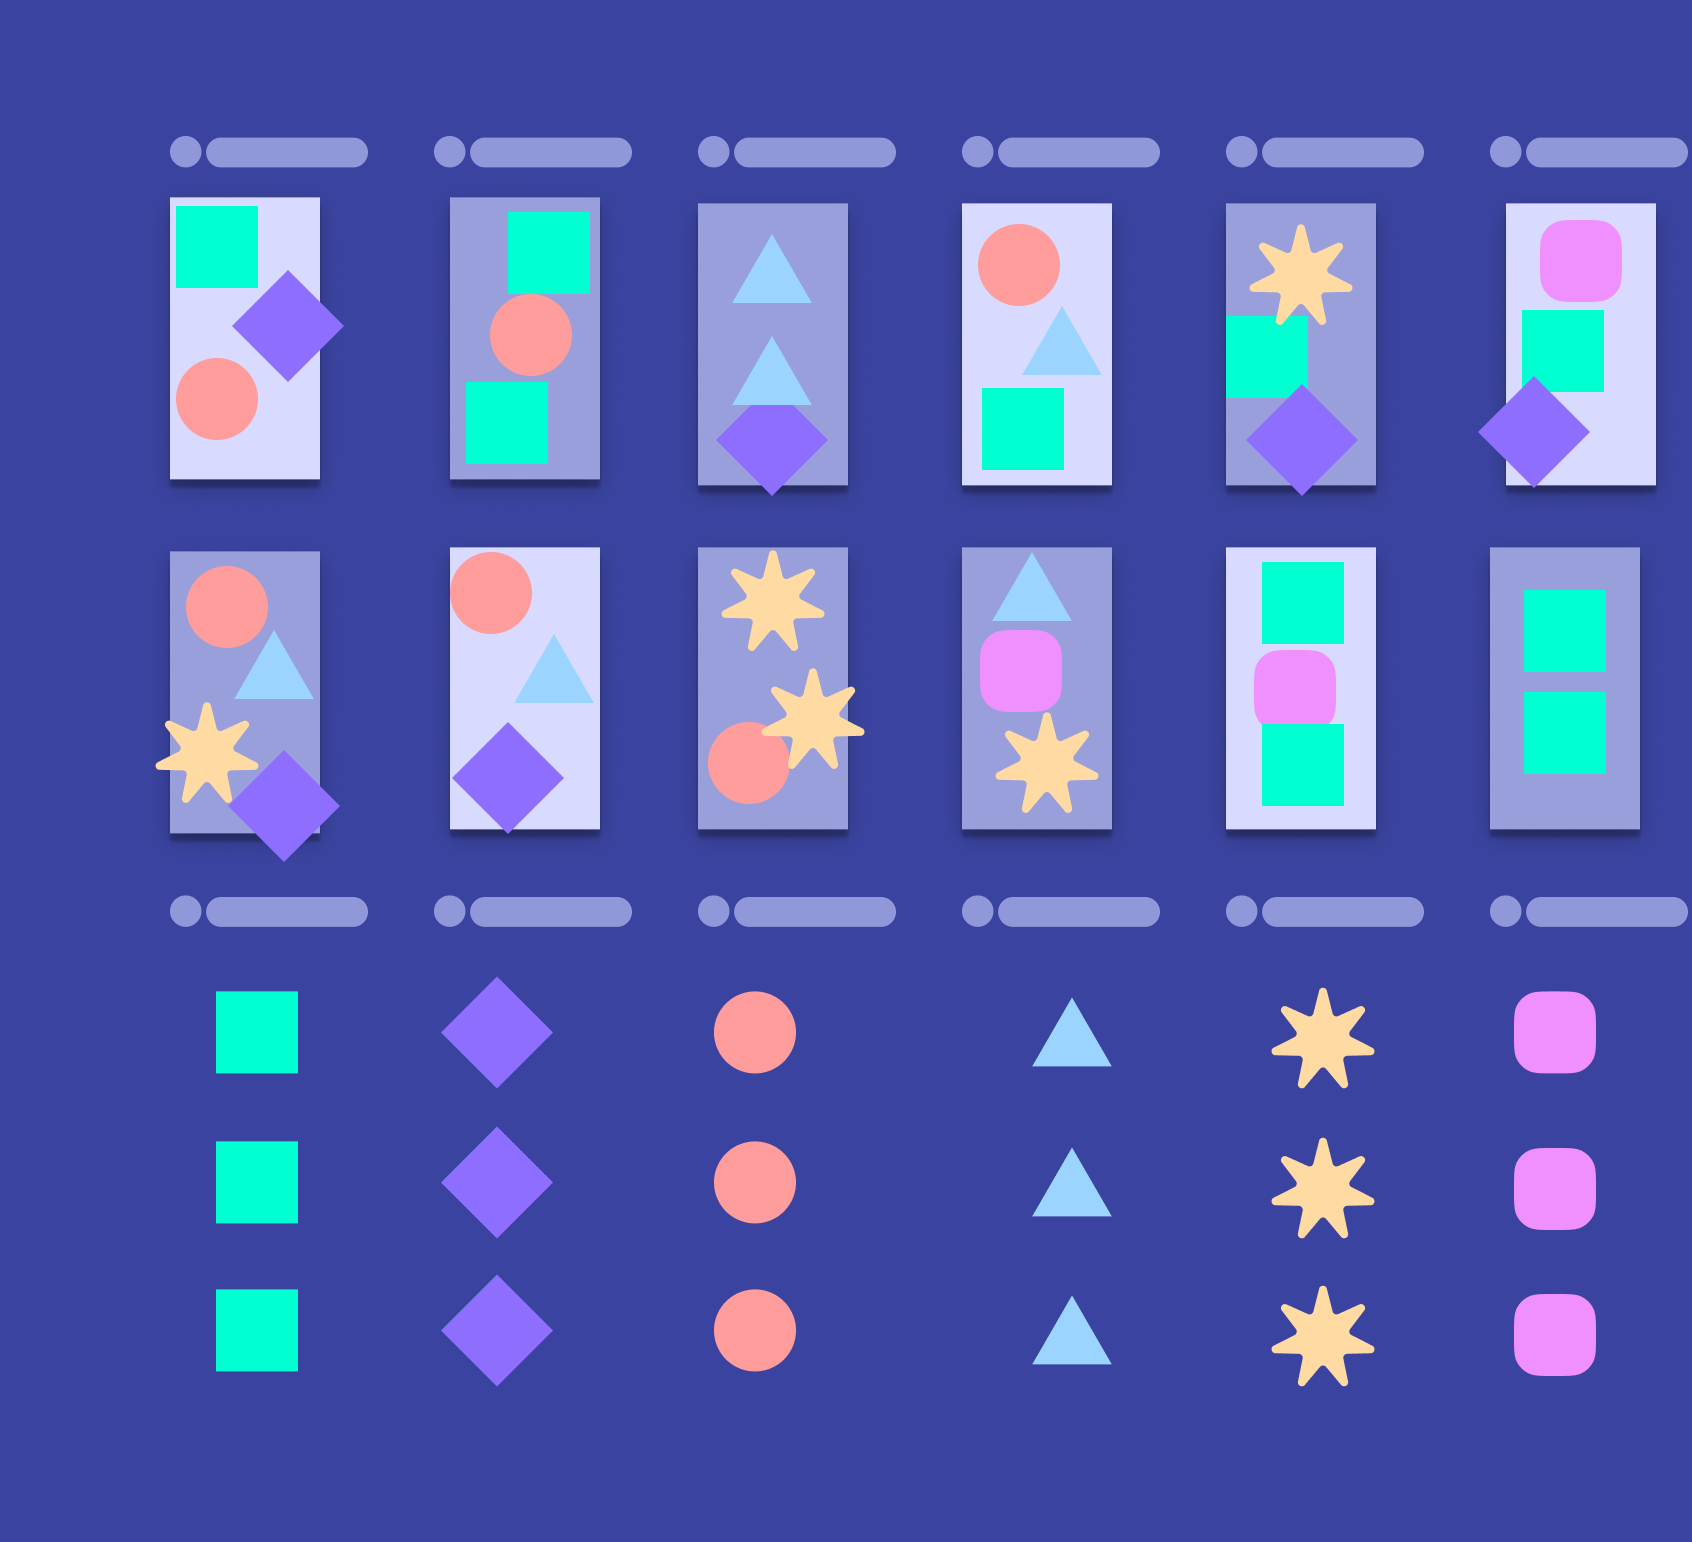
Breaking up into organisms, molecules & atoms
After the low-fidelity wires we analysed and matched components that can be reused across the app, like atoms.
Each atom (component) had slight variations, like different CTAs of a button.
03 — OnboardingUser Onboarding (Registration & Login)
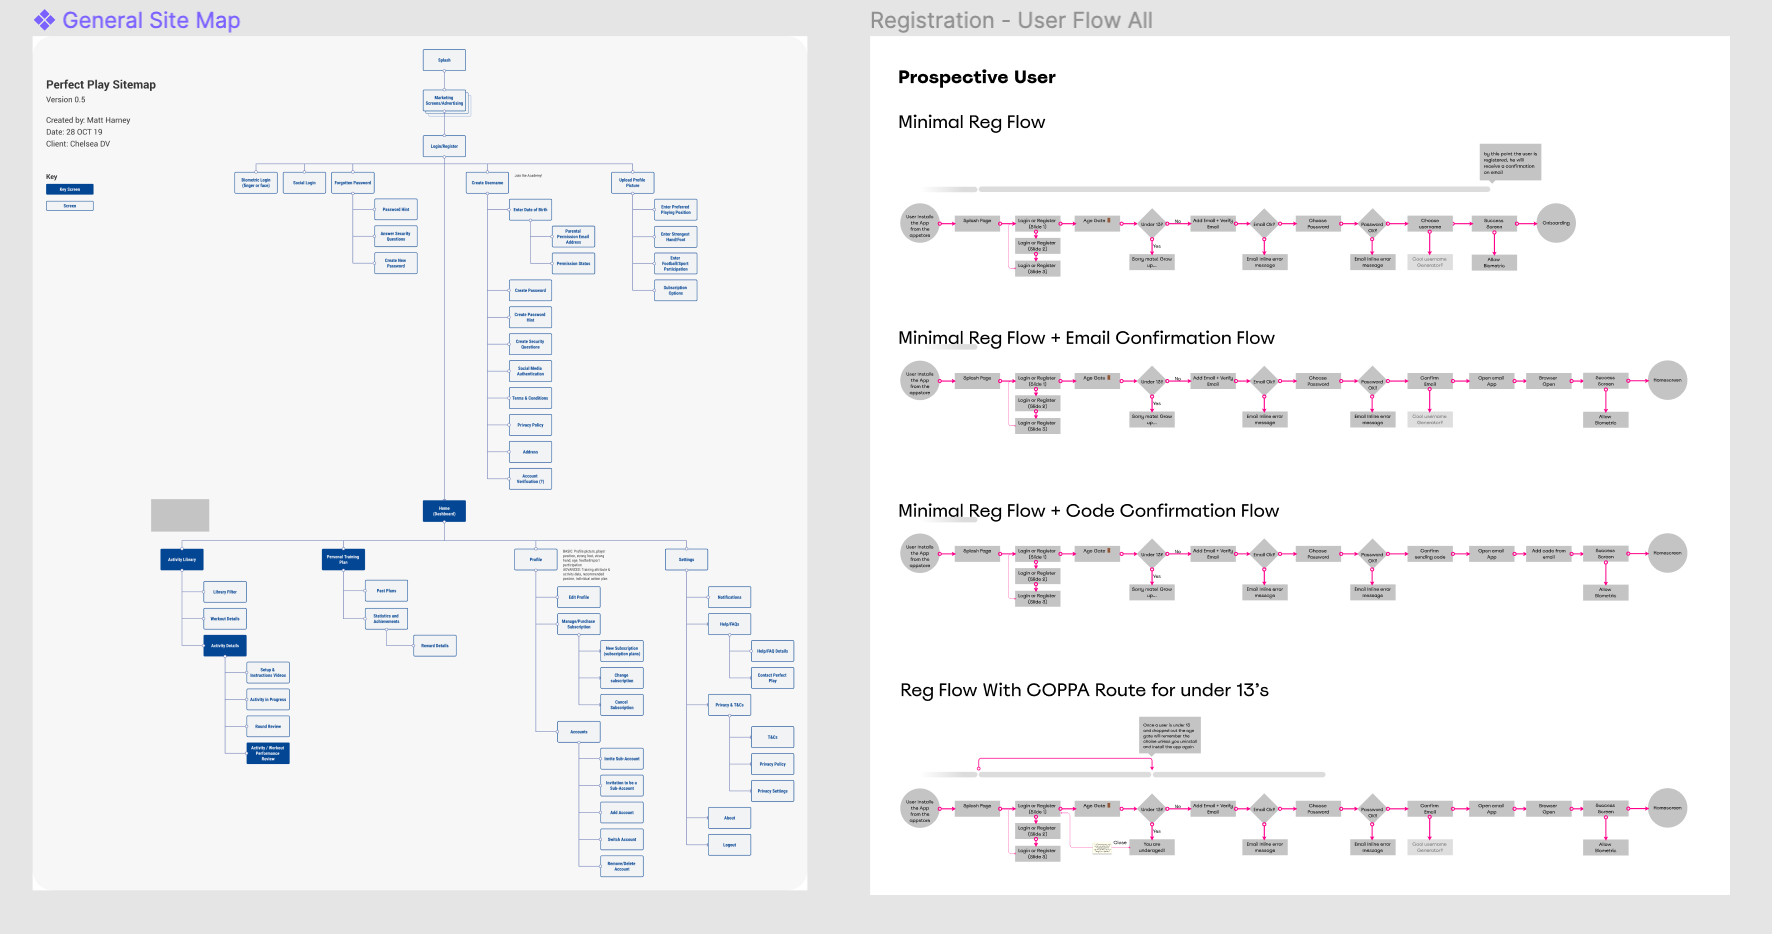
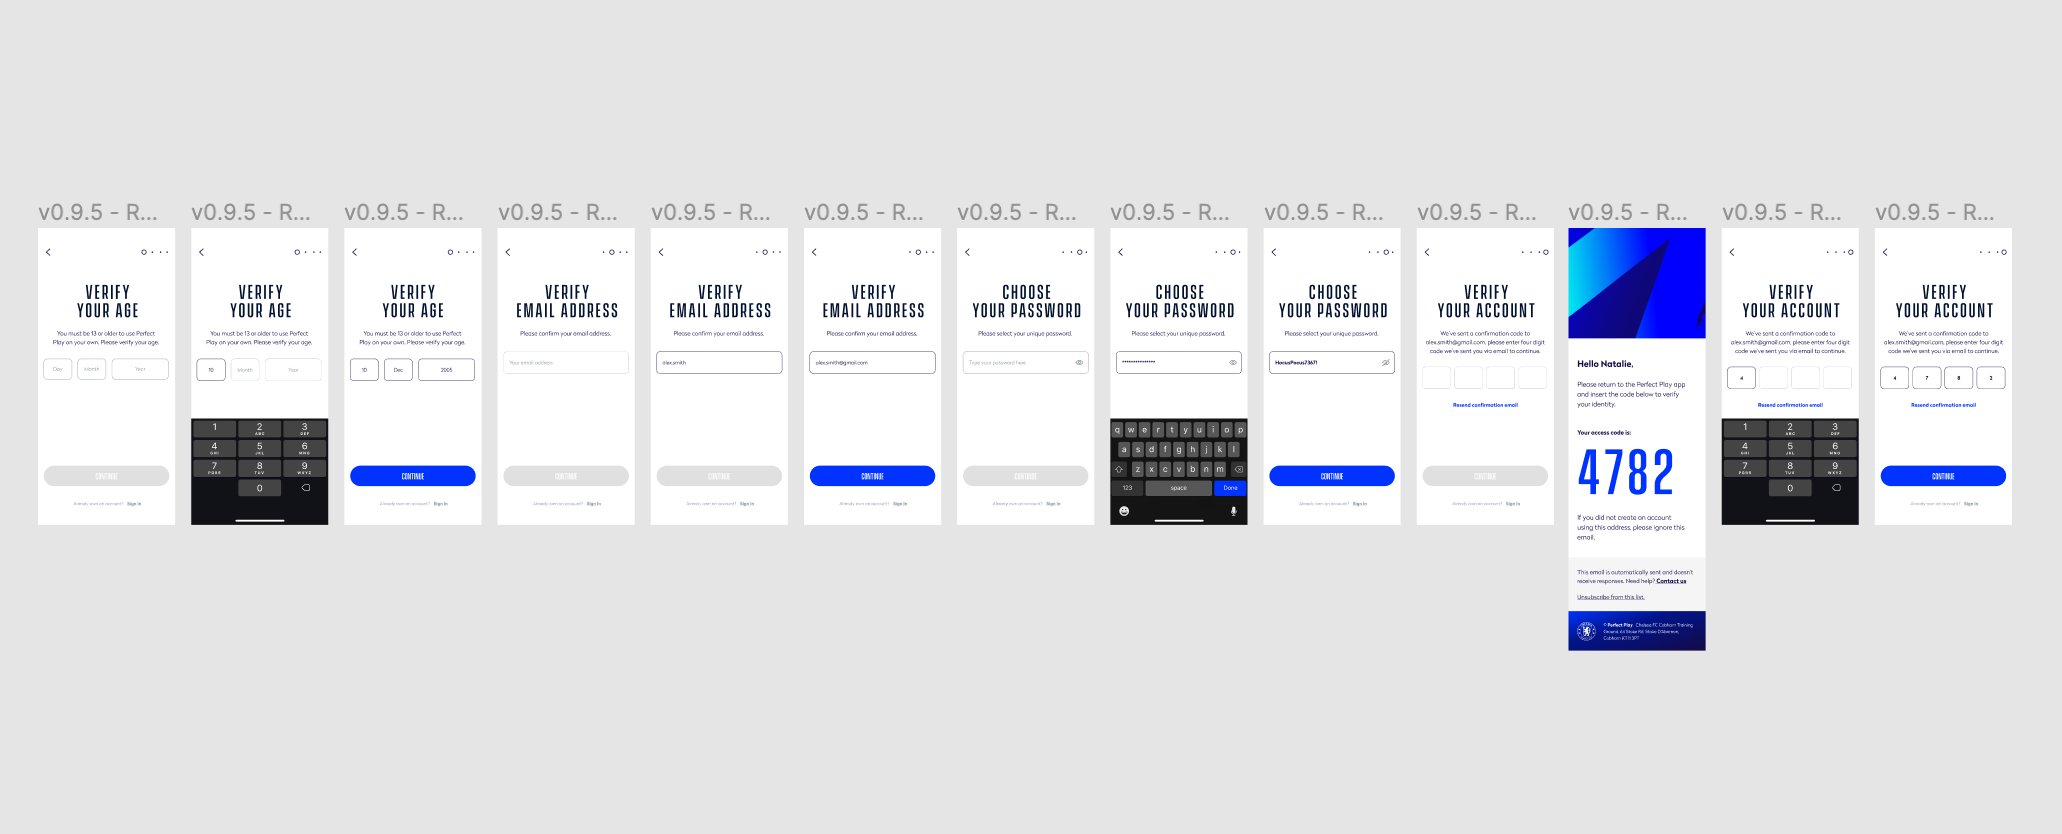
Prototype
One of the many prototypes used for testing and stakeholder presentation, featuring a simple registration flow with email confirmation.
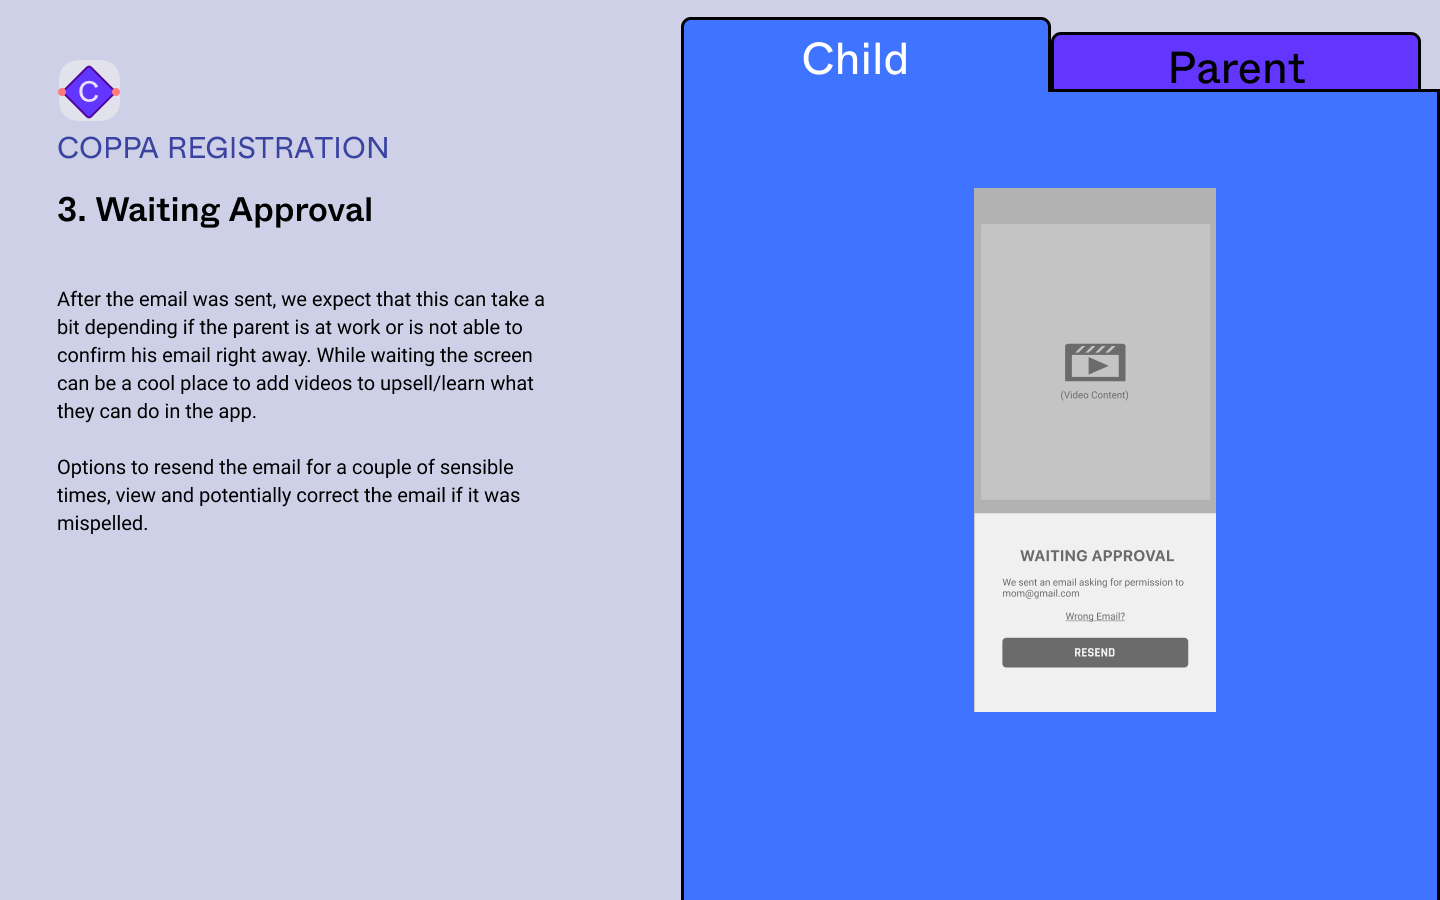
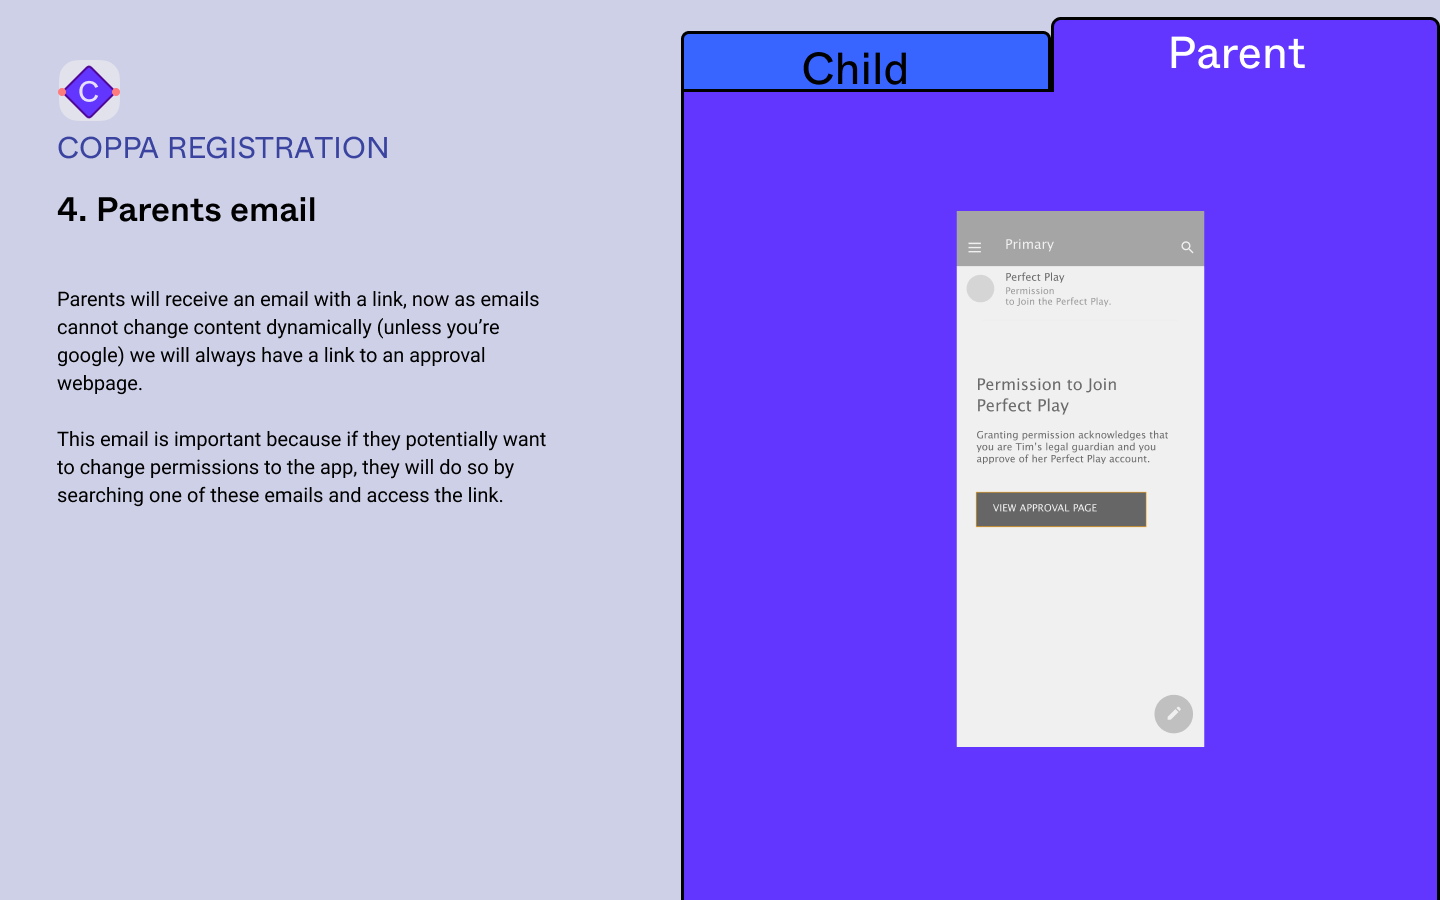
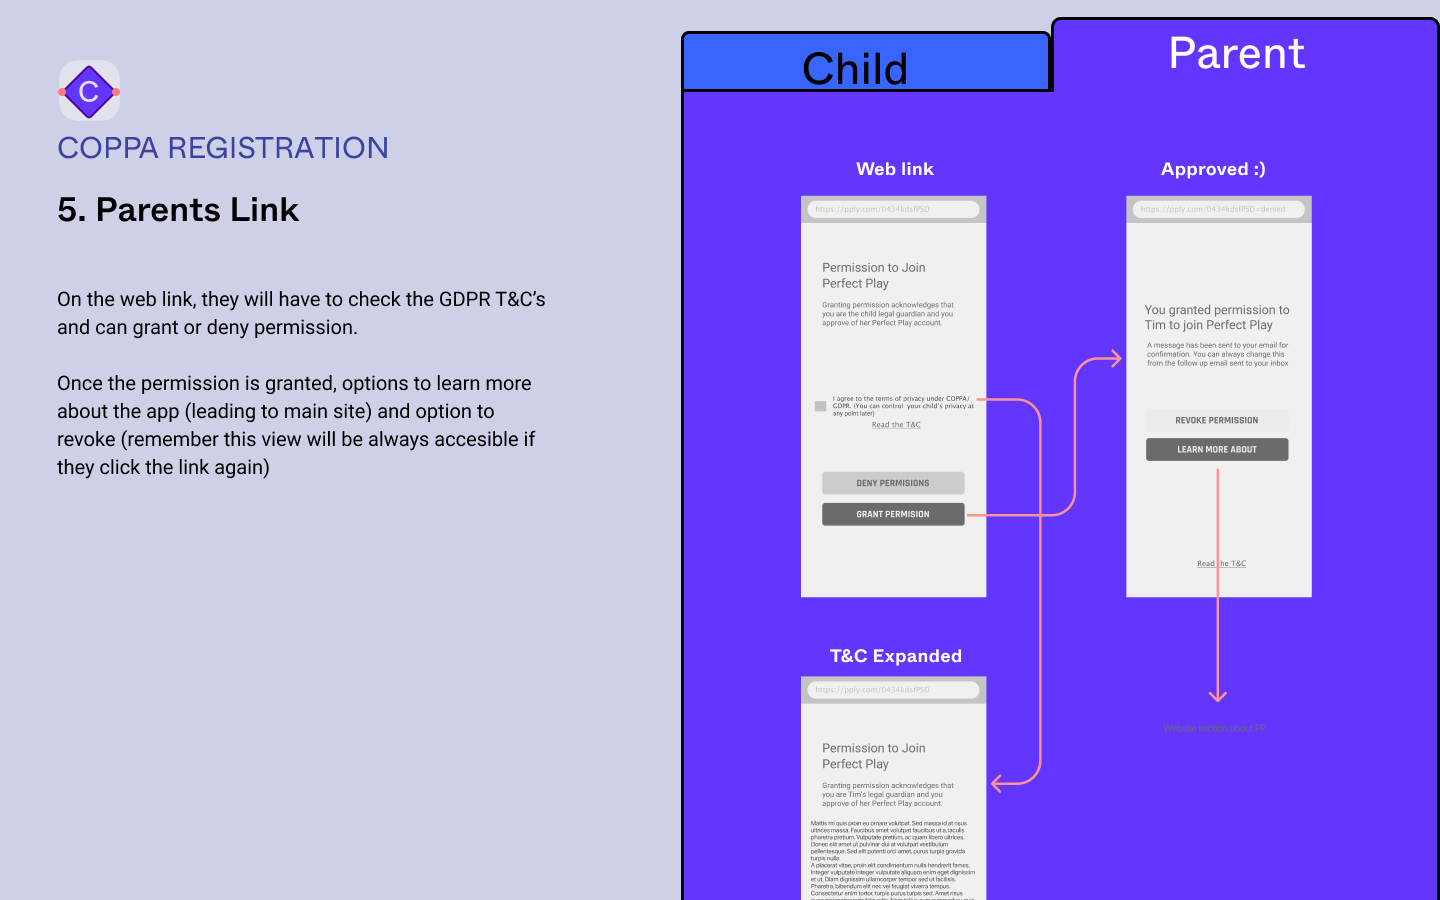
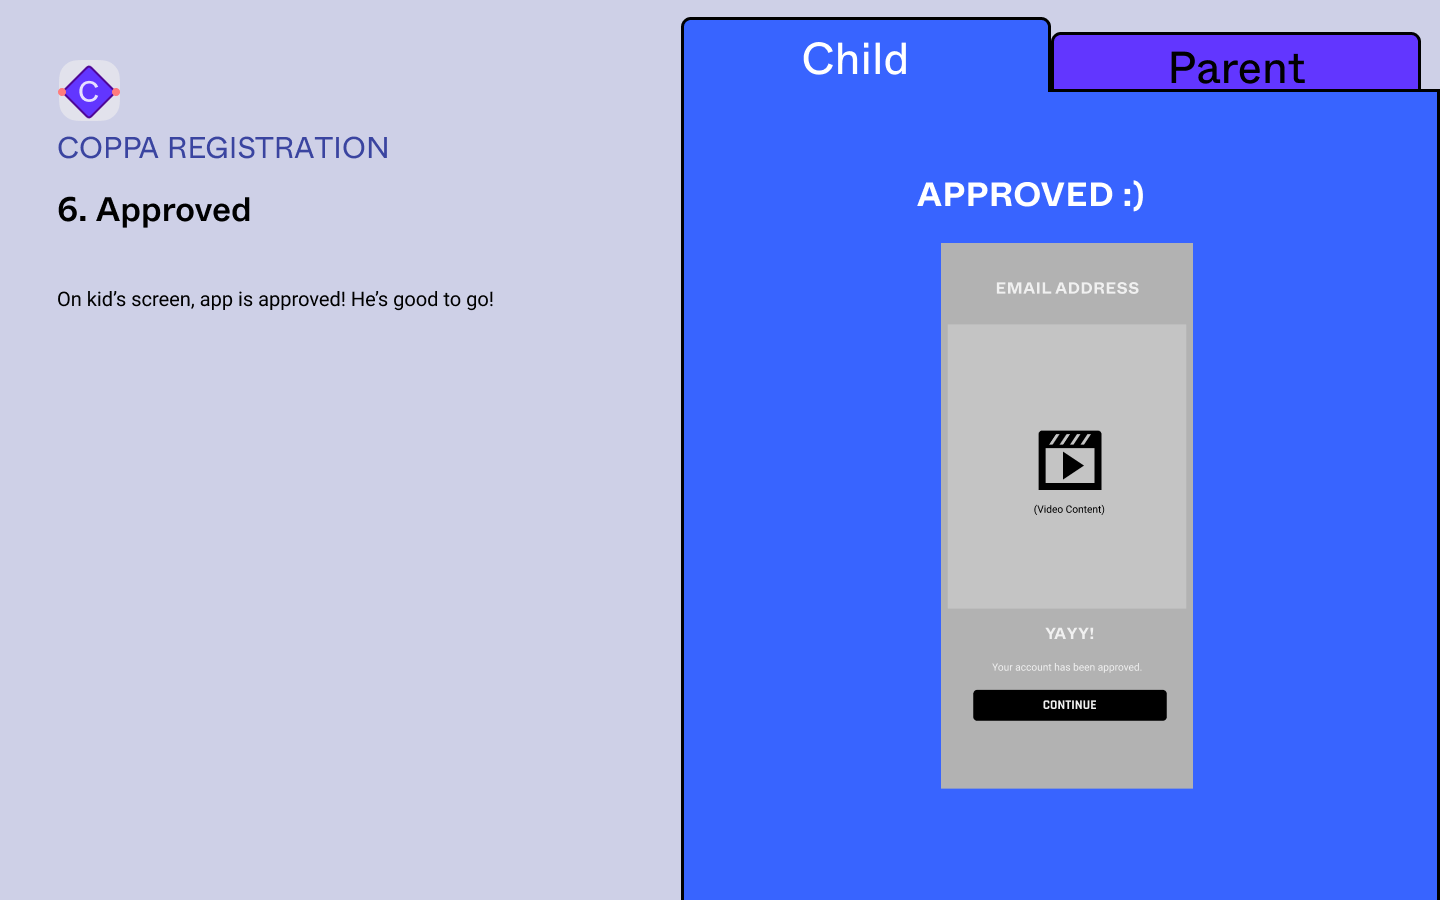
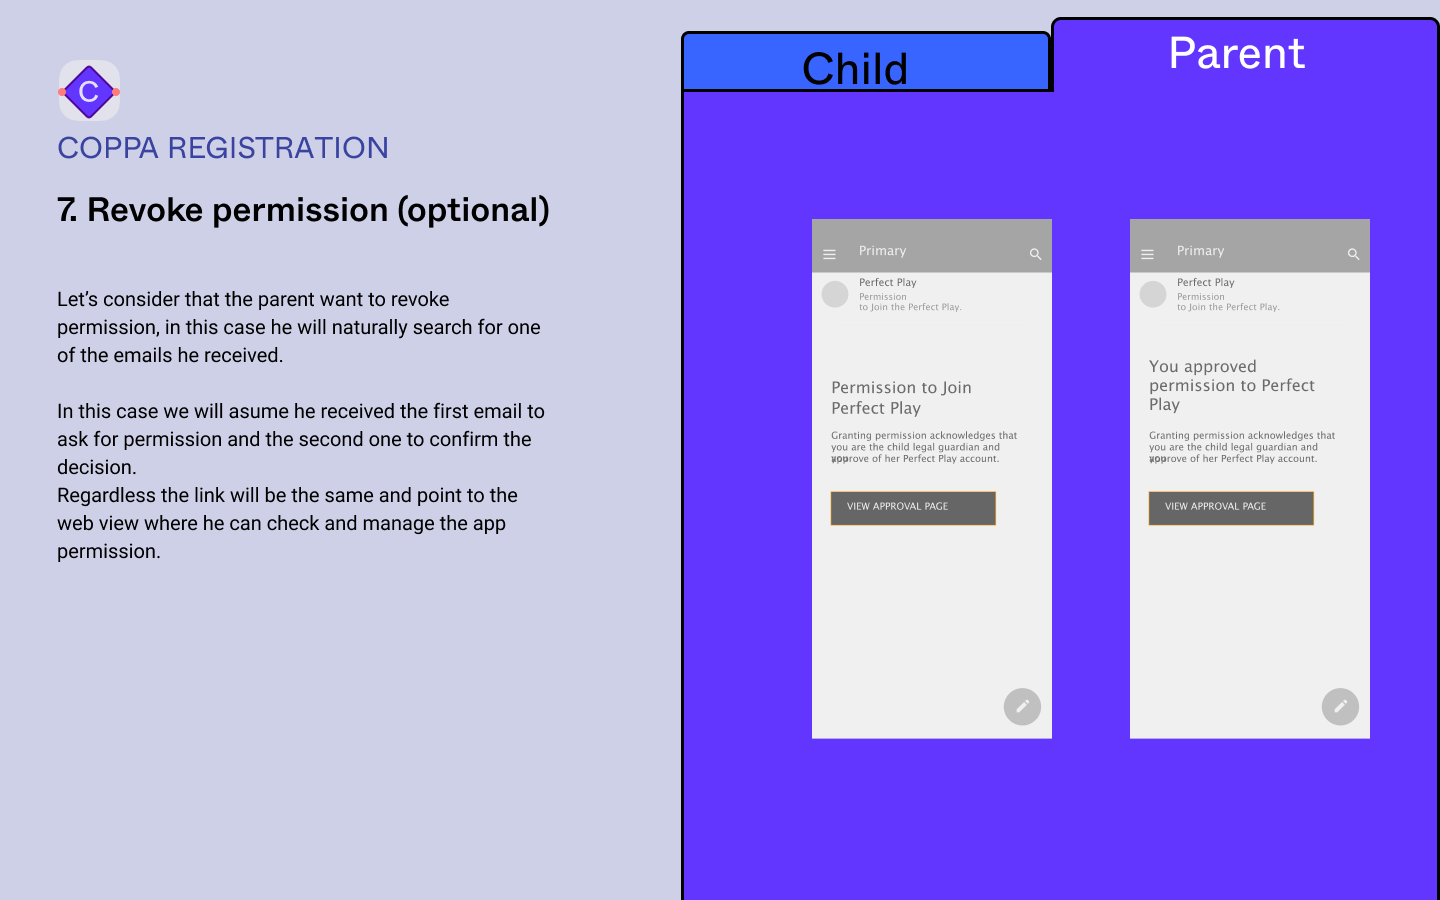
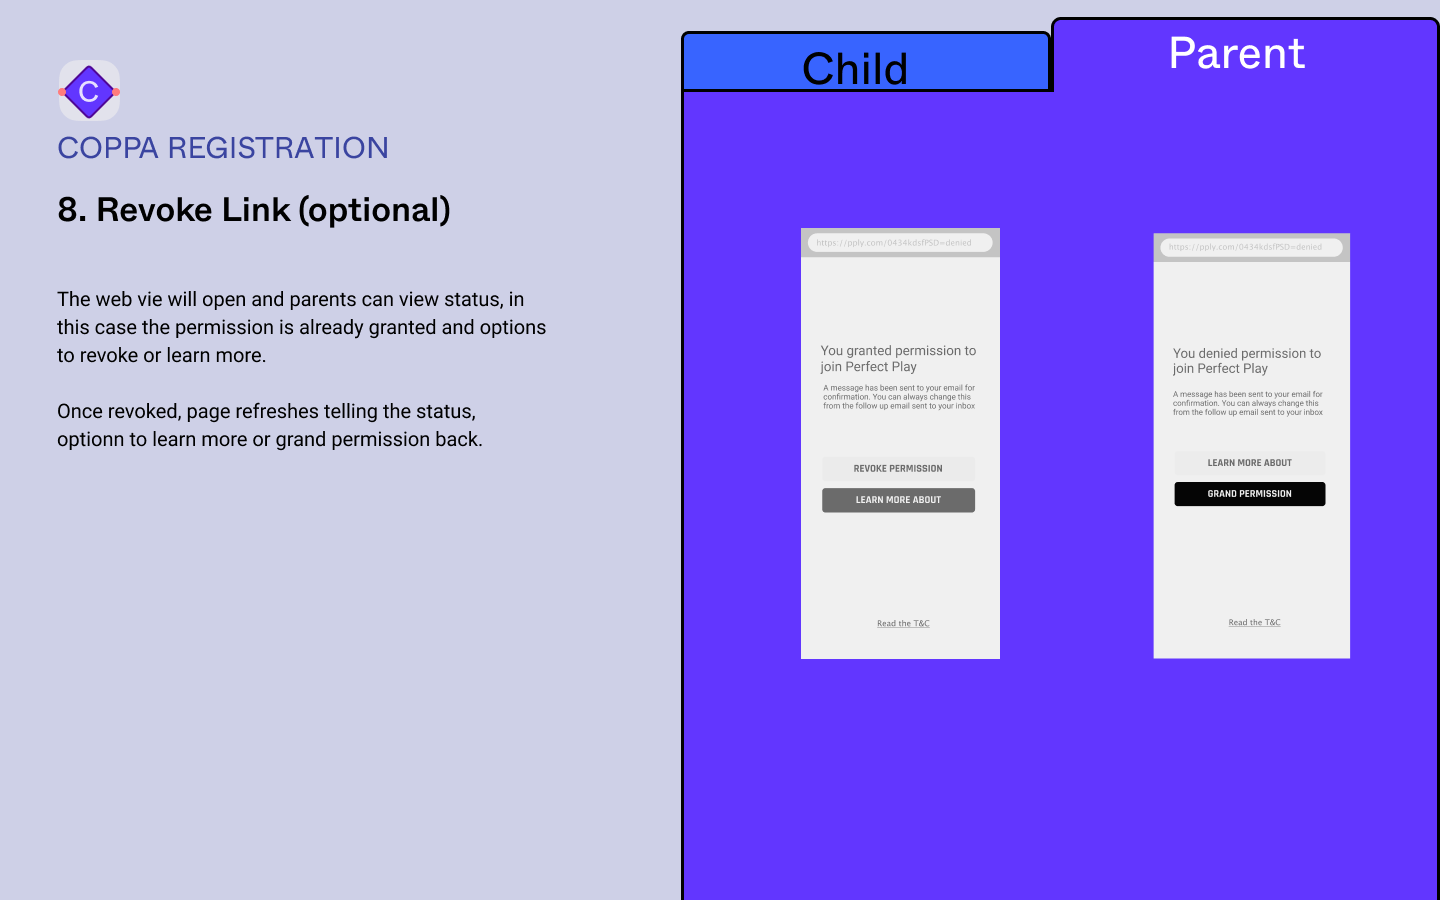
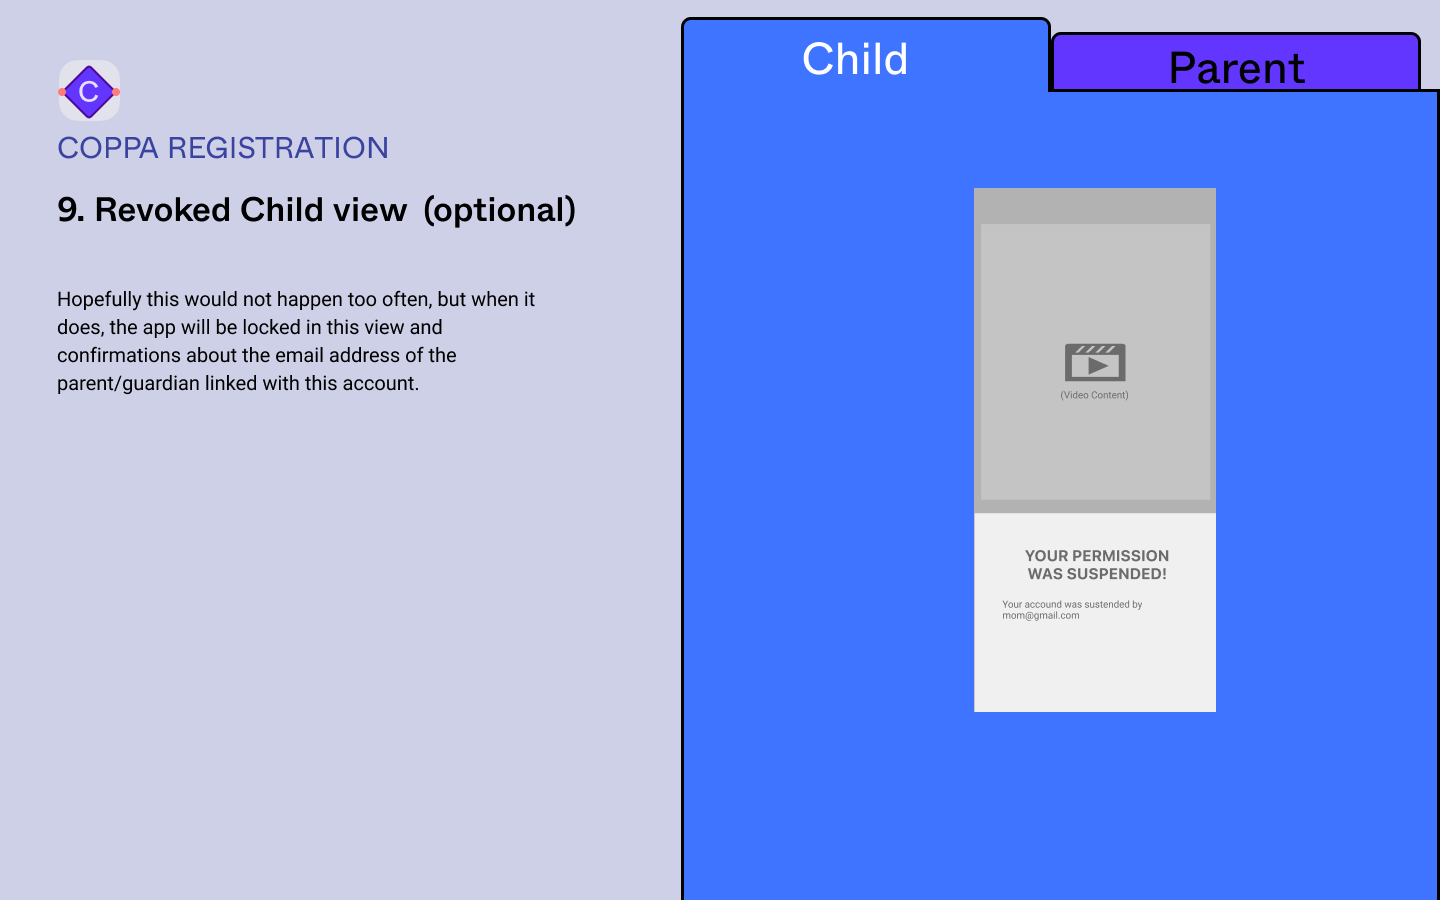
COPPA registration
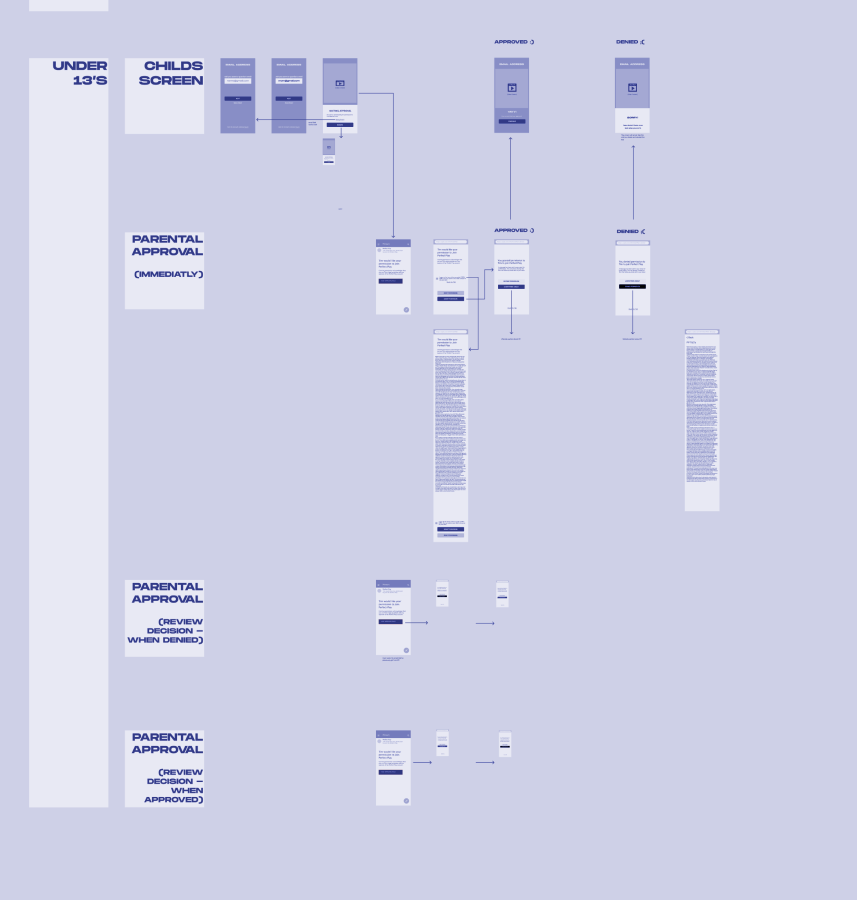
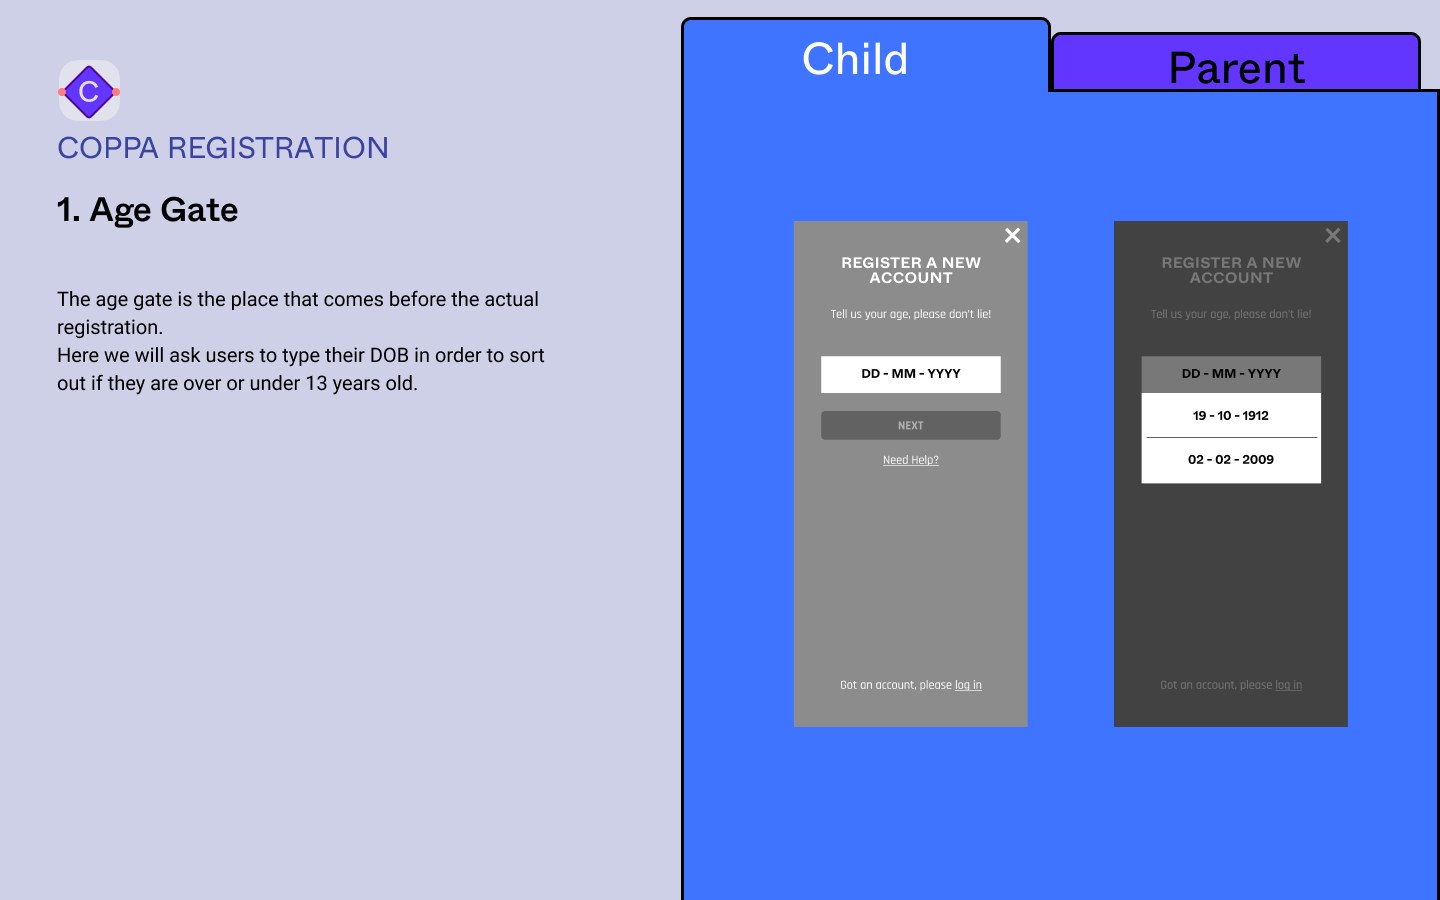
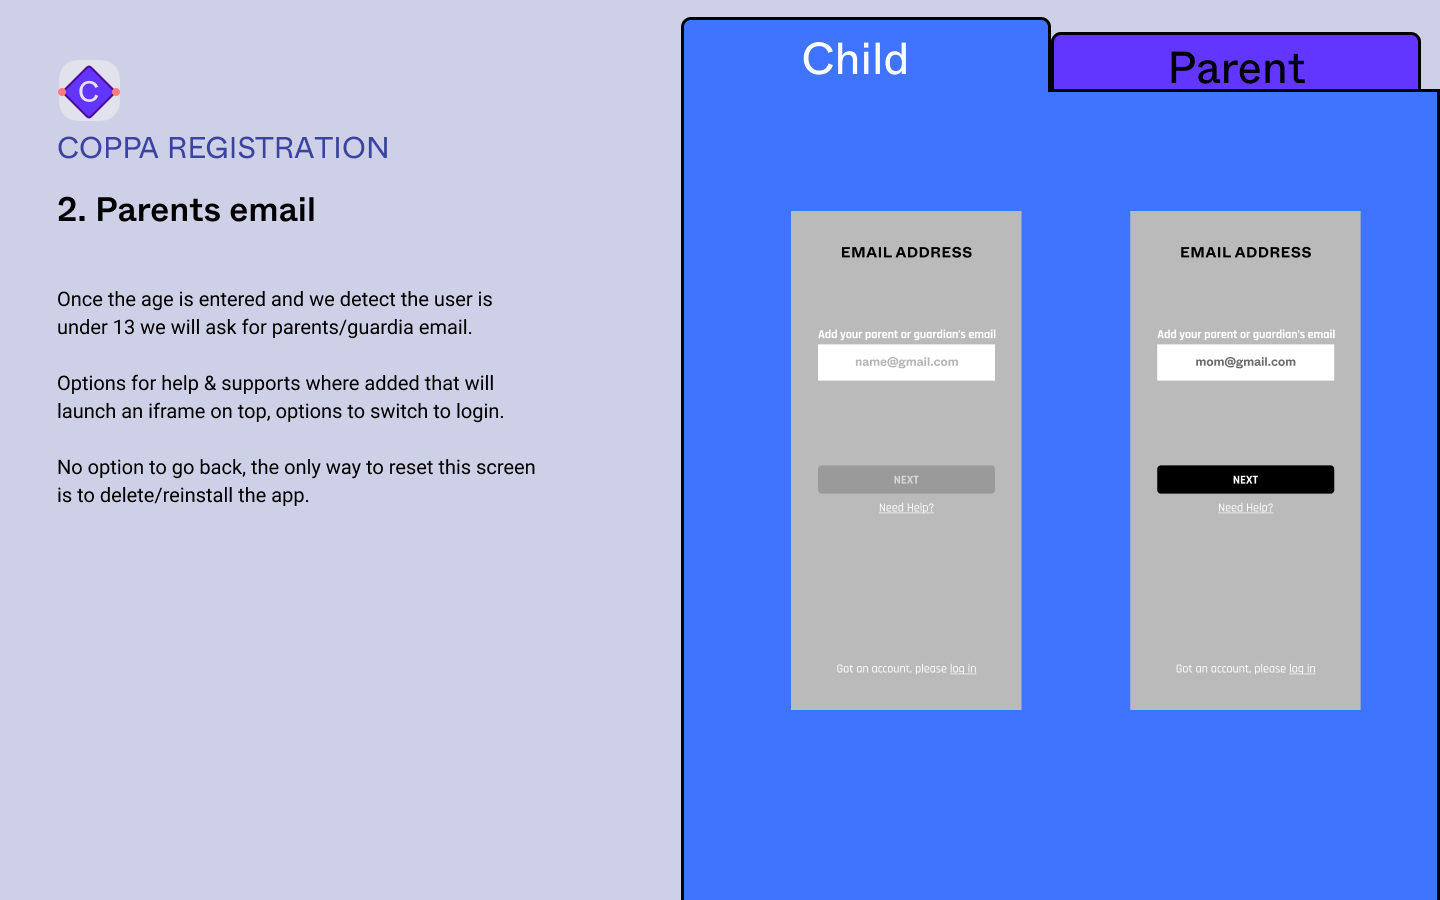
In the US we were required to make a special registration flow for kids under 13 years old, compliant with COPPA — a short abbreviation for Children’s Online Privacy Protection Act, enacted by the US Congress in ’98.
TL;DR: Our task was to create a reg flow where we could not store or save any data until their parent or guardian would give their permission. Also, once granted, options to retrieve, admin or modify permissions were created.
04 — FeaturesTraining Plan
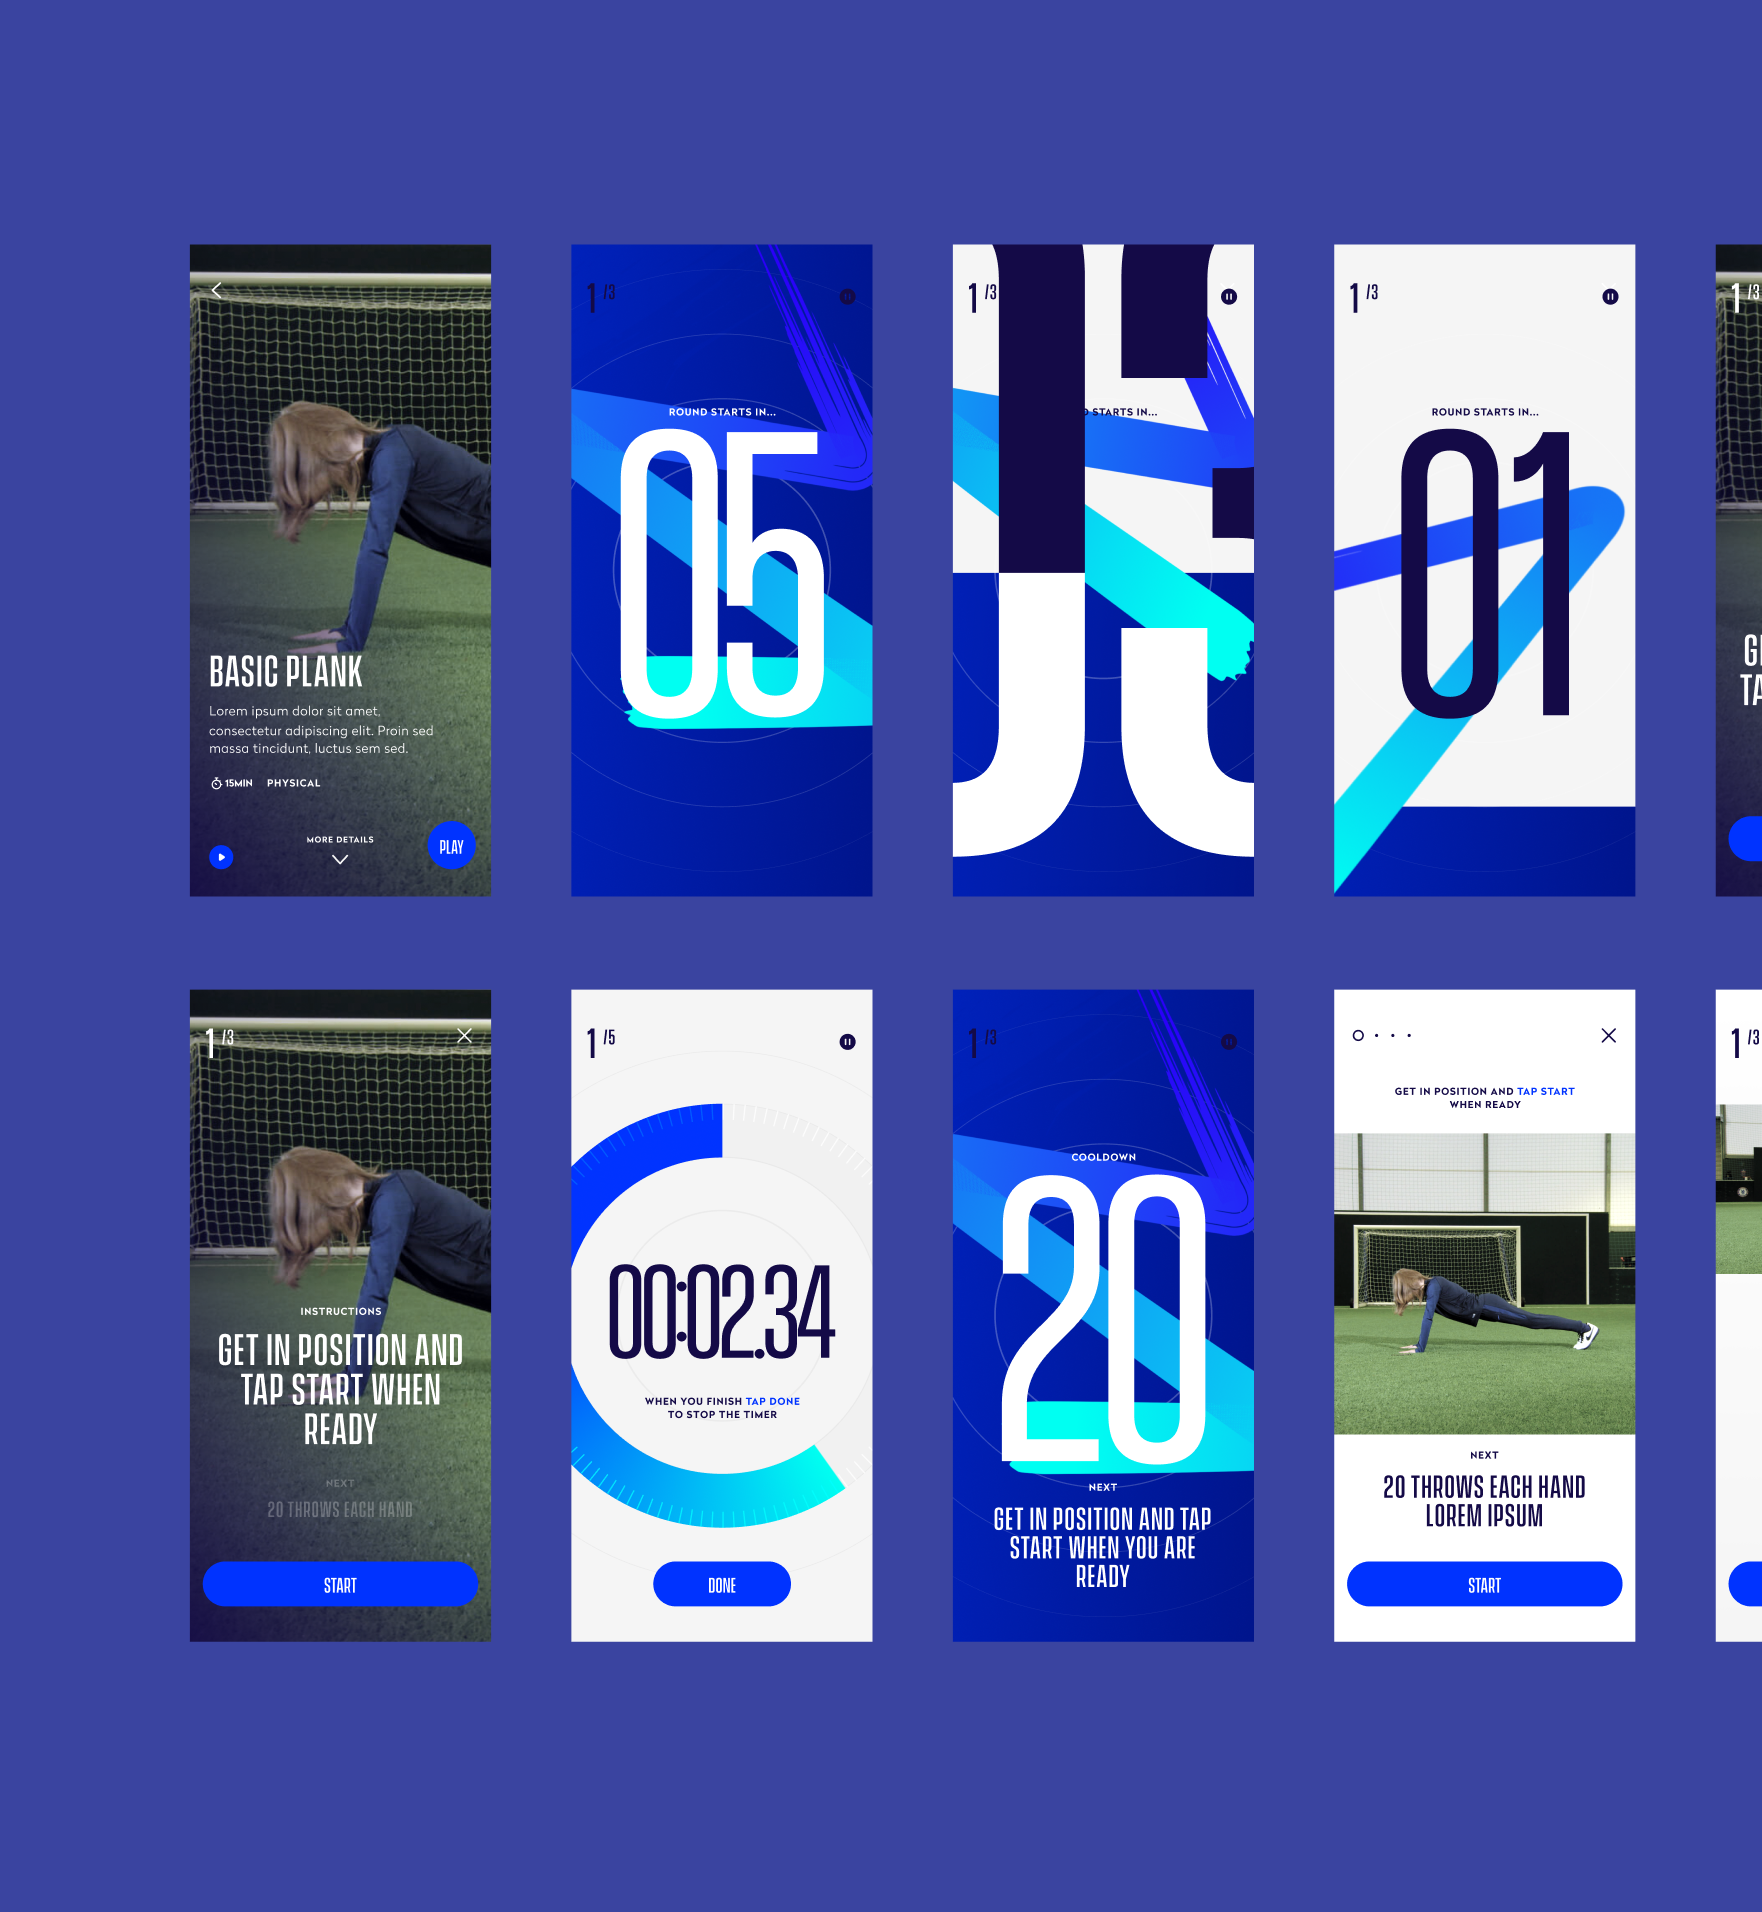
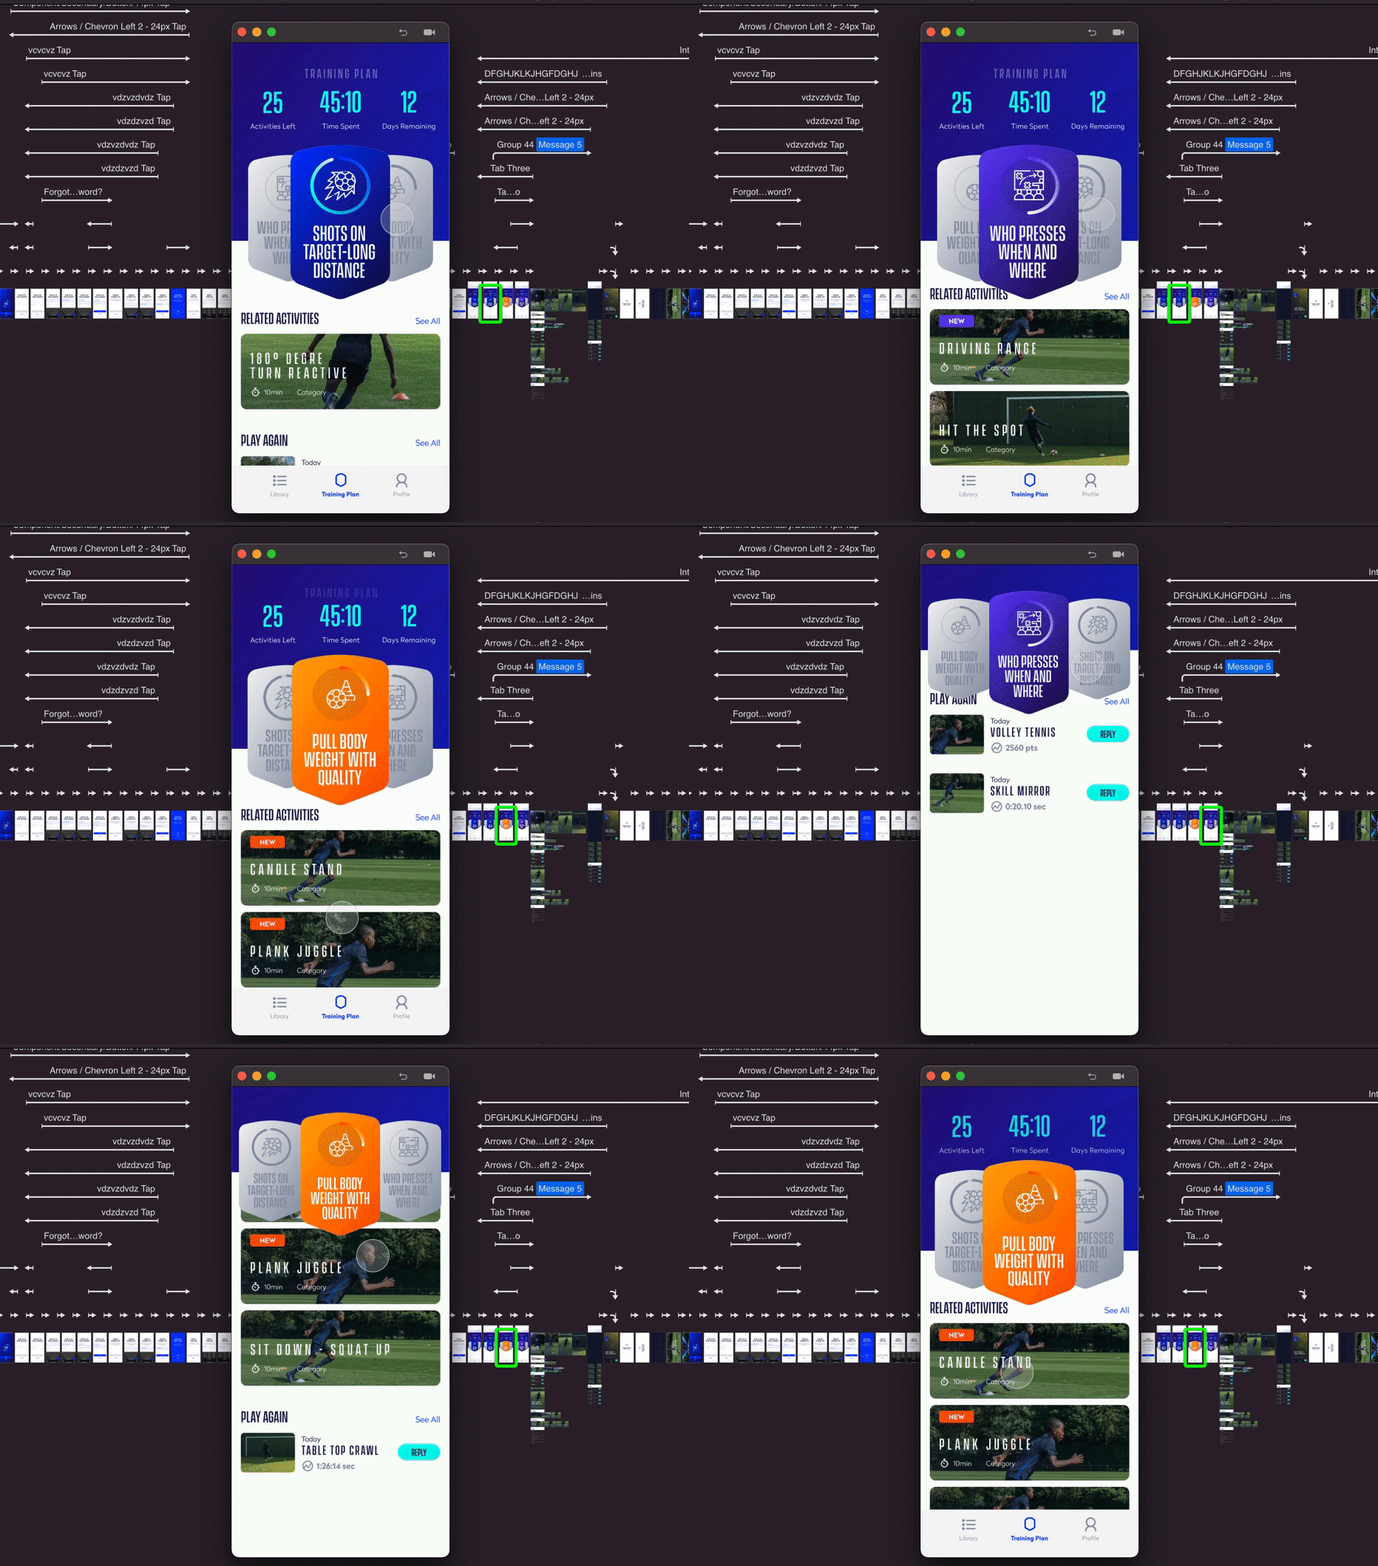
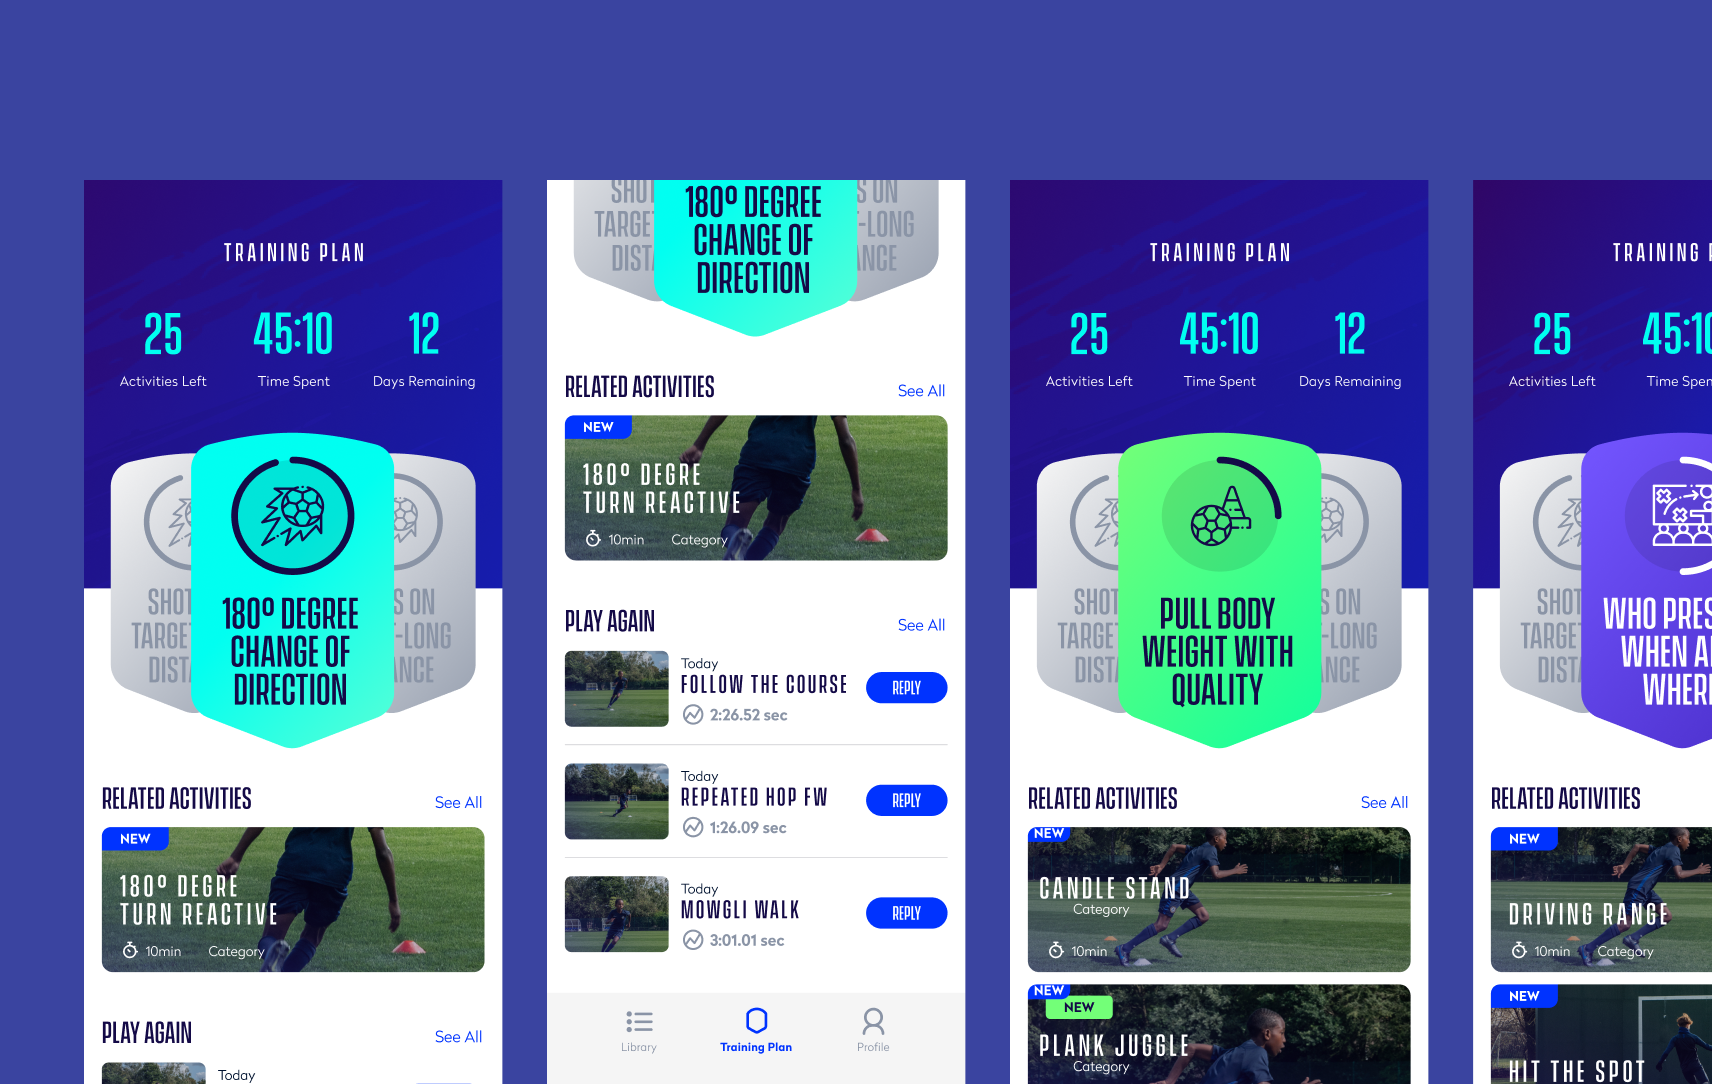
Each training plan is unique for each individual, based on the data we pull from the onboarding, and it’s designed to always challenge the user to push a bit more via realistic AI-driven goals.
05 — FeaturesSubscription Strategy
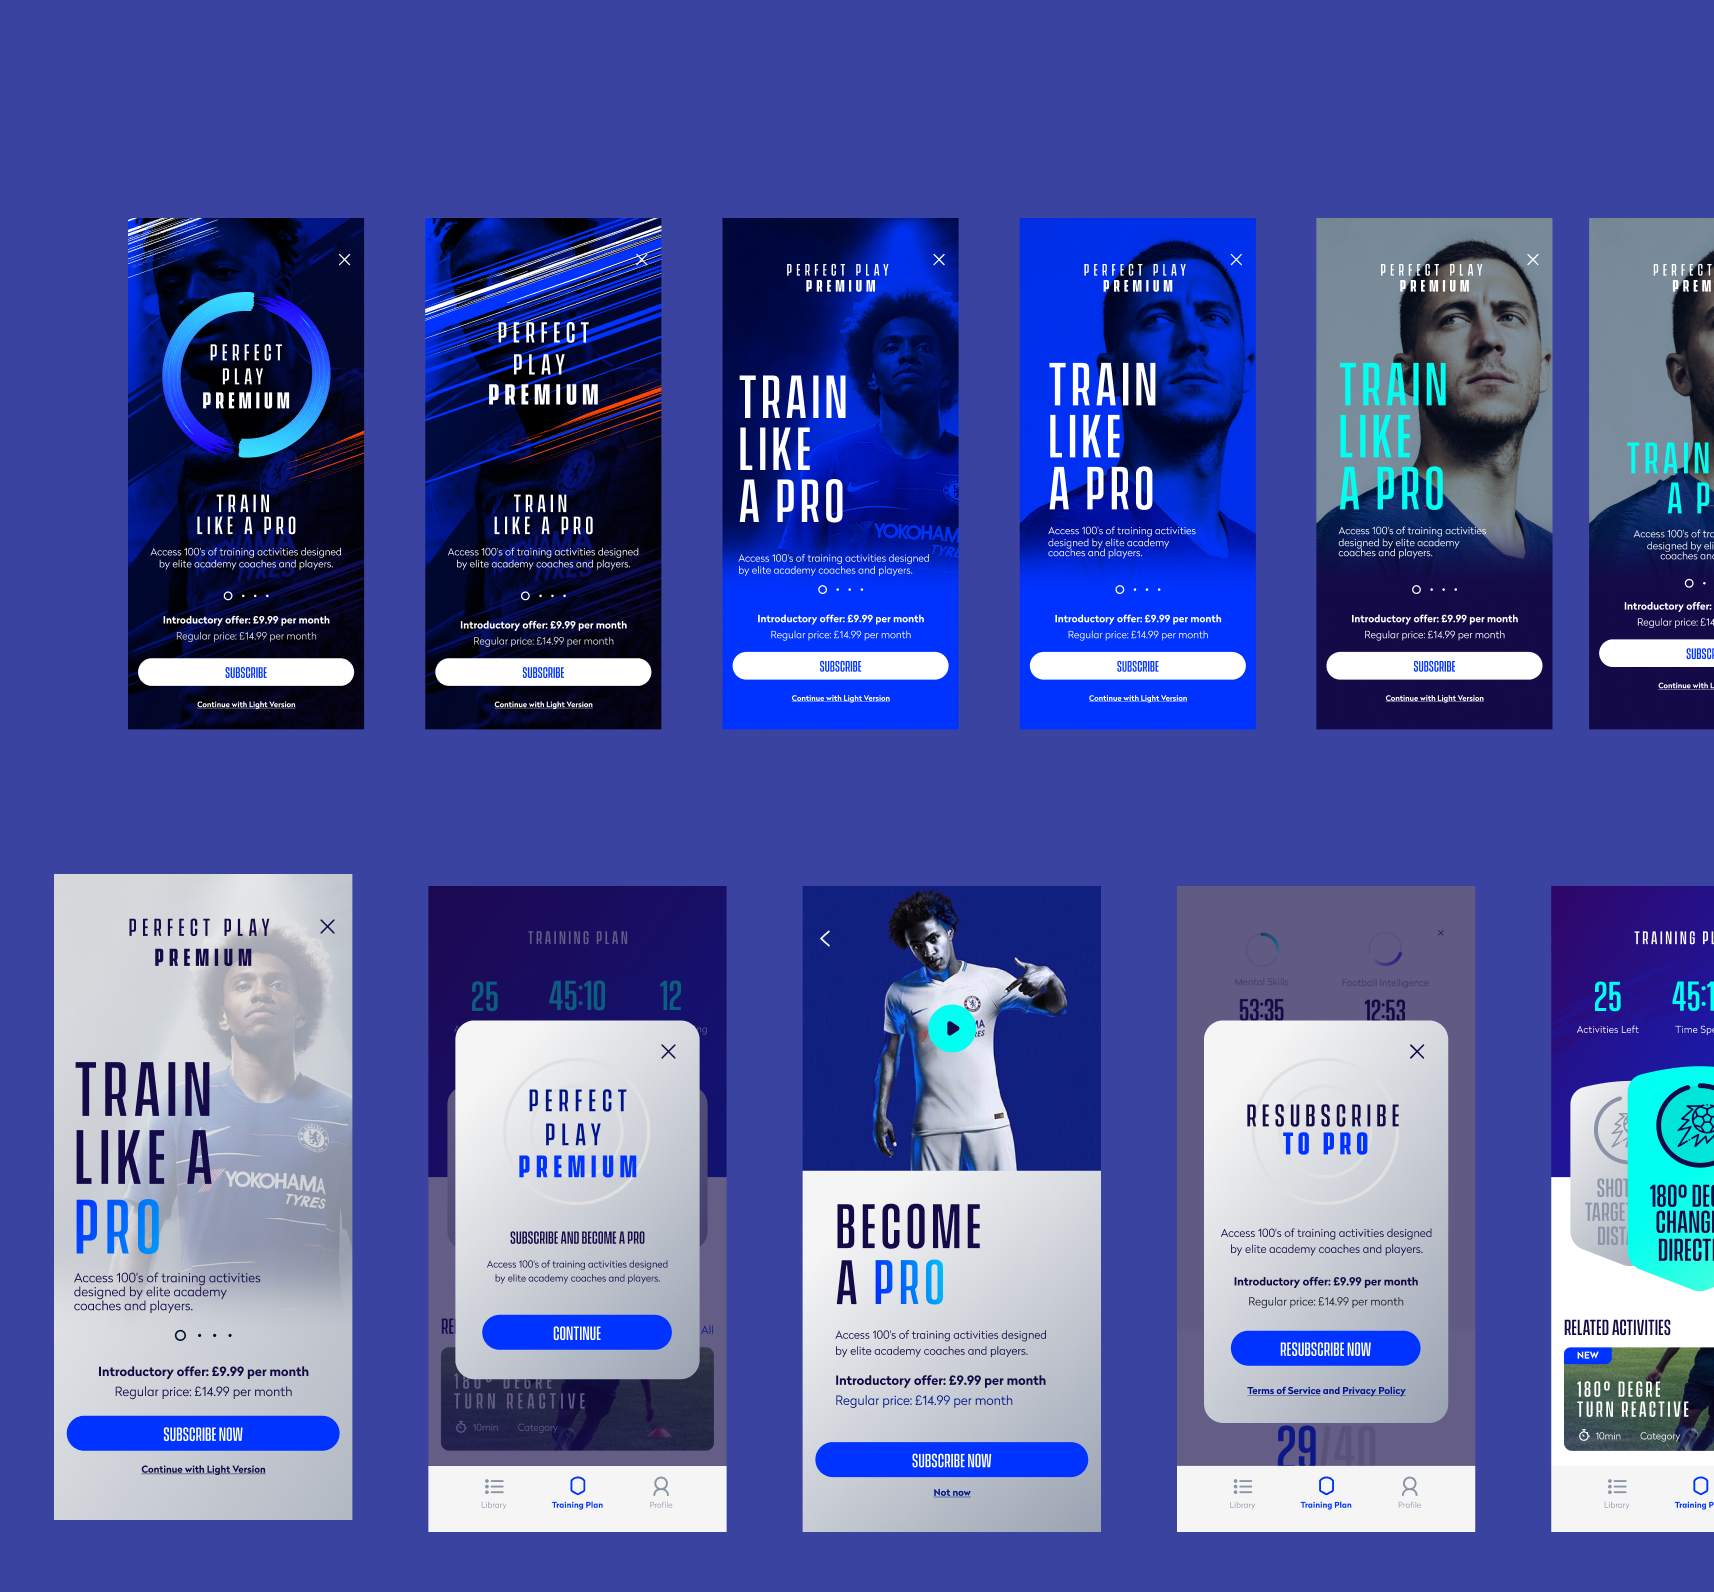
Subscription strategy was thought through from different views along with our colleagues from business planning.
We selected a bunch of apps that were free to play, adding other extras after a paywall.
A series of timed pop-ups were added in a sequence that would affect the overall experience as little as possible.
Free vs Paid designs were an important task; we thought about creating a more ‘premium’ feel and experience for the paying users, taking patterns from how YouTube and LinkedIn tackle their paying users.
06 — FeaturesDownloads & Preloading
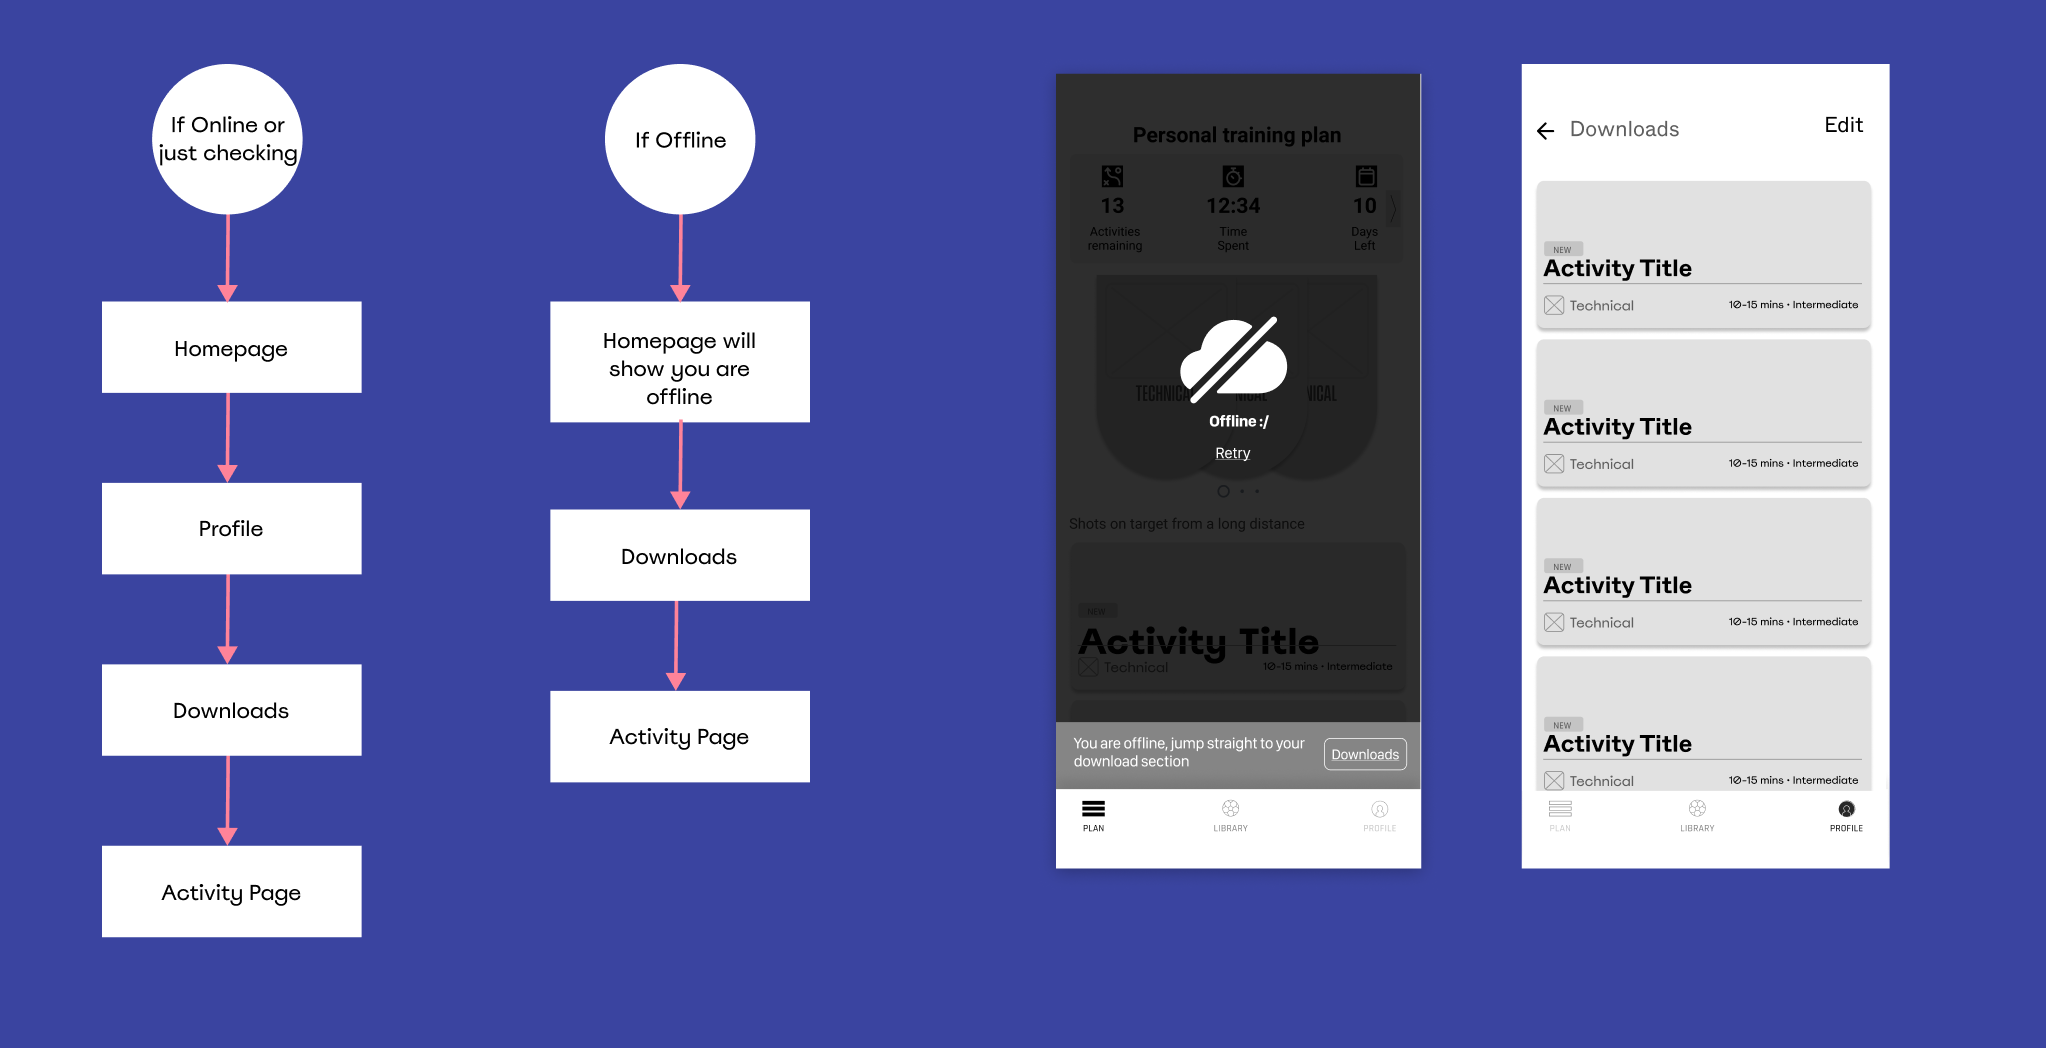
Users can save their content, games, and activities on their device by downloading them through the app. This feature is useful for accessing the content later in offline mode or when experiencing a poor internet connection, such as on a flight. Users can manage their downloads through the app.
Preloading was part of the strategy, working with developers to make the React frontend much faster. In the UX phase we demarcated a flow which is the most likely path a user would navigate through the app, so the loading time was much faster.
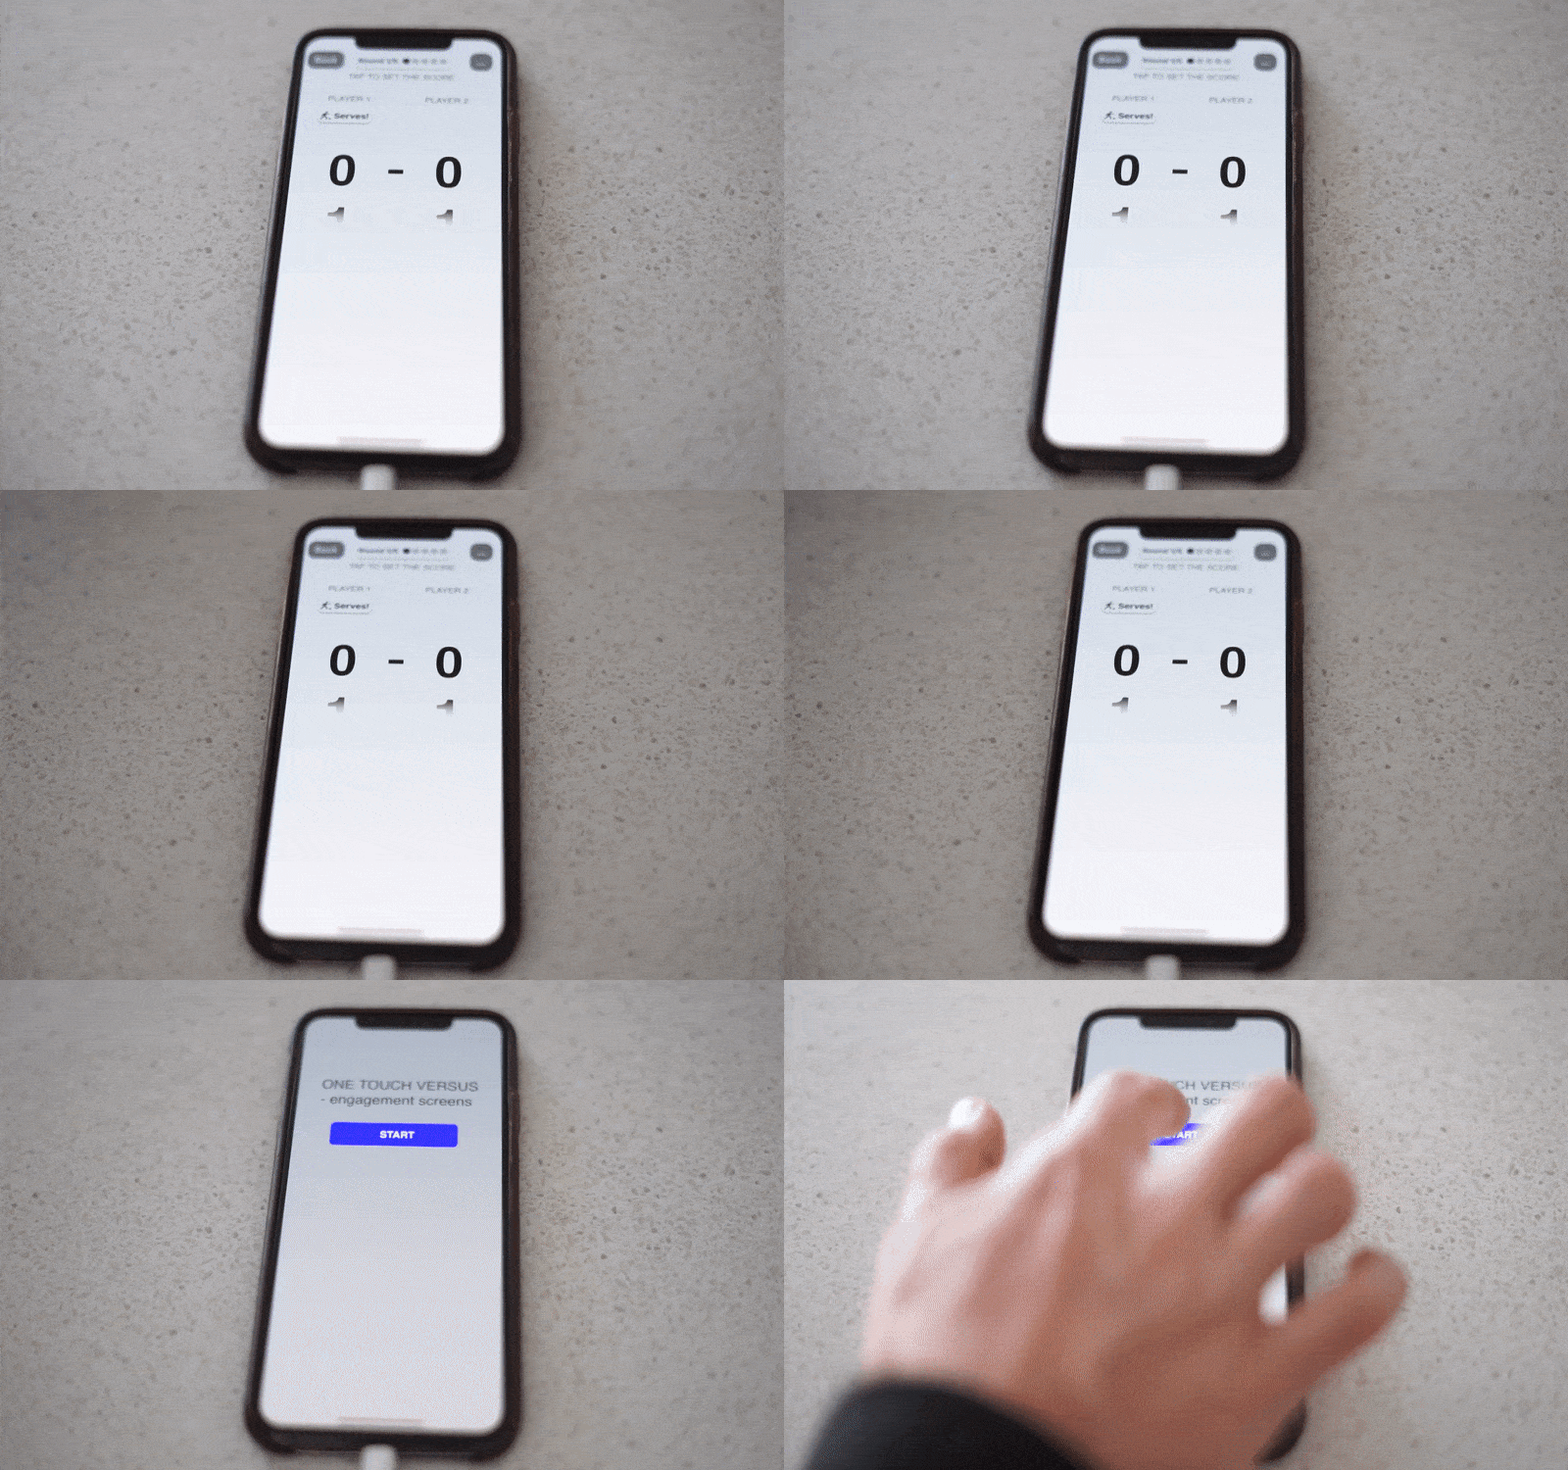
07 — FeaturesCreating AR Setups
One bespoke feature on Perfect Play was the AR setup for large-scale 3D objects.
While small or relatively small objects like an IKEA chest of drawers are easy to tap and place, a 7m football setup does not work that easily.
As AR is fairly new, we’ve done our research on apps that are designed for creating floor plans for real estate, and complicated ruler apps.
Here is an article I wrote afterwards about placing large objects in AR:
Placing large 3D objects in AR ✷ Hey, this is an adapted post over an issue that we’ve encountered at Chelsea DV while working on Perfect Play, a football app using AR in order to help folks arrange different games ✷ ✷ ✷ Read the note →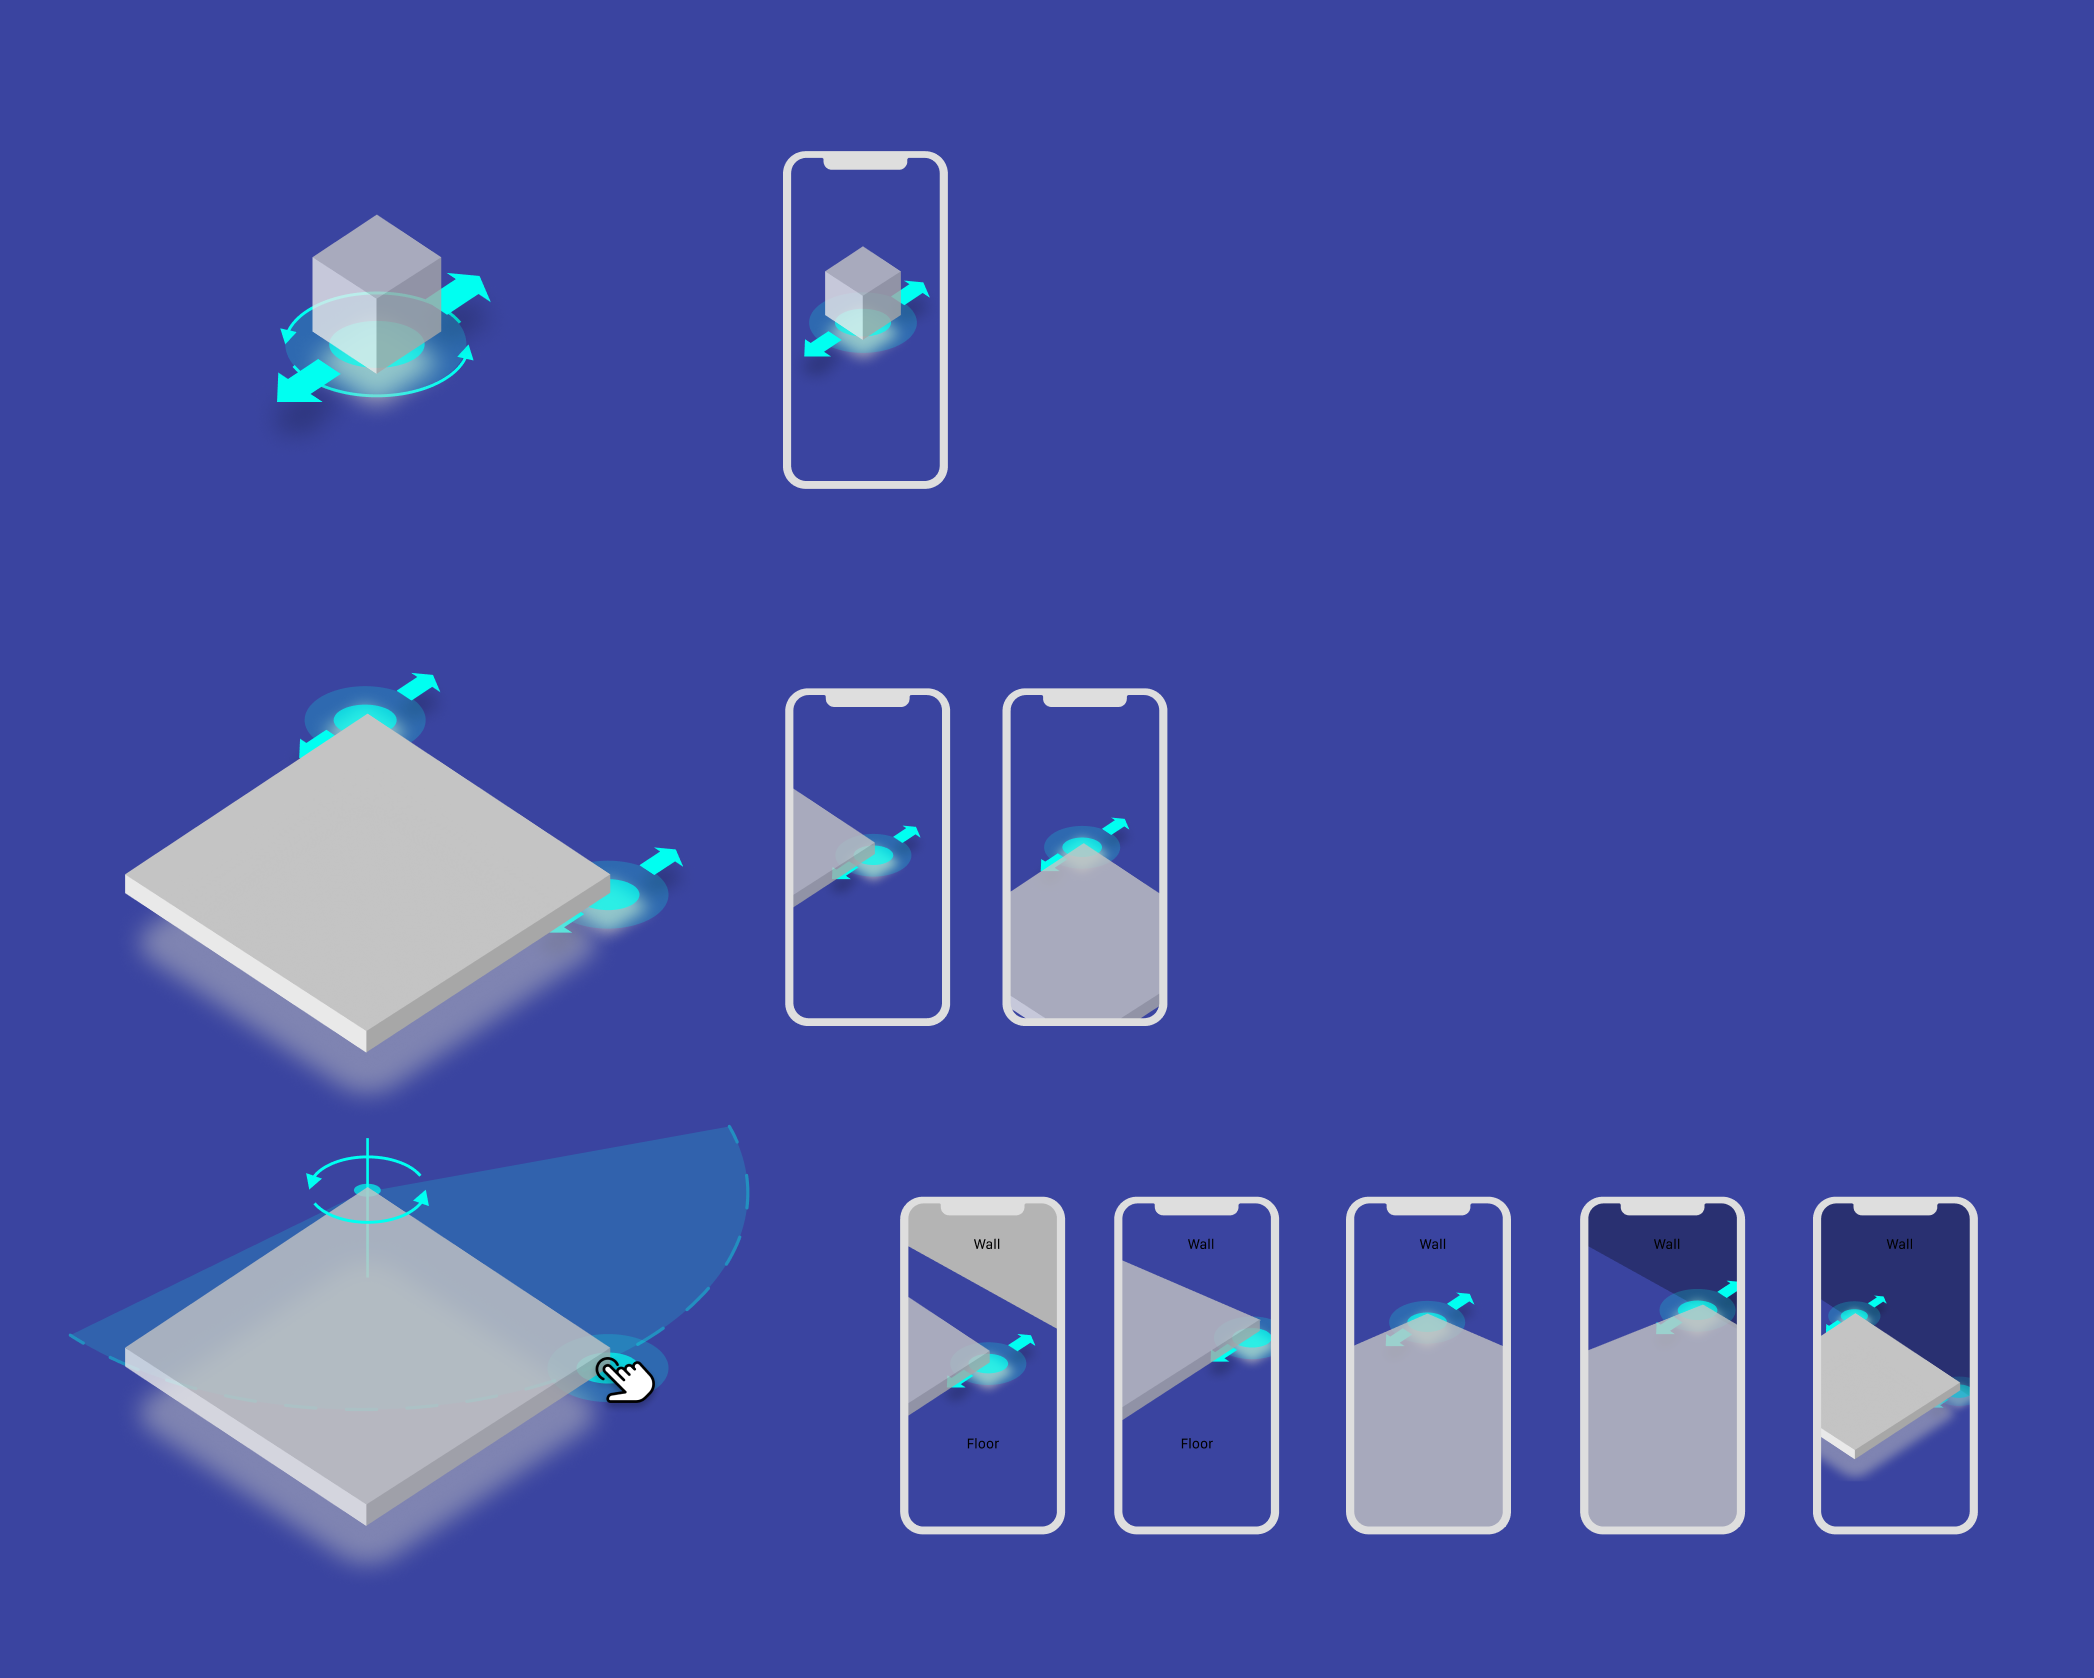
08 — FeaturesDynamic Shooting Game
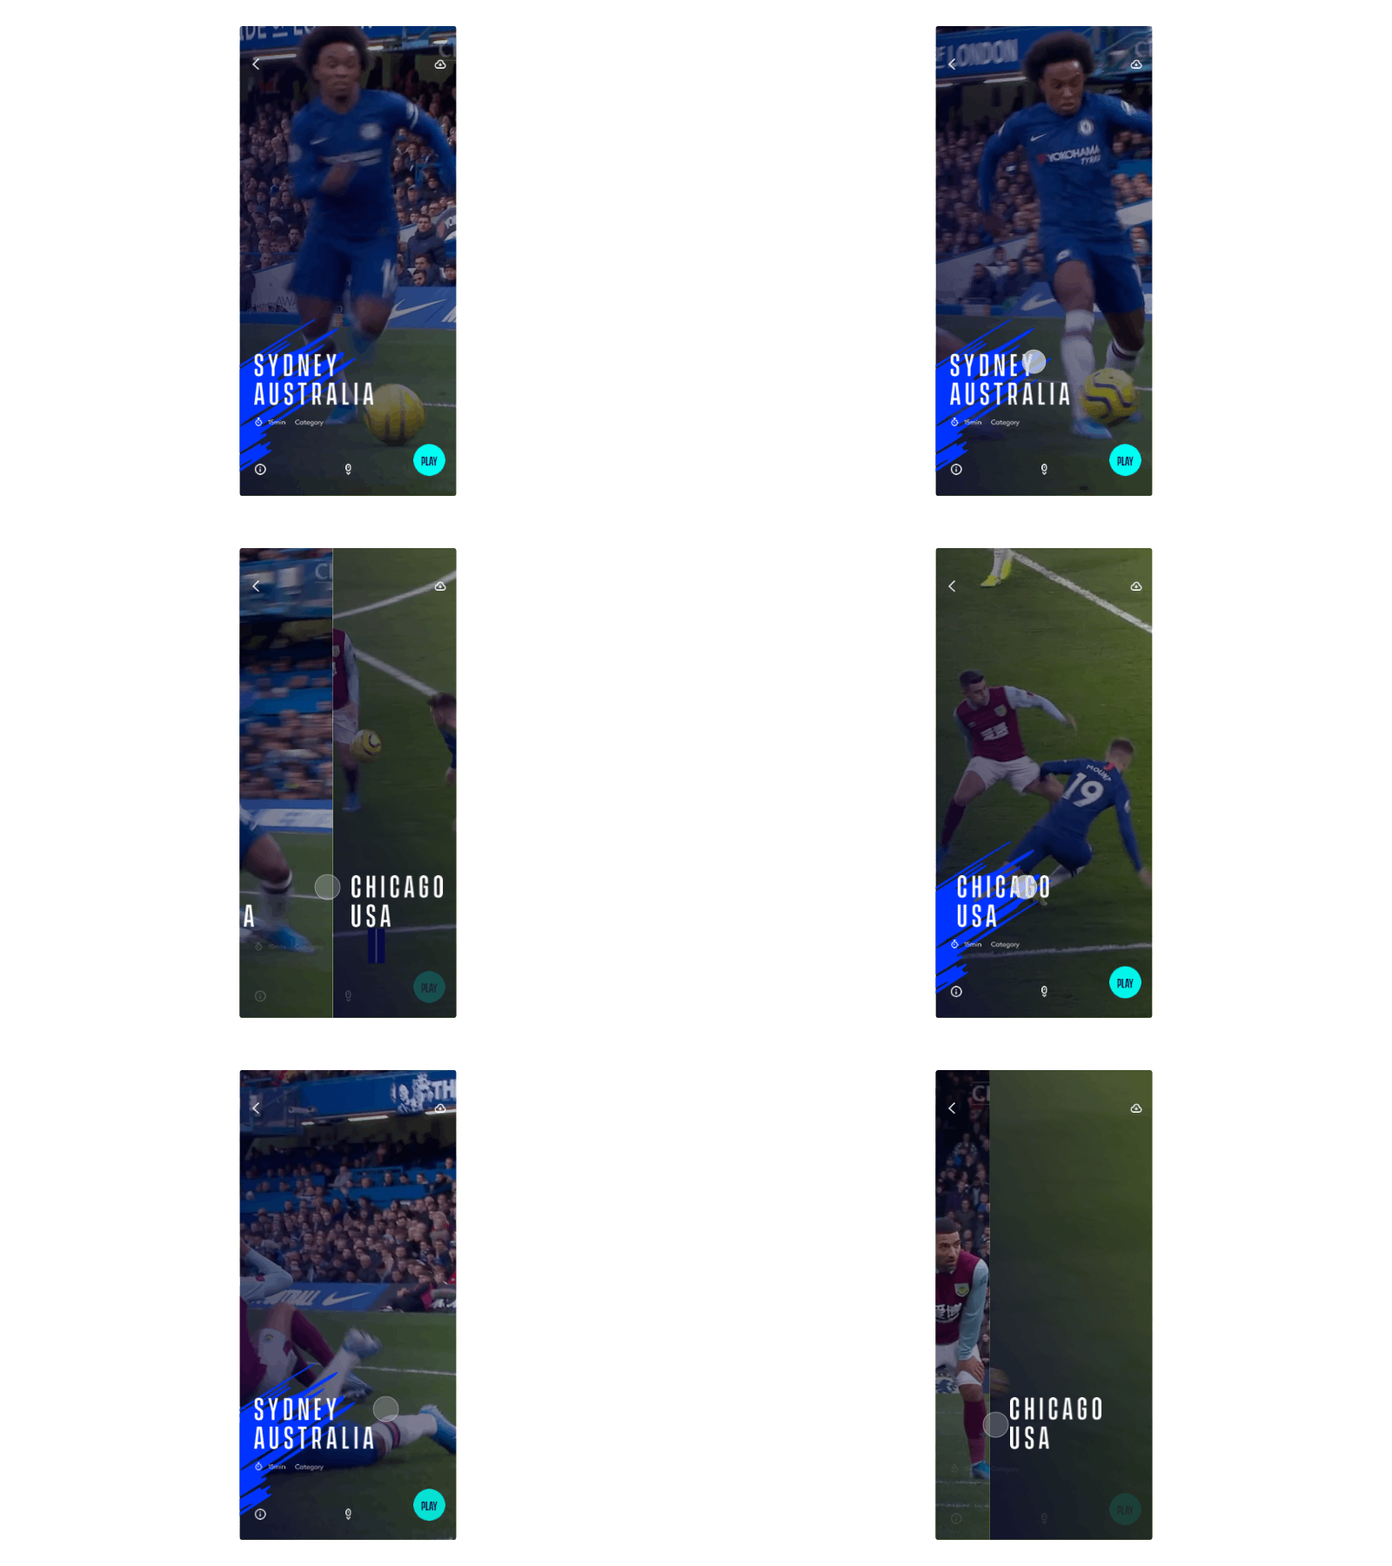
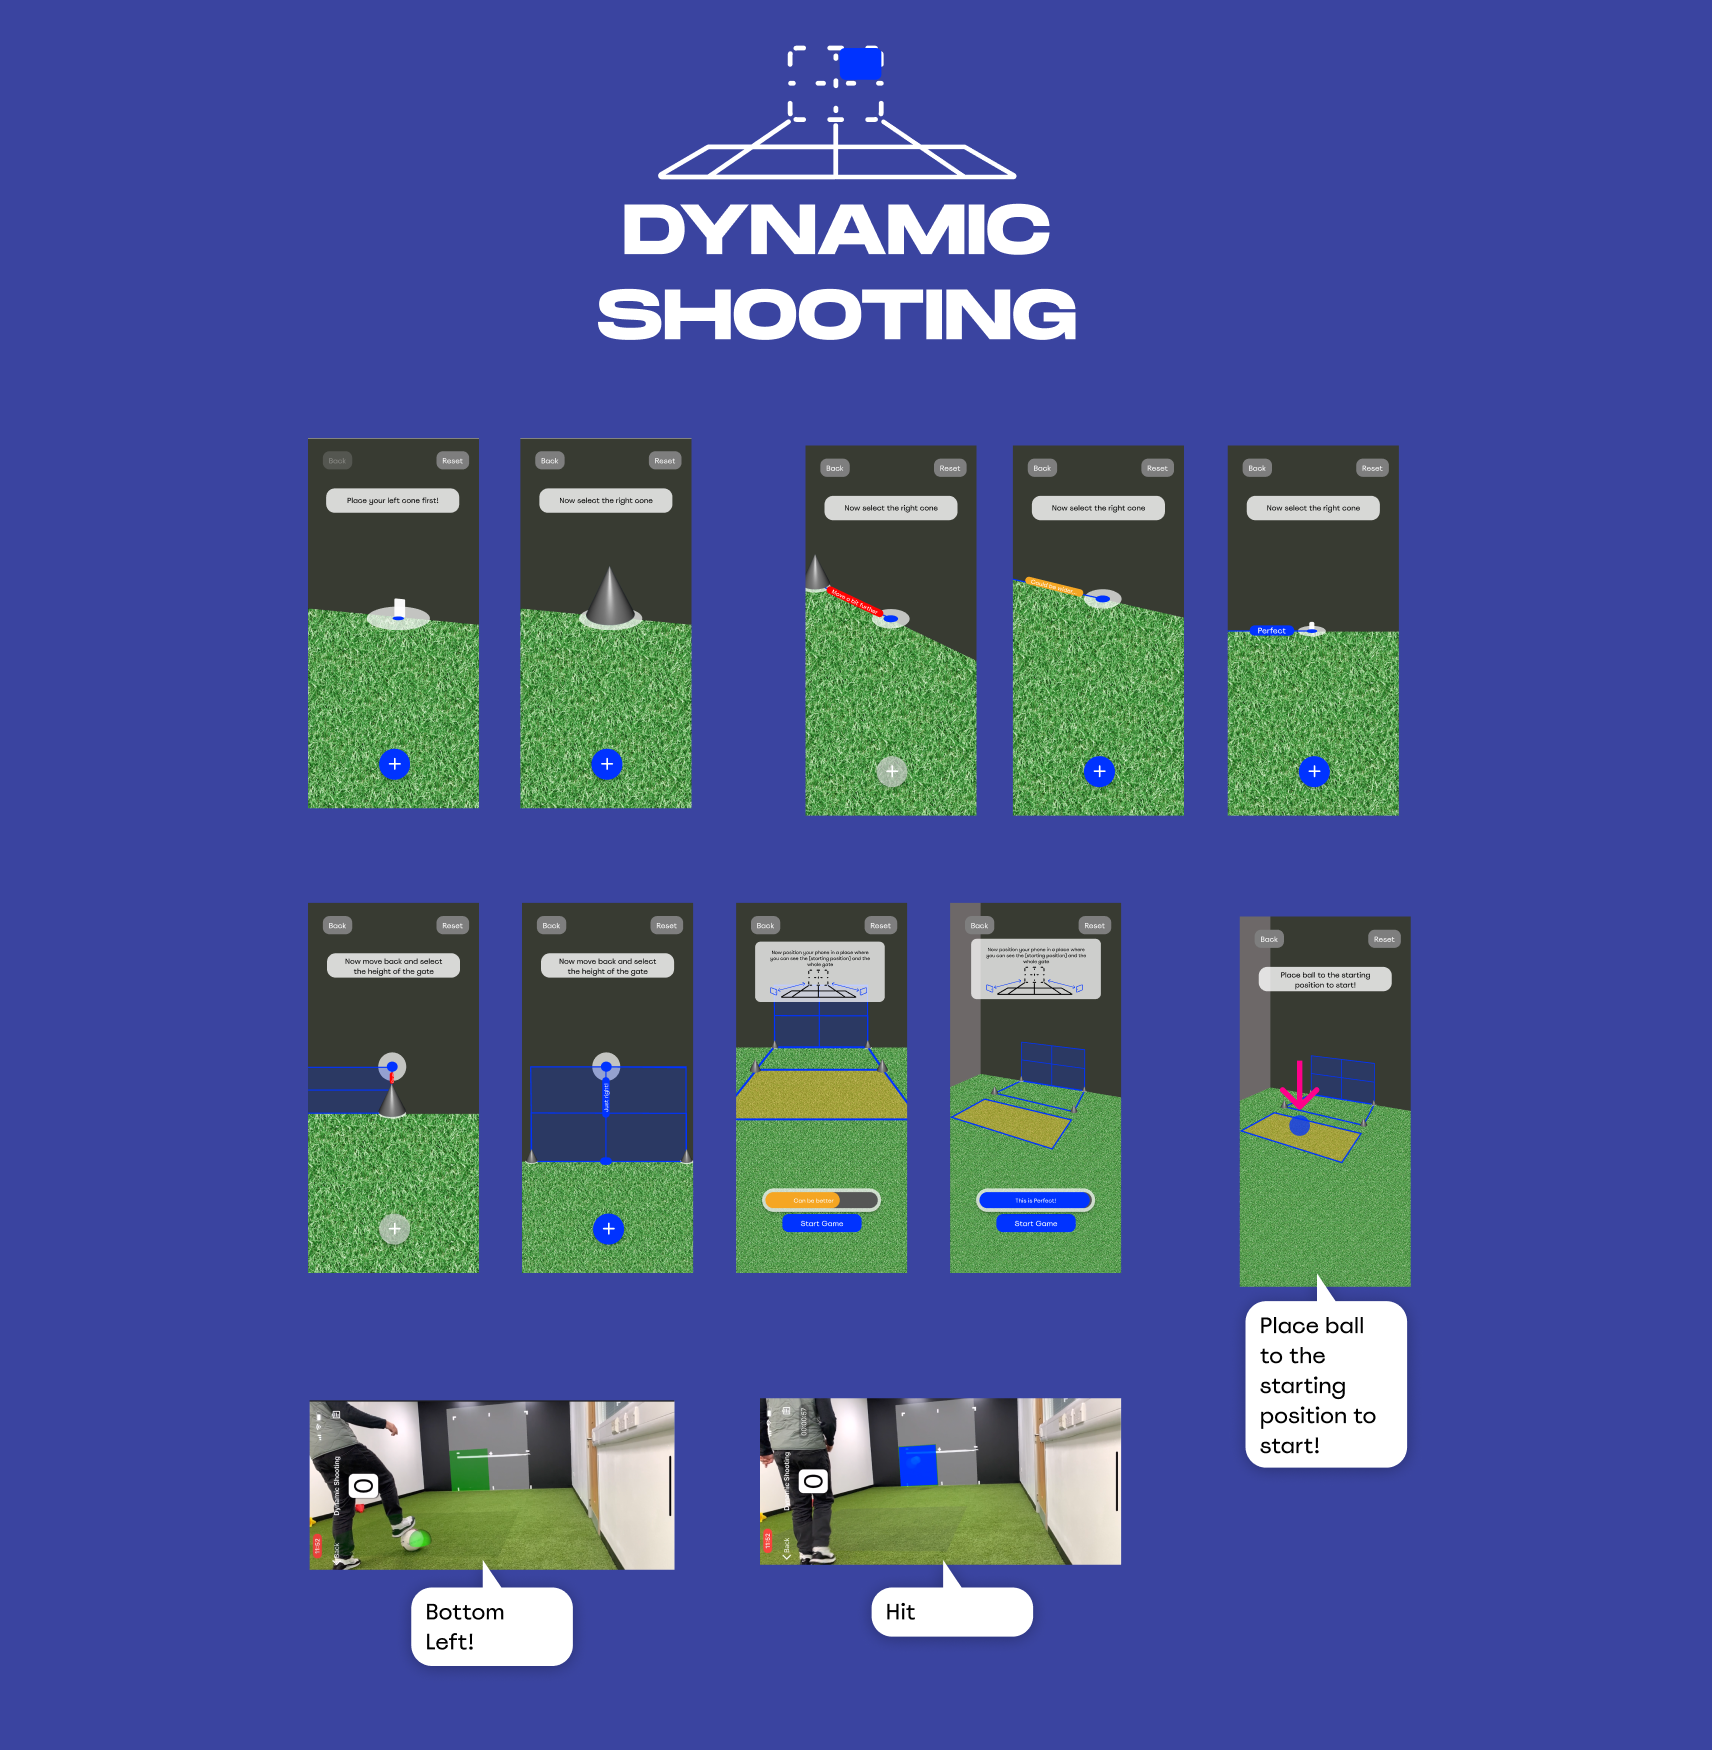
Dynamic Shooting is an interesting computer-vision training assistant that helps you perfect your target precision.
Before the game starts, the user is requested to set up and mark their gate — the 2×2 matrix where they will receive instructions to aim the ball at.
The challenge was to create a step-by-step, easy to comprehend setup flow, flexible enough to work on a designated football field, but also in their back yard!
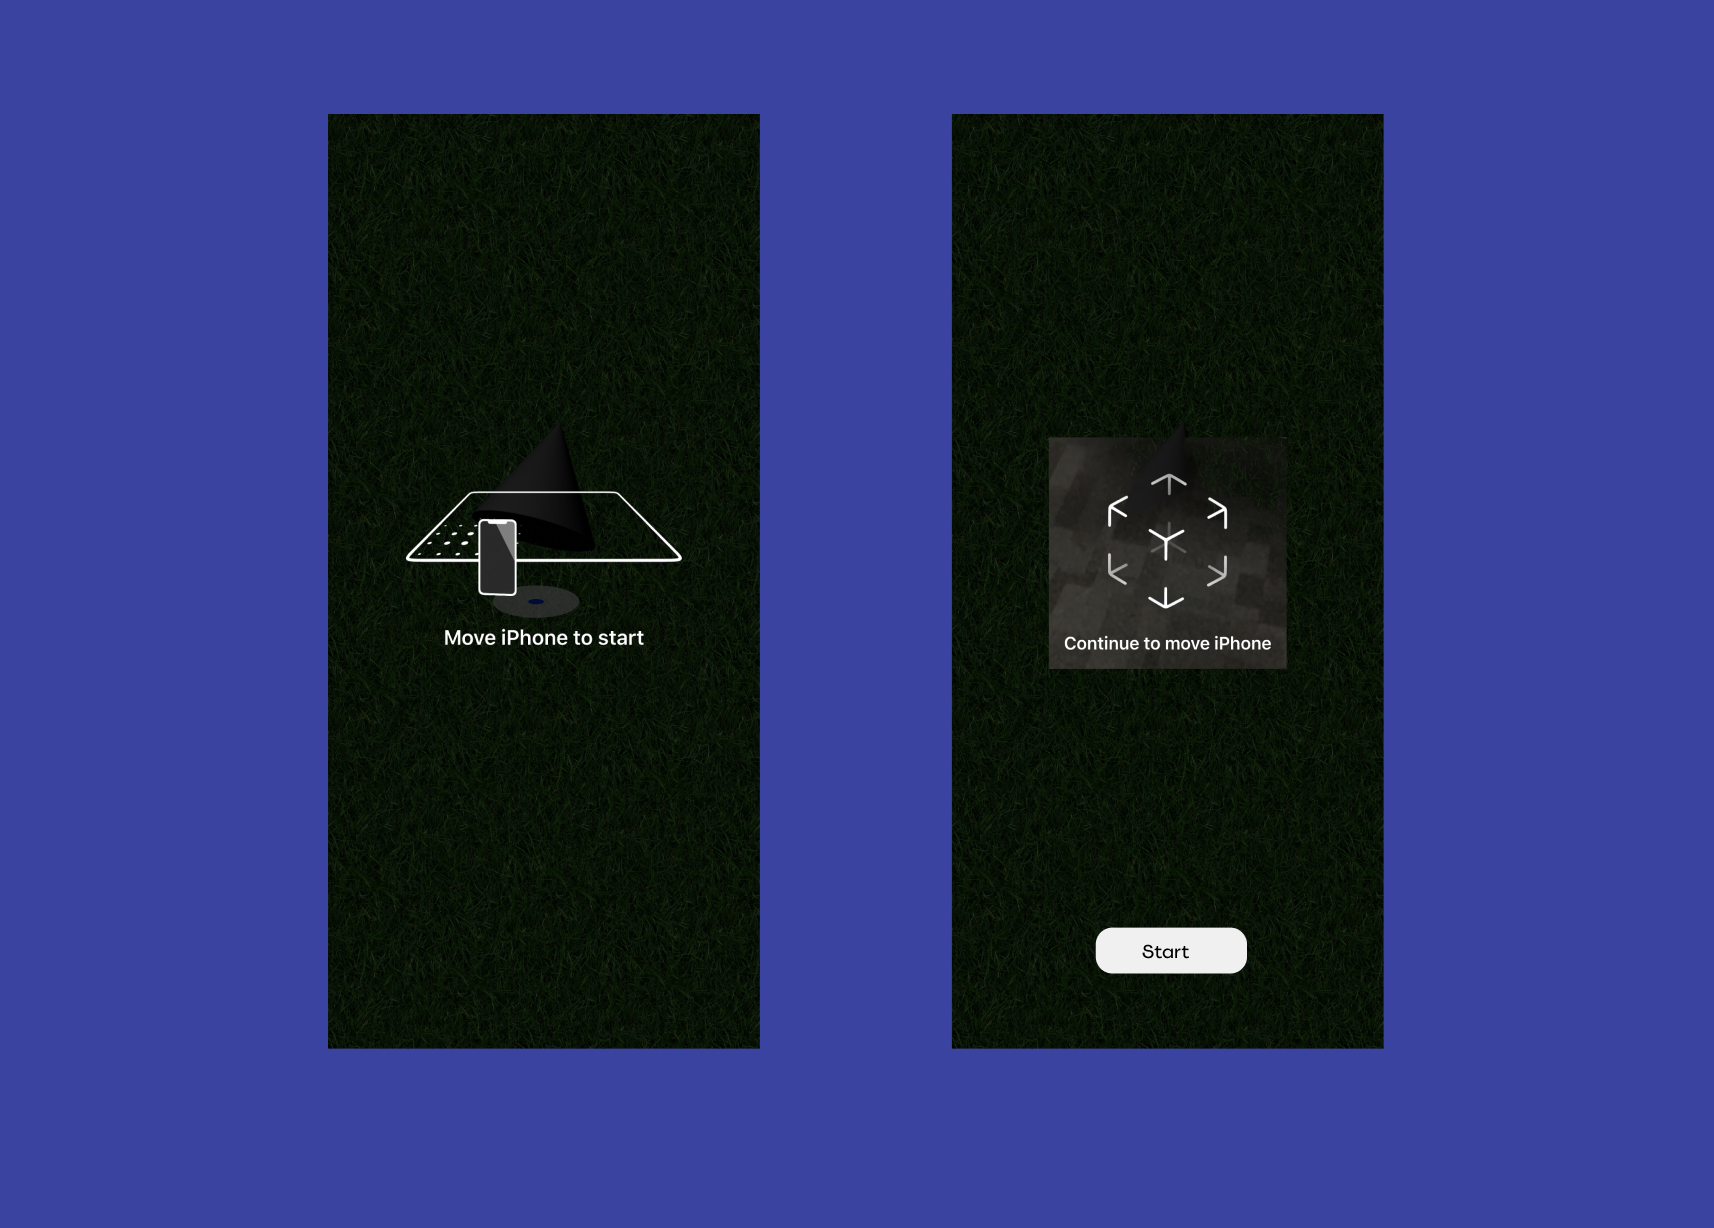
AR scanning
Here we have two steps to set up the AR with Apple’s ARKit (as in 2019).
When you start the AR setup, it will prompt to scan your environment to the minimum space required to place the objects.
From here there are two routes: either continue scanning to the desired ideal needs, or start placing objects (and potentially ask later to move and scan more).
Gate setup: left cone
The first step is to place the first point of the gate between the floor and wall.
As ARKit 2019 did not detect walls yet, we needed to rely on users to place the points in the right spot, without any backend validation.
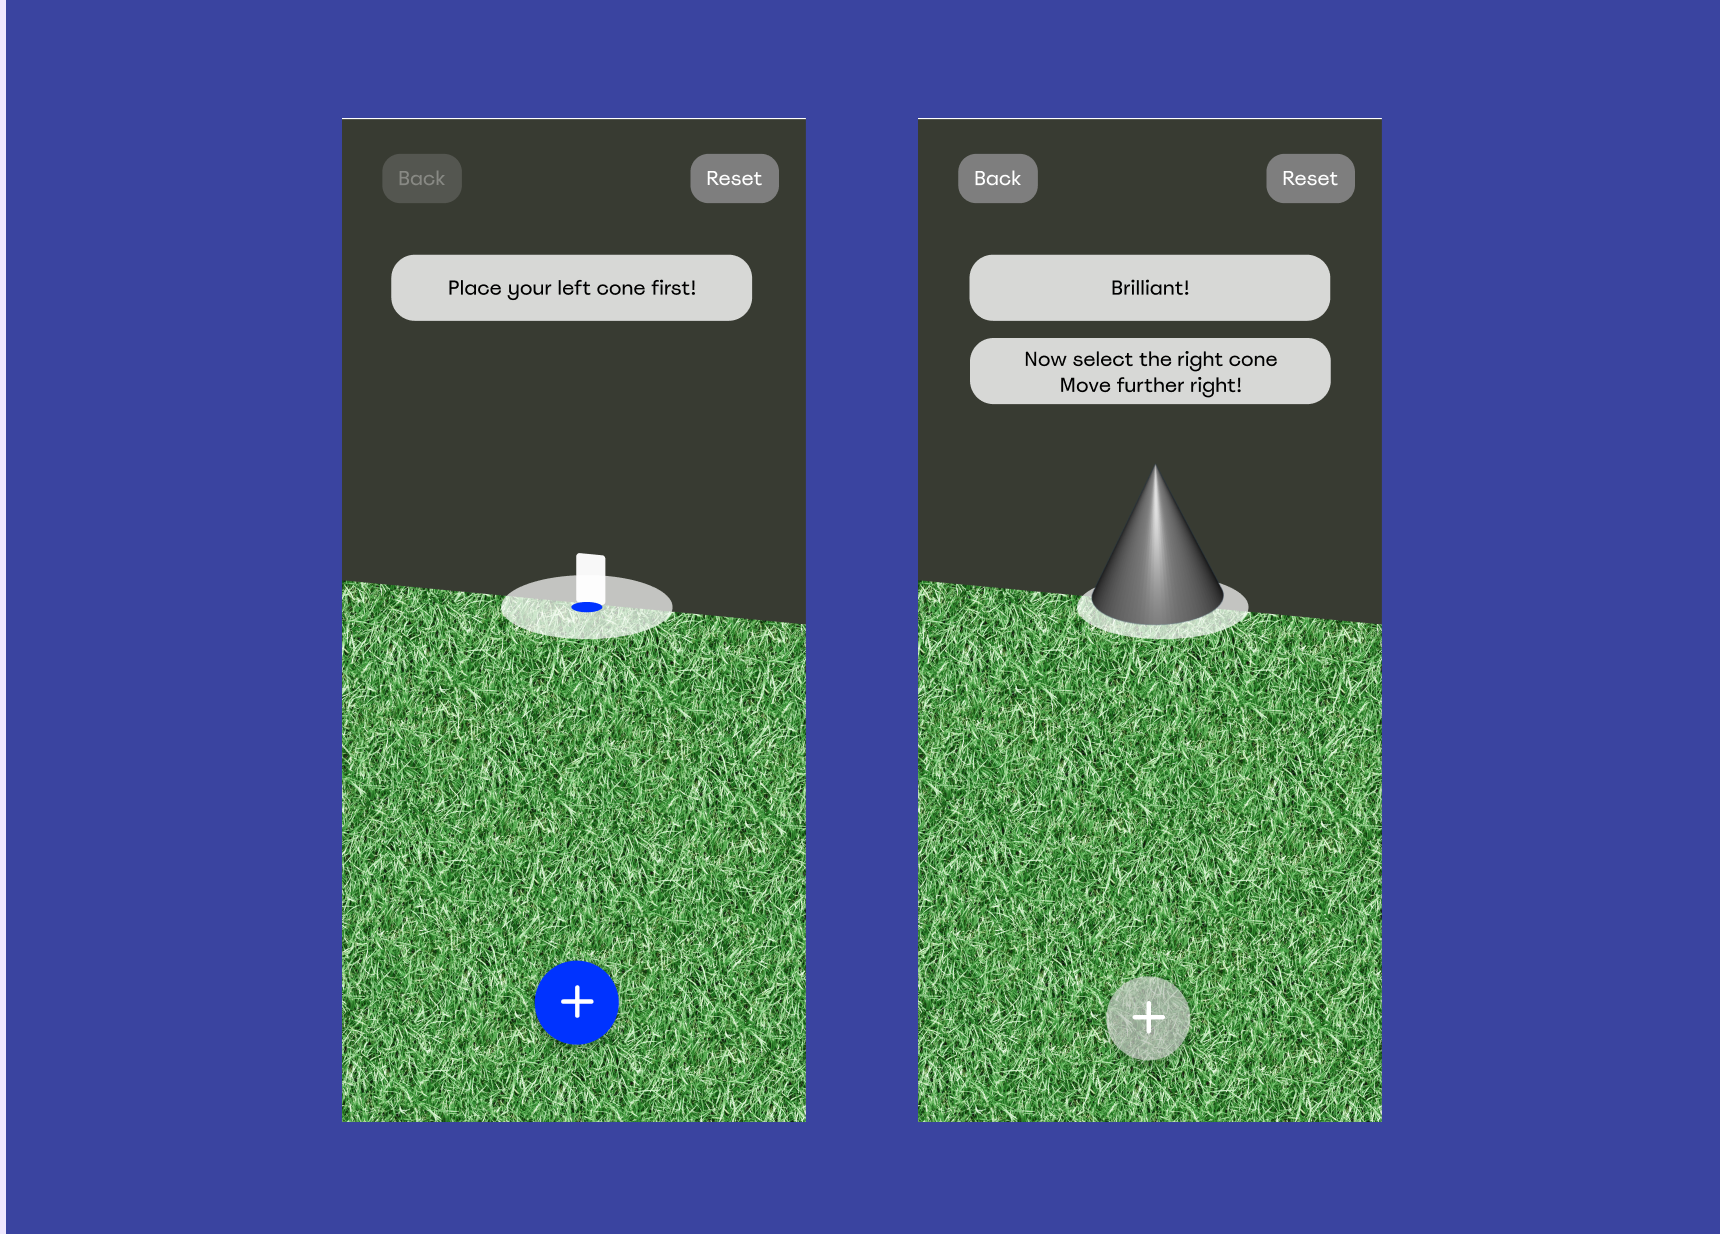
The placing point is in the middle of the screen; while moving your device the AR will follow the plane detected. Once you find the right spot you hit the Plus (+) button and a confirmation (text + sound) will prompt, along with the next instructions to move further left to place the next cone.
Gate setup: right cone
Once the user placed their first marker, they will move the device away to the right (or left, as it will be calculated automatically).
Now the gate has a min, ideal and maximum required space.
If the space is too short to set the gate, the ruler will be red and the placement button disabled.
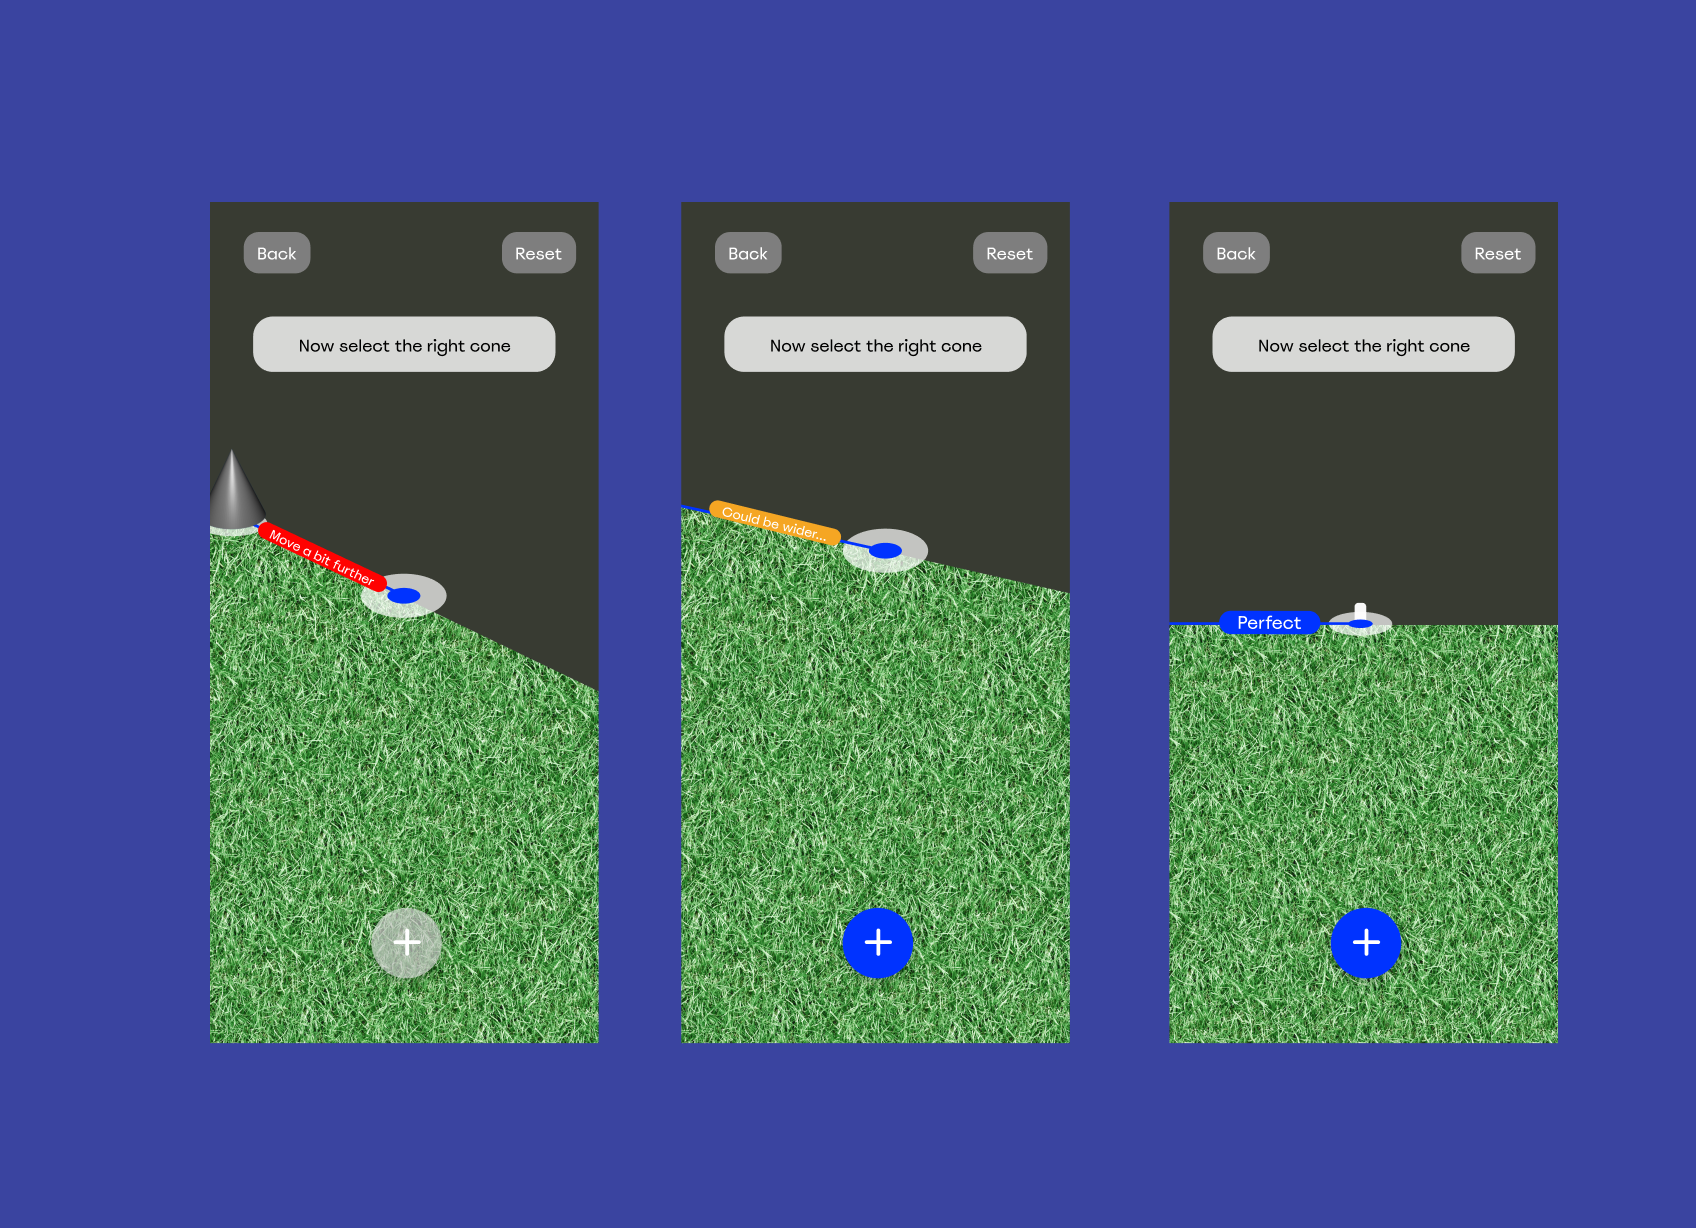
If they reached over the minimum width, the line will be orange and the placement button will be available.
If the user has enough space to reach the ideal size, the point will snap into place (along vibrate haptics) and the line will become blue.
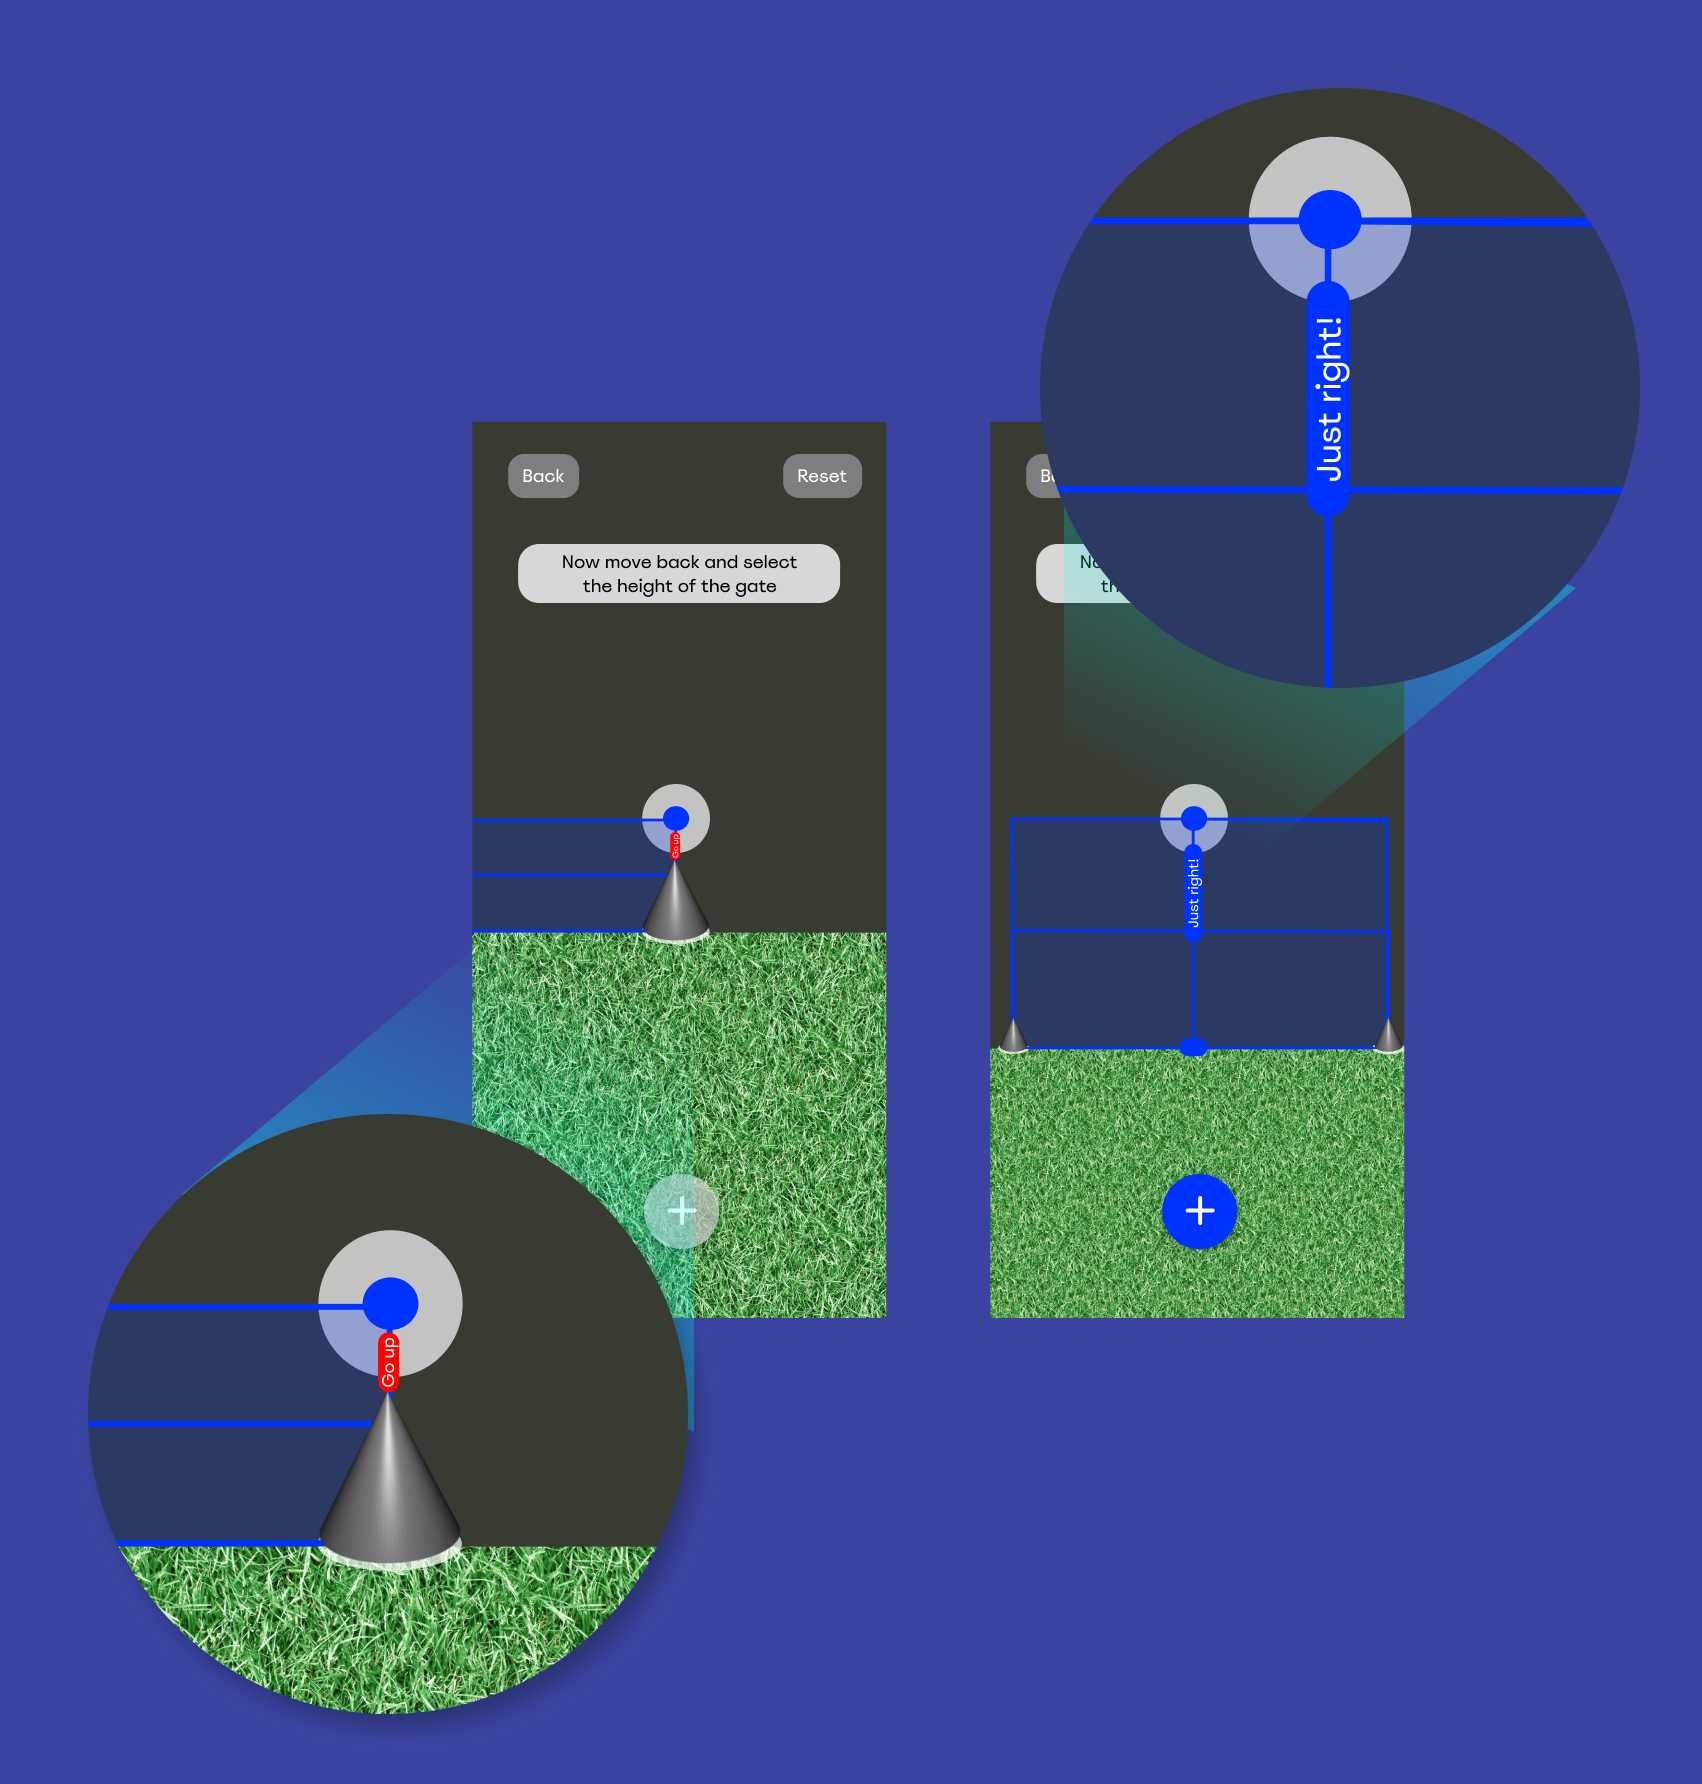
Gate height
Ok, we have now the two points of the gate; we only need the height to start the play! As the users move their screen up, the gate height ruler will show a point to adjust height.
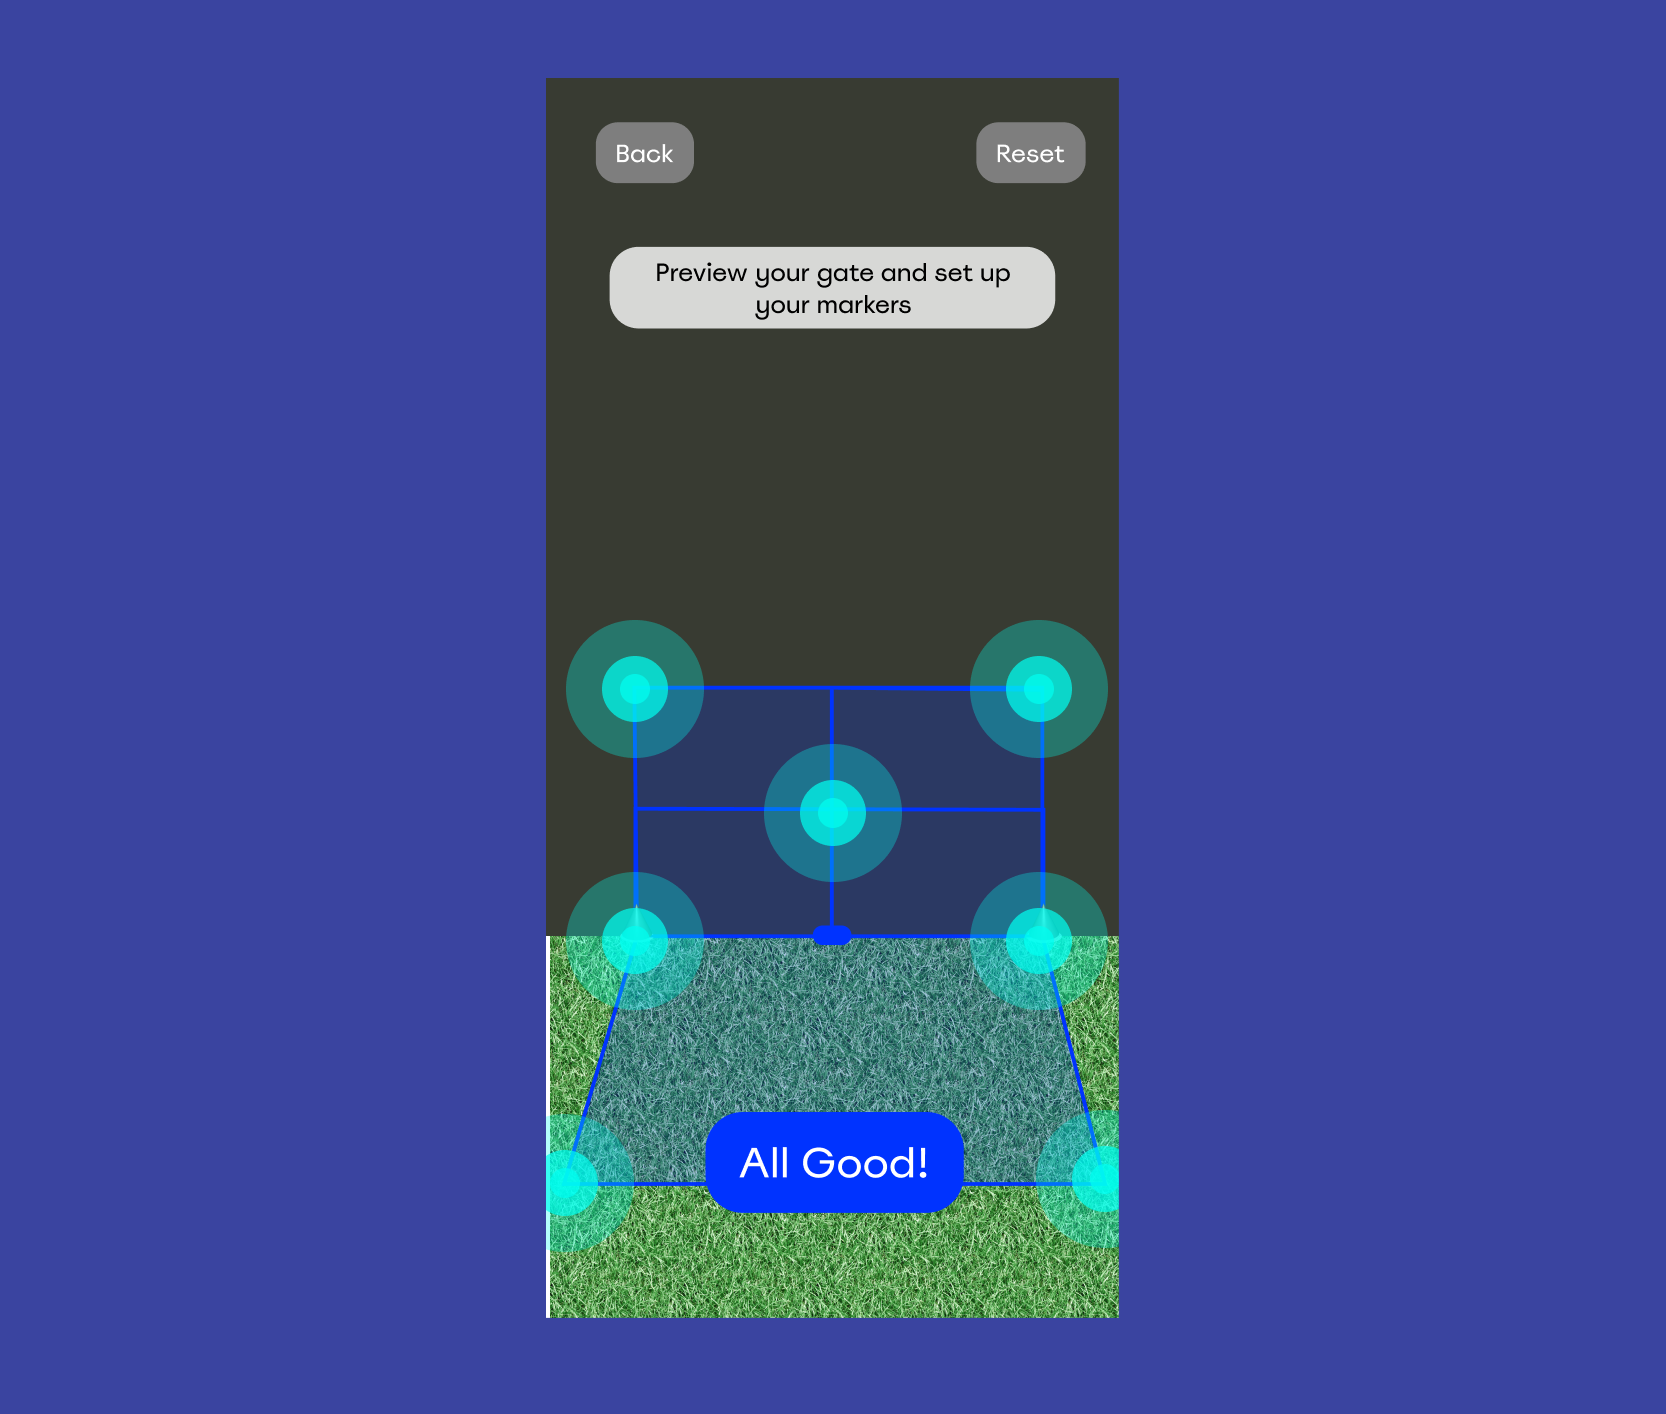
Confirm & place markers
We have the gate setup; now it’s the time to review the position (they can drag and adjust if needed) and set up real-life markers like tape, two bottles of water, clothes etc.
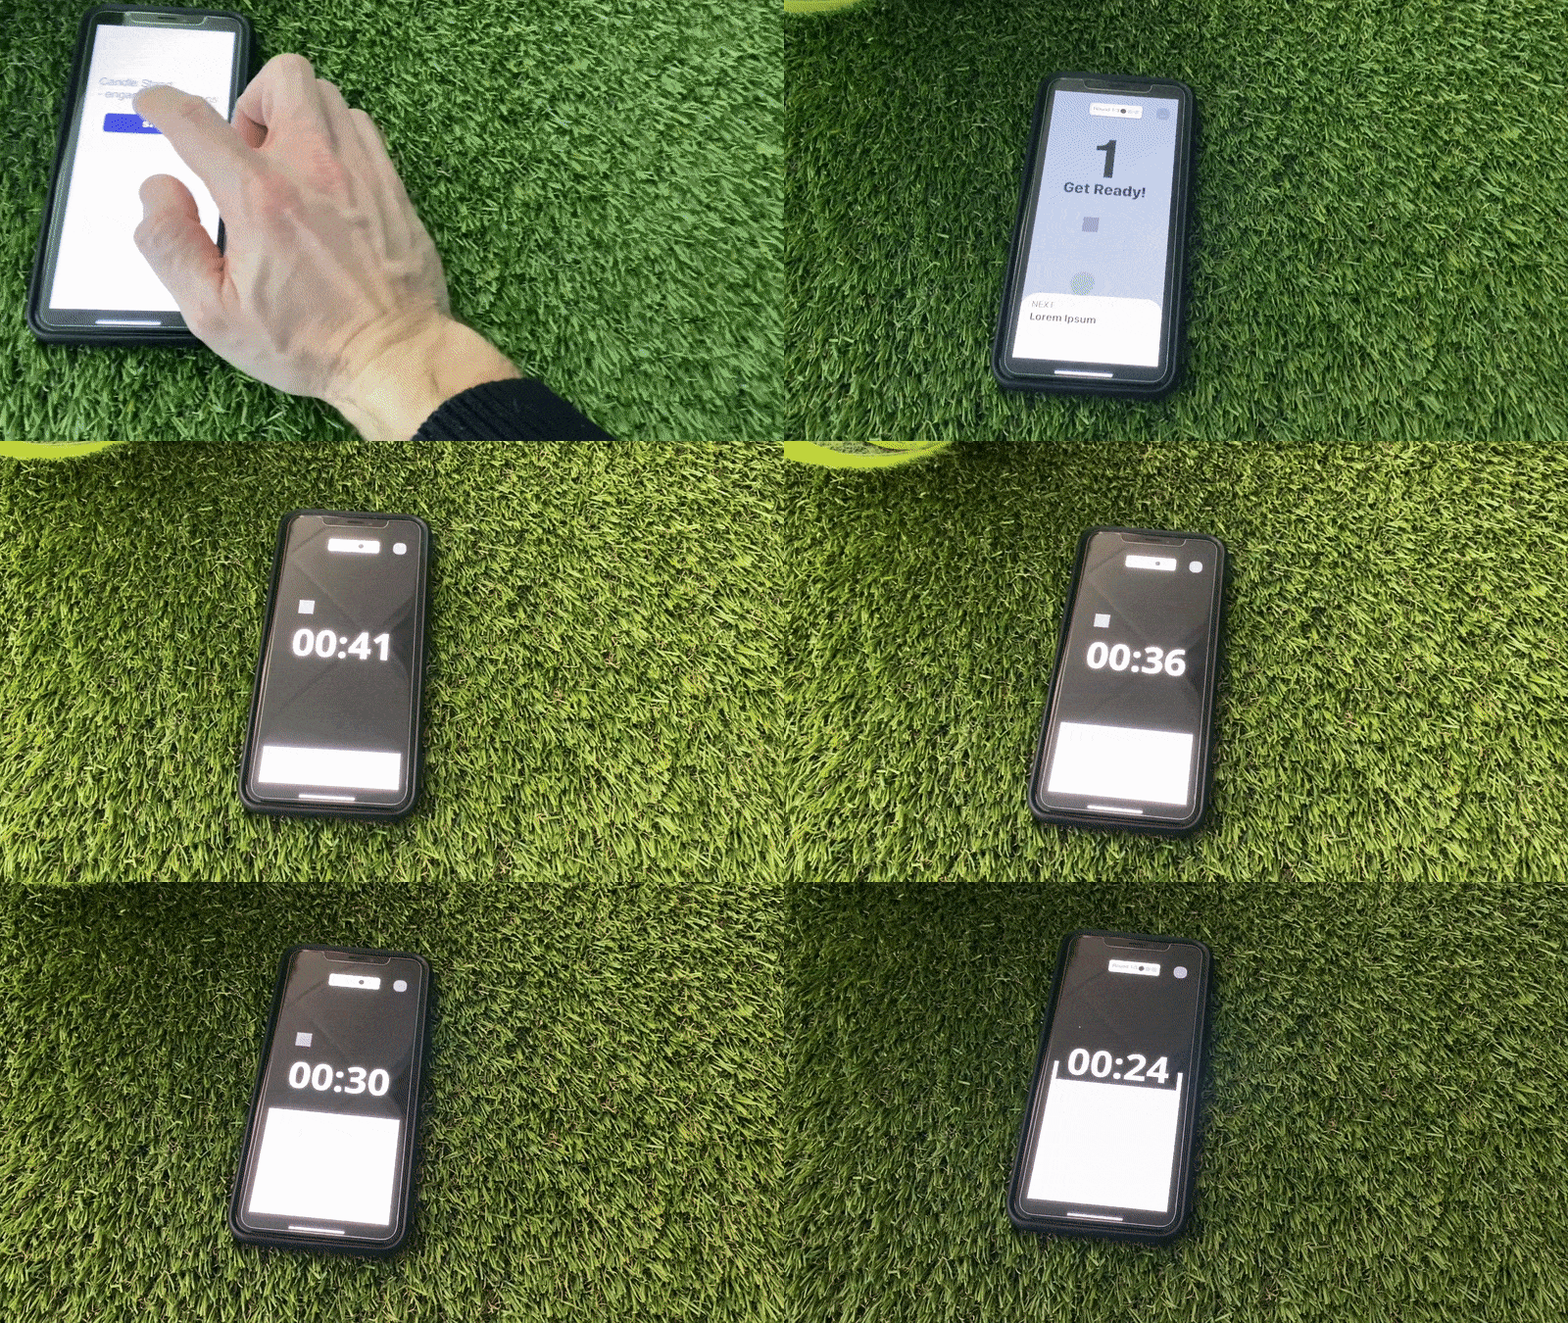
Place phone on tripod
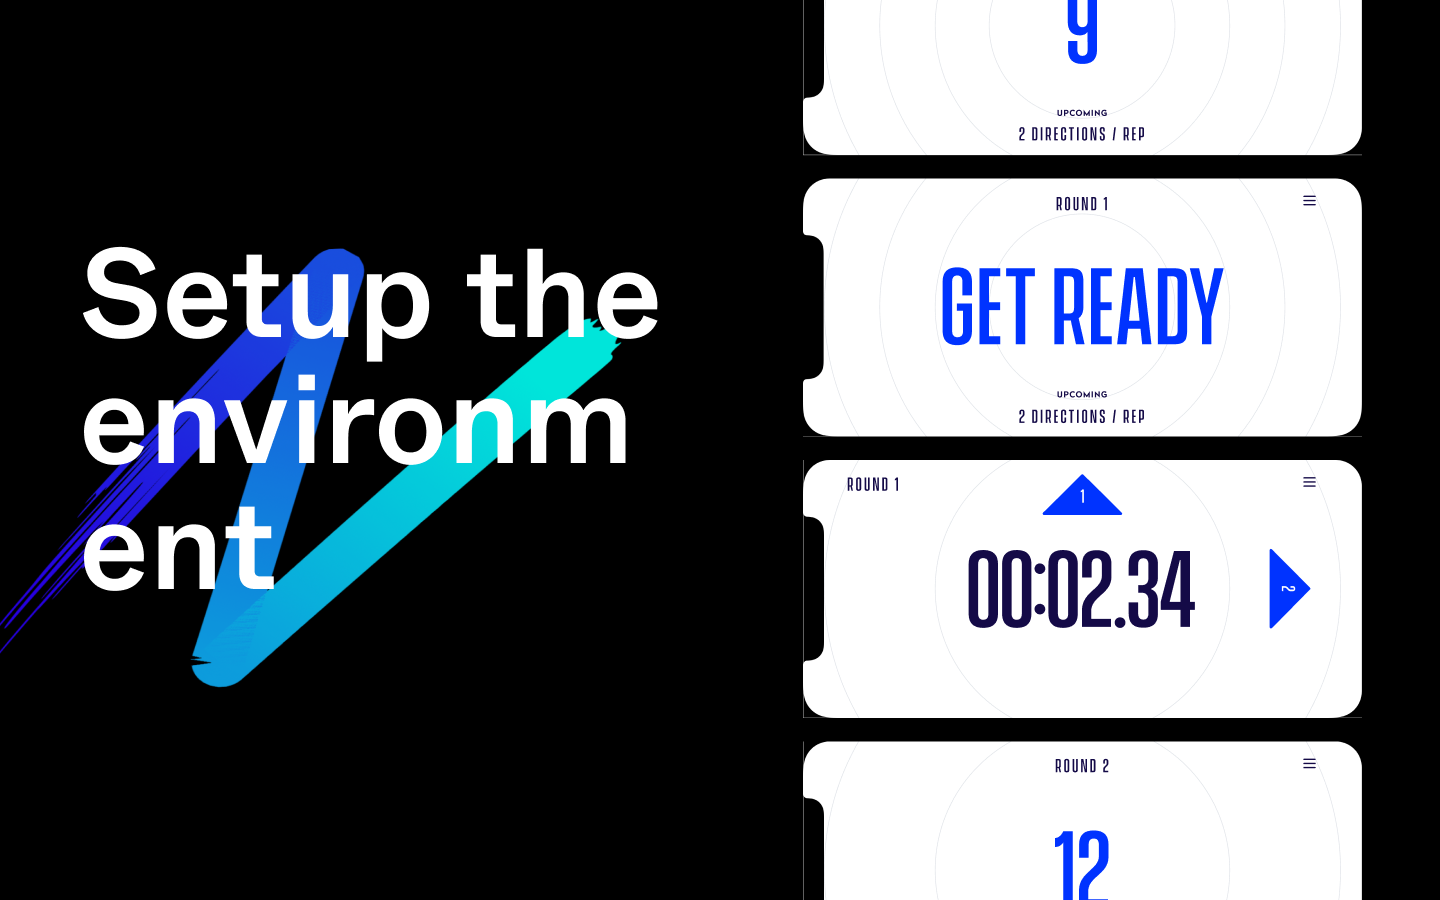
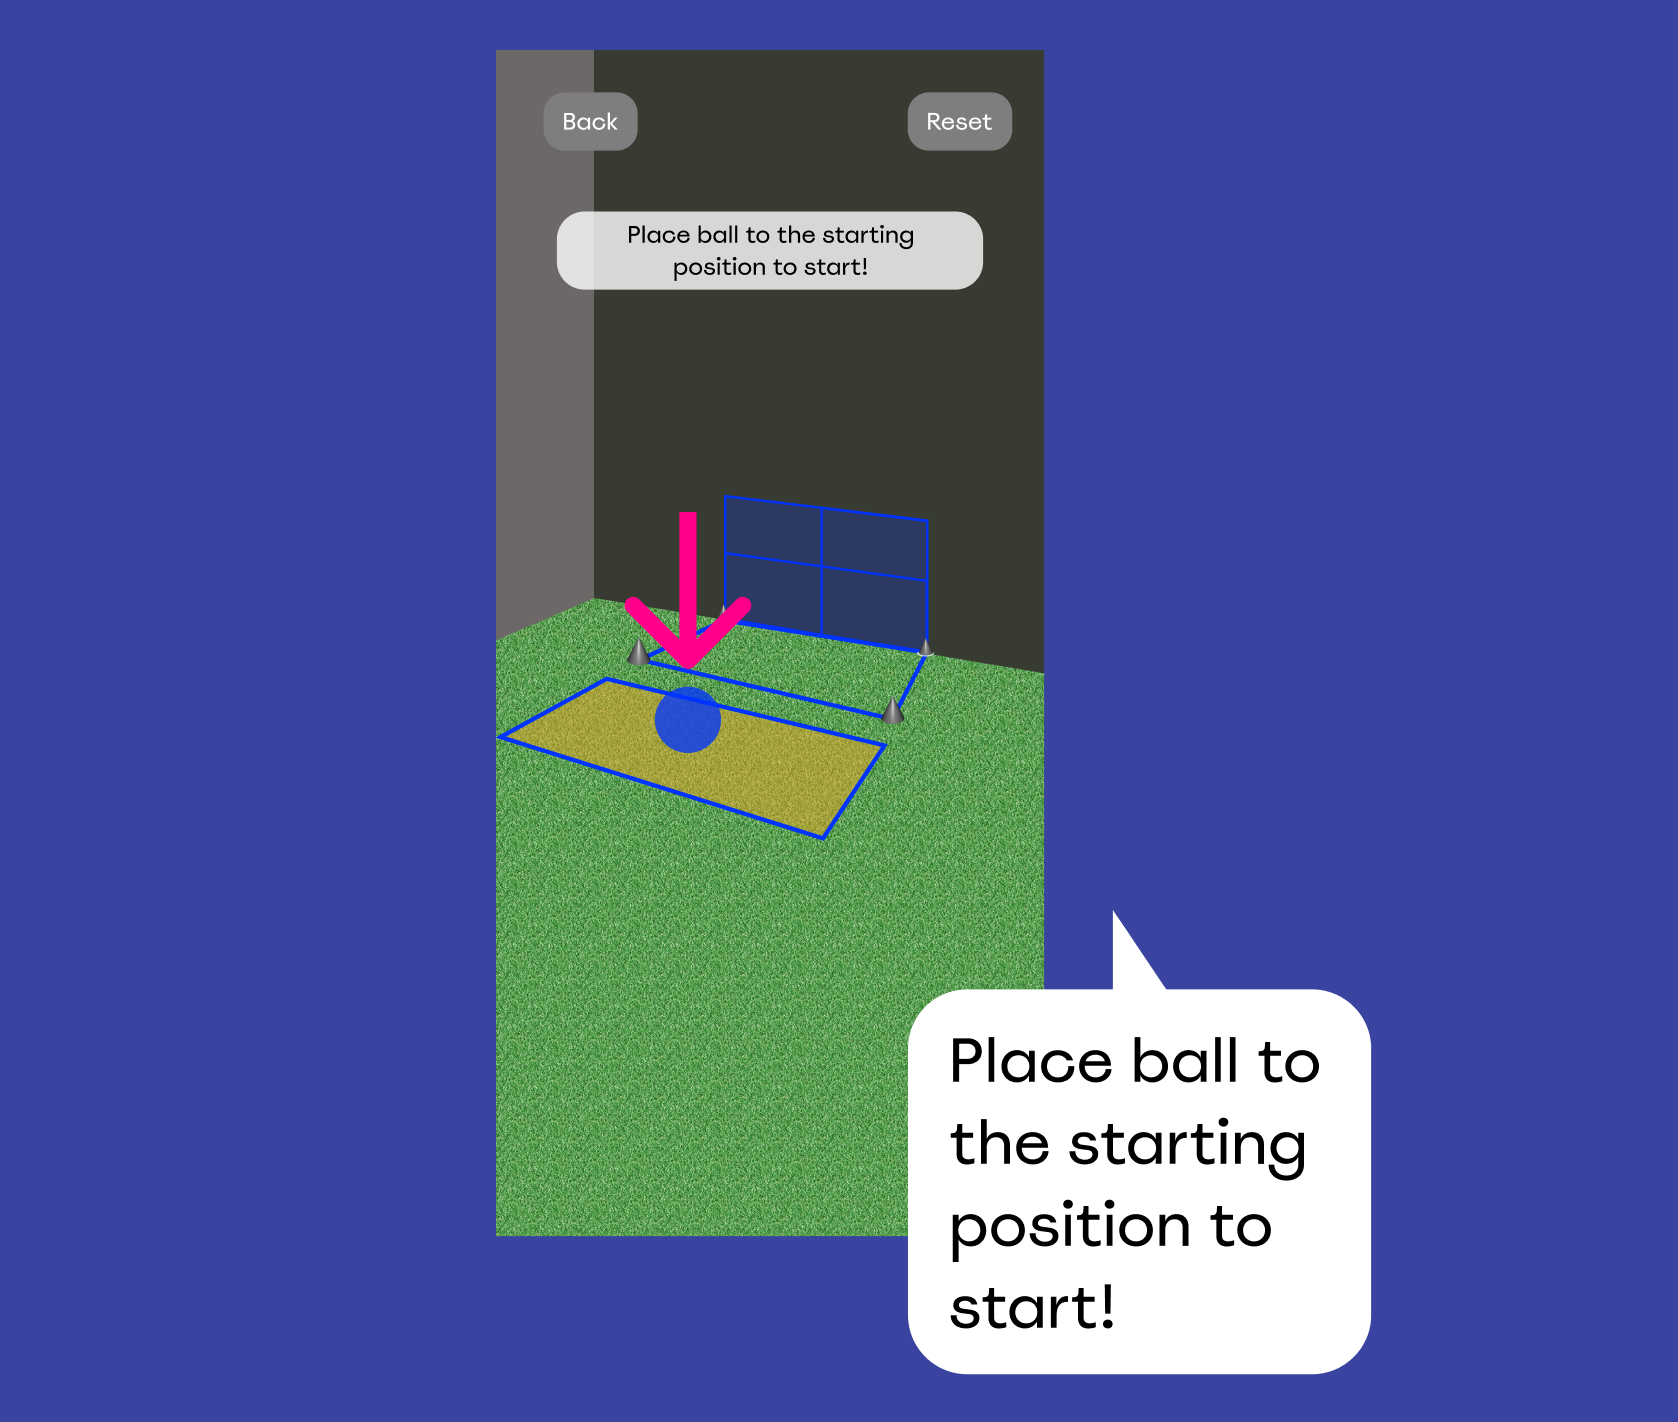
In order for the computer vision to work, it needs a good overview of the gate and starting position. The starting position is the yellow rectangle at a specific distance from the gate (this will vary level by level) where players will be asked to start and remain while playing.
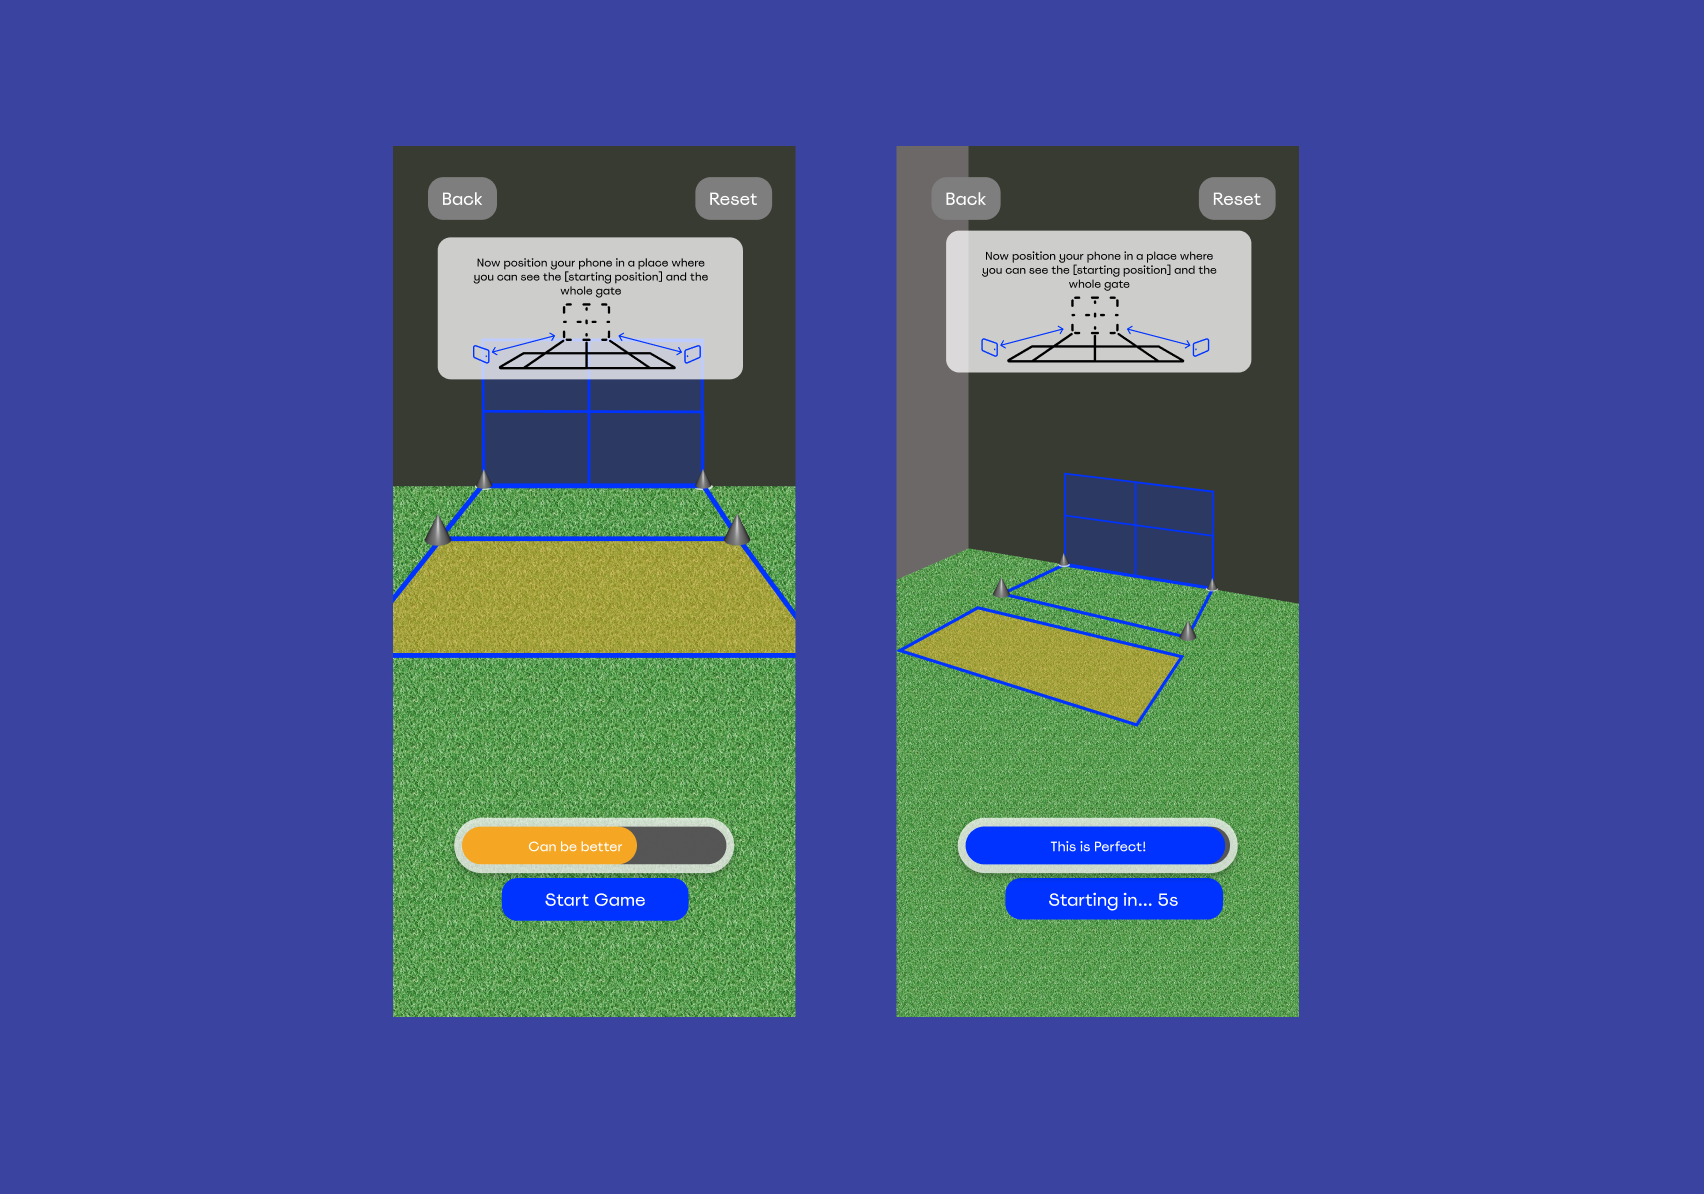
Again, here is the case of a minimum overview (if they are indoors with limited space) and an ideal. We took into consideration that some users may not see the screen while the phone is on the tripod, and added voice and sound feedback.
Move to the starting point
So now, to start, the users will need to just move with the ball to the yellow starting point.
By this point they will only hear the app giving instructions.
The game will start automatically a couple of seconds after they are in the starting position.
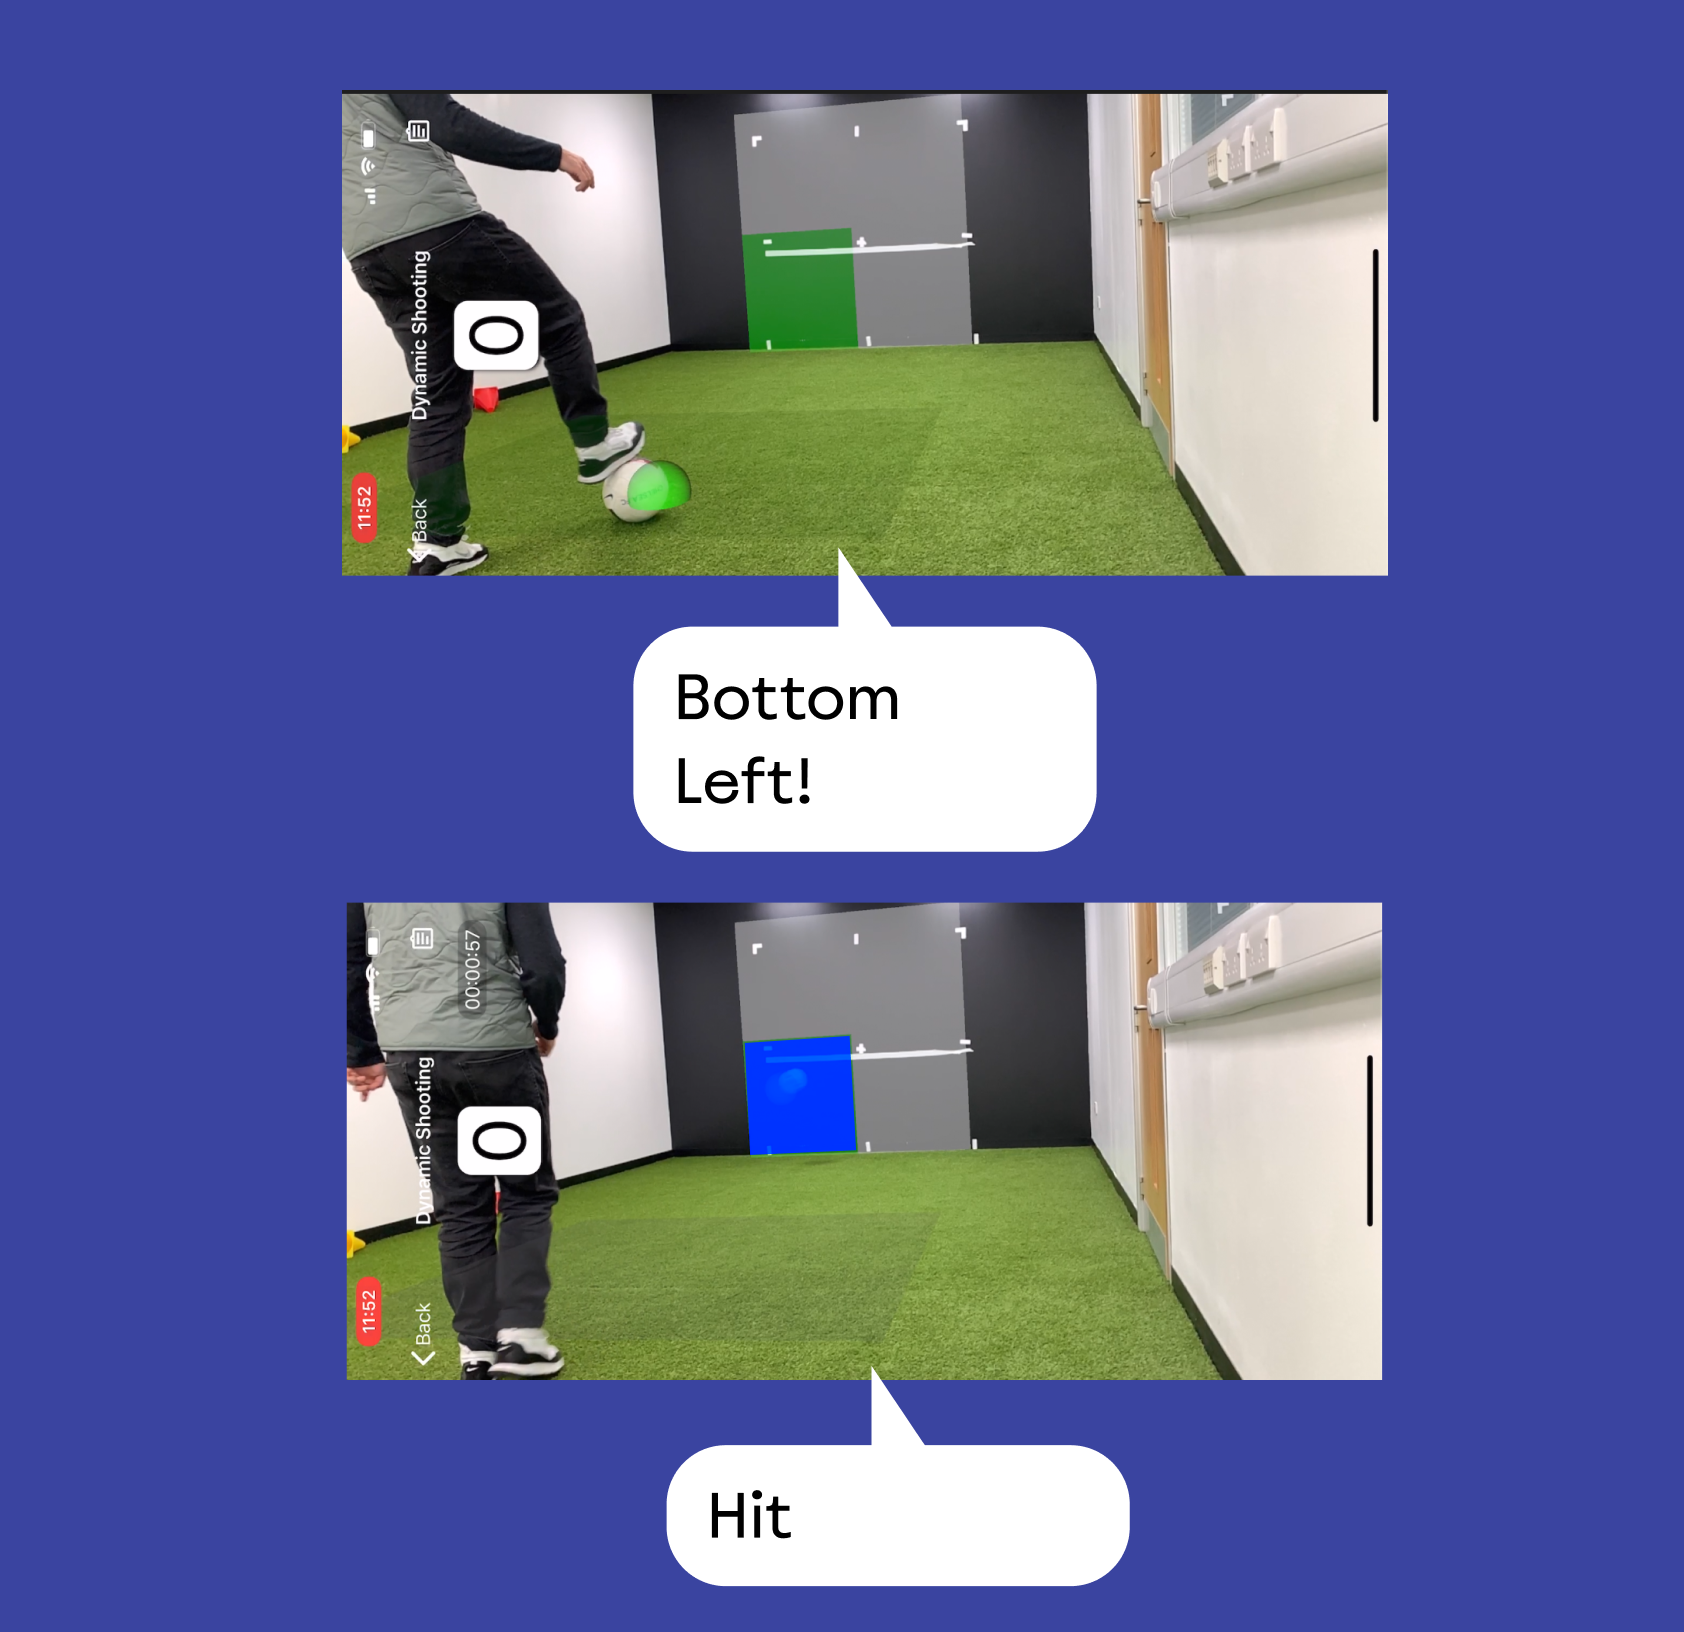
Gameplay
Gameplay begins, and the interactions happen only by voice instructions and sound.
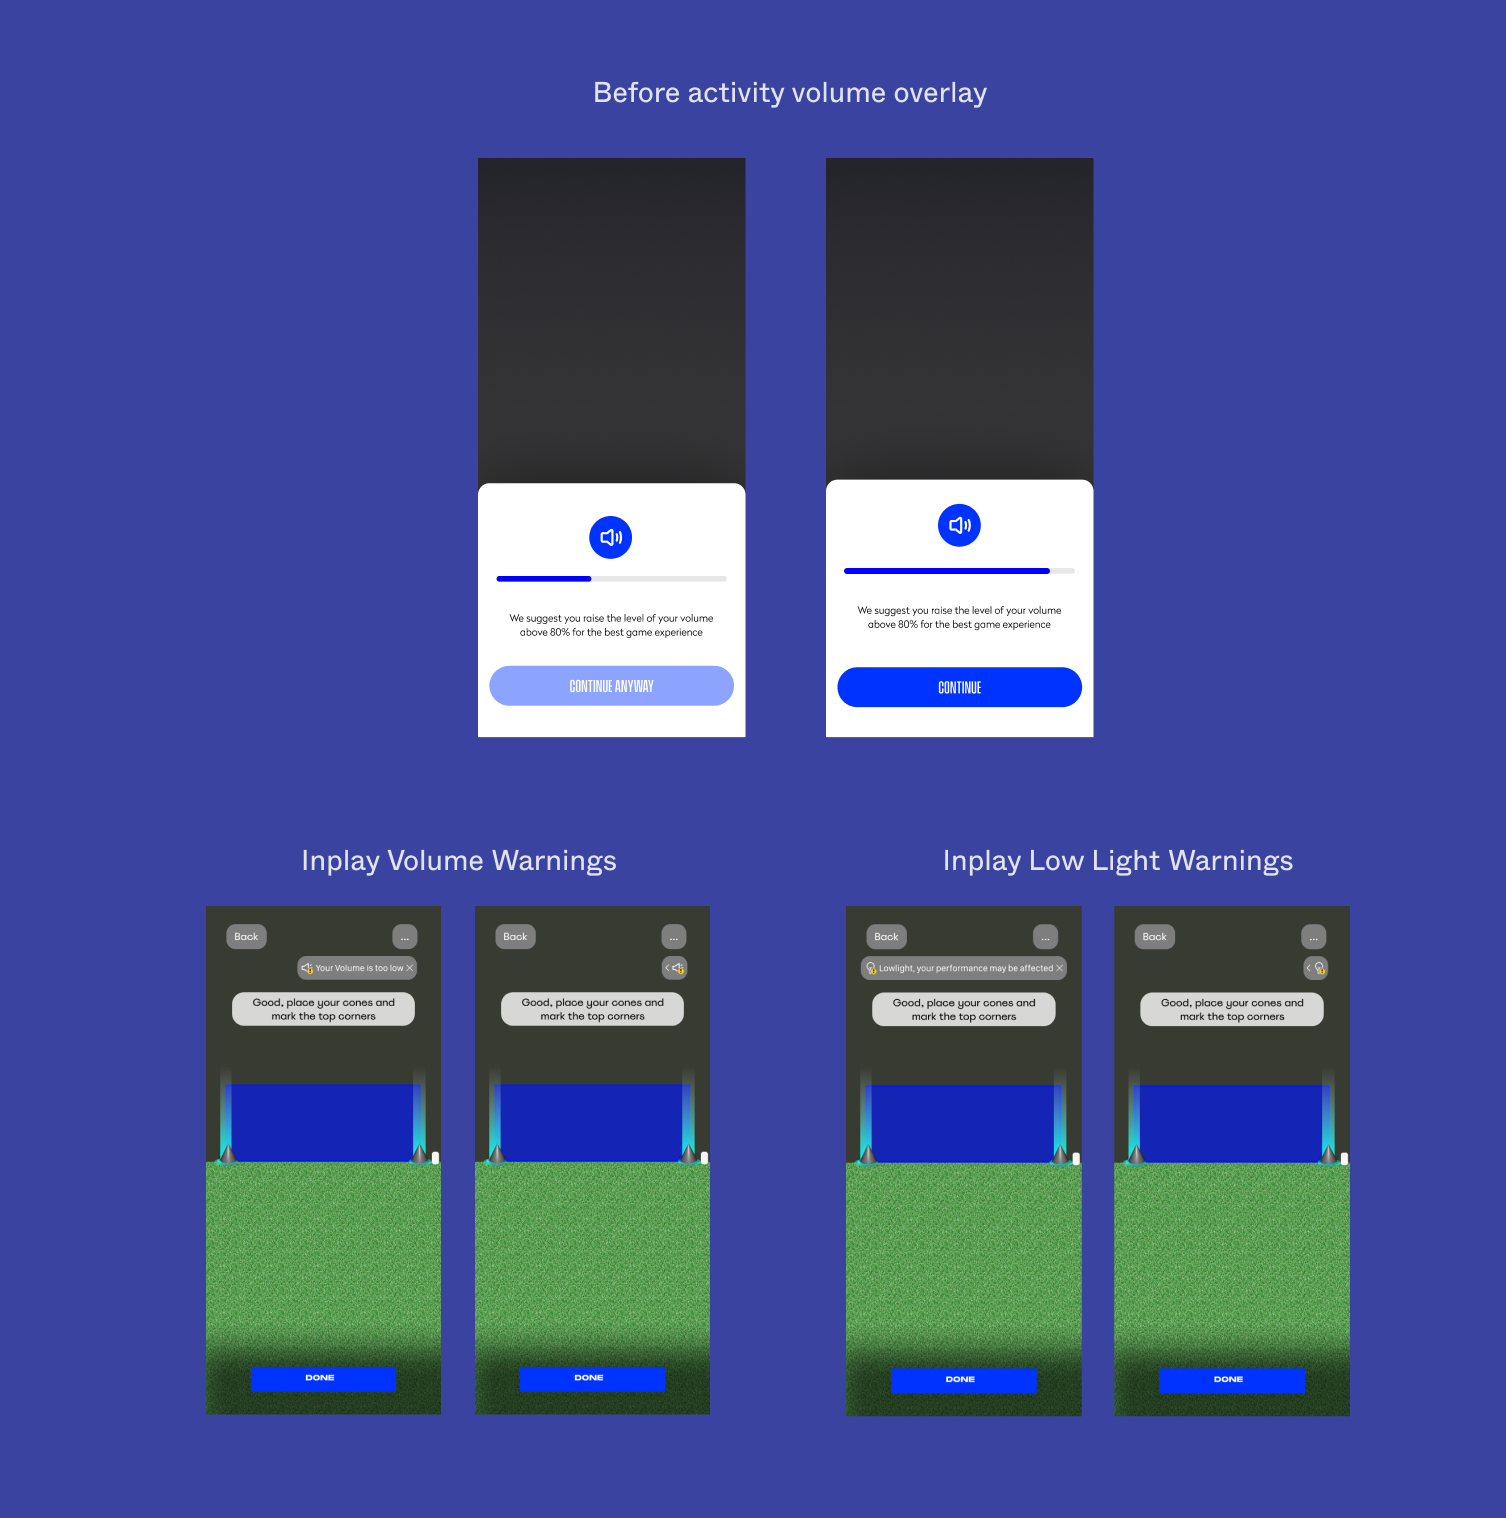
09 — FeaturesVolume & Lowlight Notifications
Because some activities were based on instructions delivered only by sound, we were keen to push users to max up their volume; however we did not want to impose strict behaviours that may lead to more blockers in the flow.
So we created 3 levels:
- When the volume is 0–3 the game is not playable; they need to raise it up.
- When threshold 4–8 is reached, the button becomes visible.
- At 9–10 the game will start automatically after a short timer.
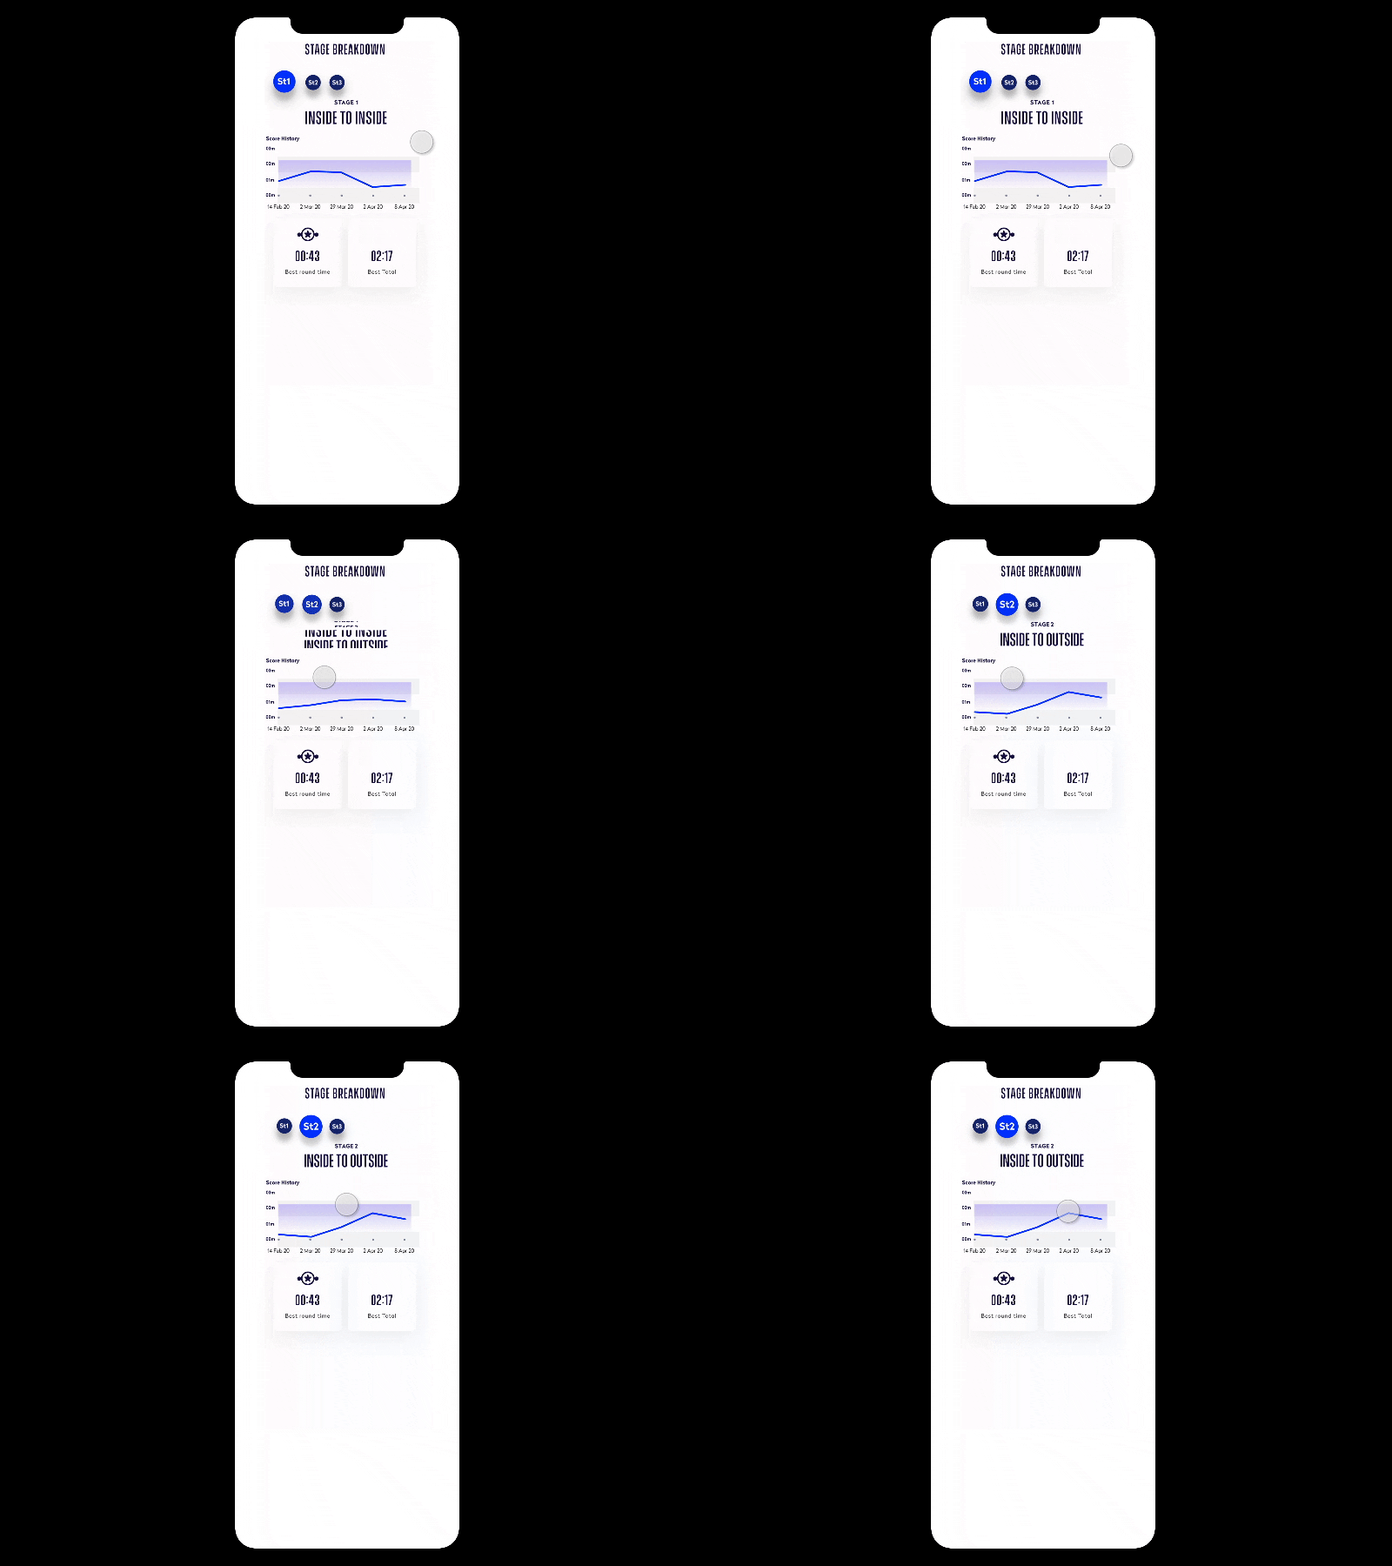
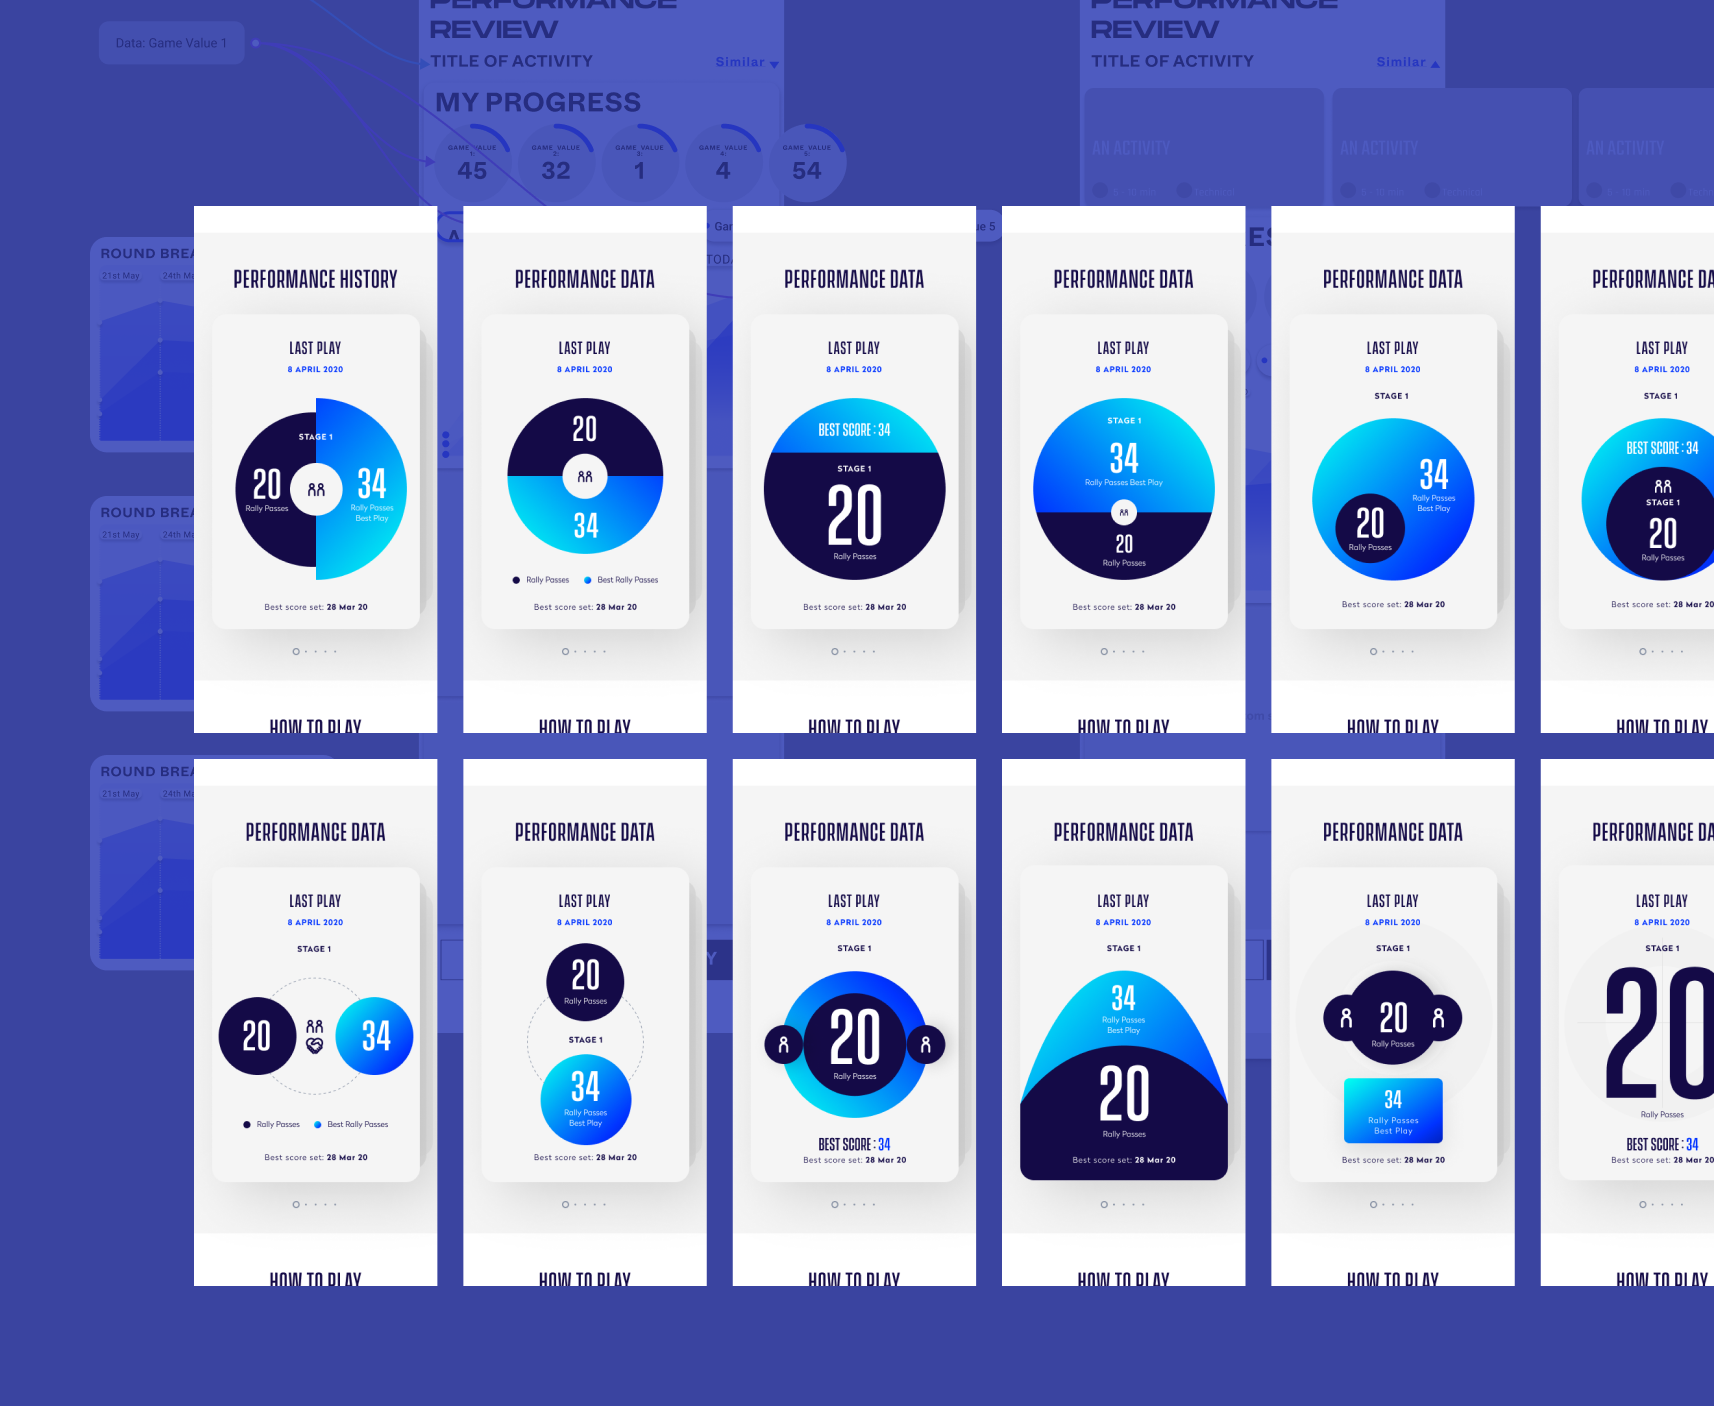
10 — FeaturesPerformance Data
We tracked lots of data points from the backend APM; as some were strictly dev-focused, we grouped the ones that helped us to understand user performance.
We needed to create stats that were designed for both personas, as in kids and adults.
I’ve learned that in order to create a good experience incentivising kids, we needed to always reward the positives, compared with the stats for parents where we included a more holistic view.
11 — FeaturesAchievements & Goals
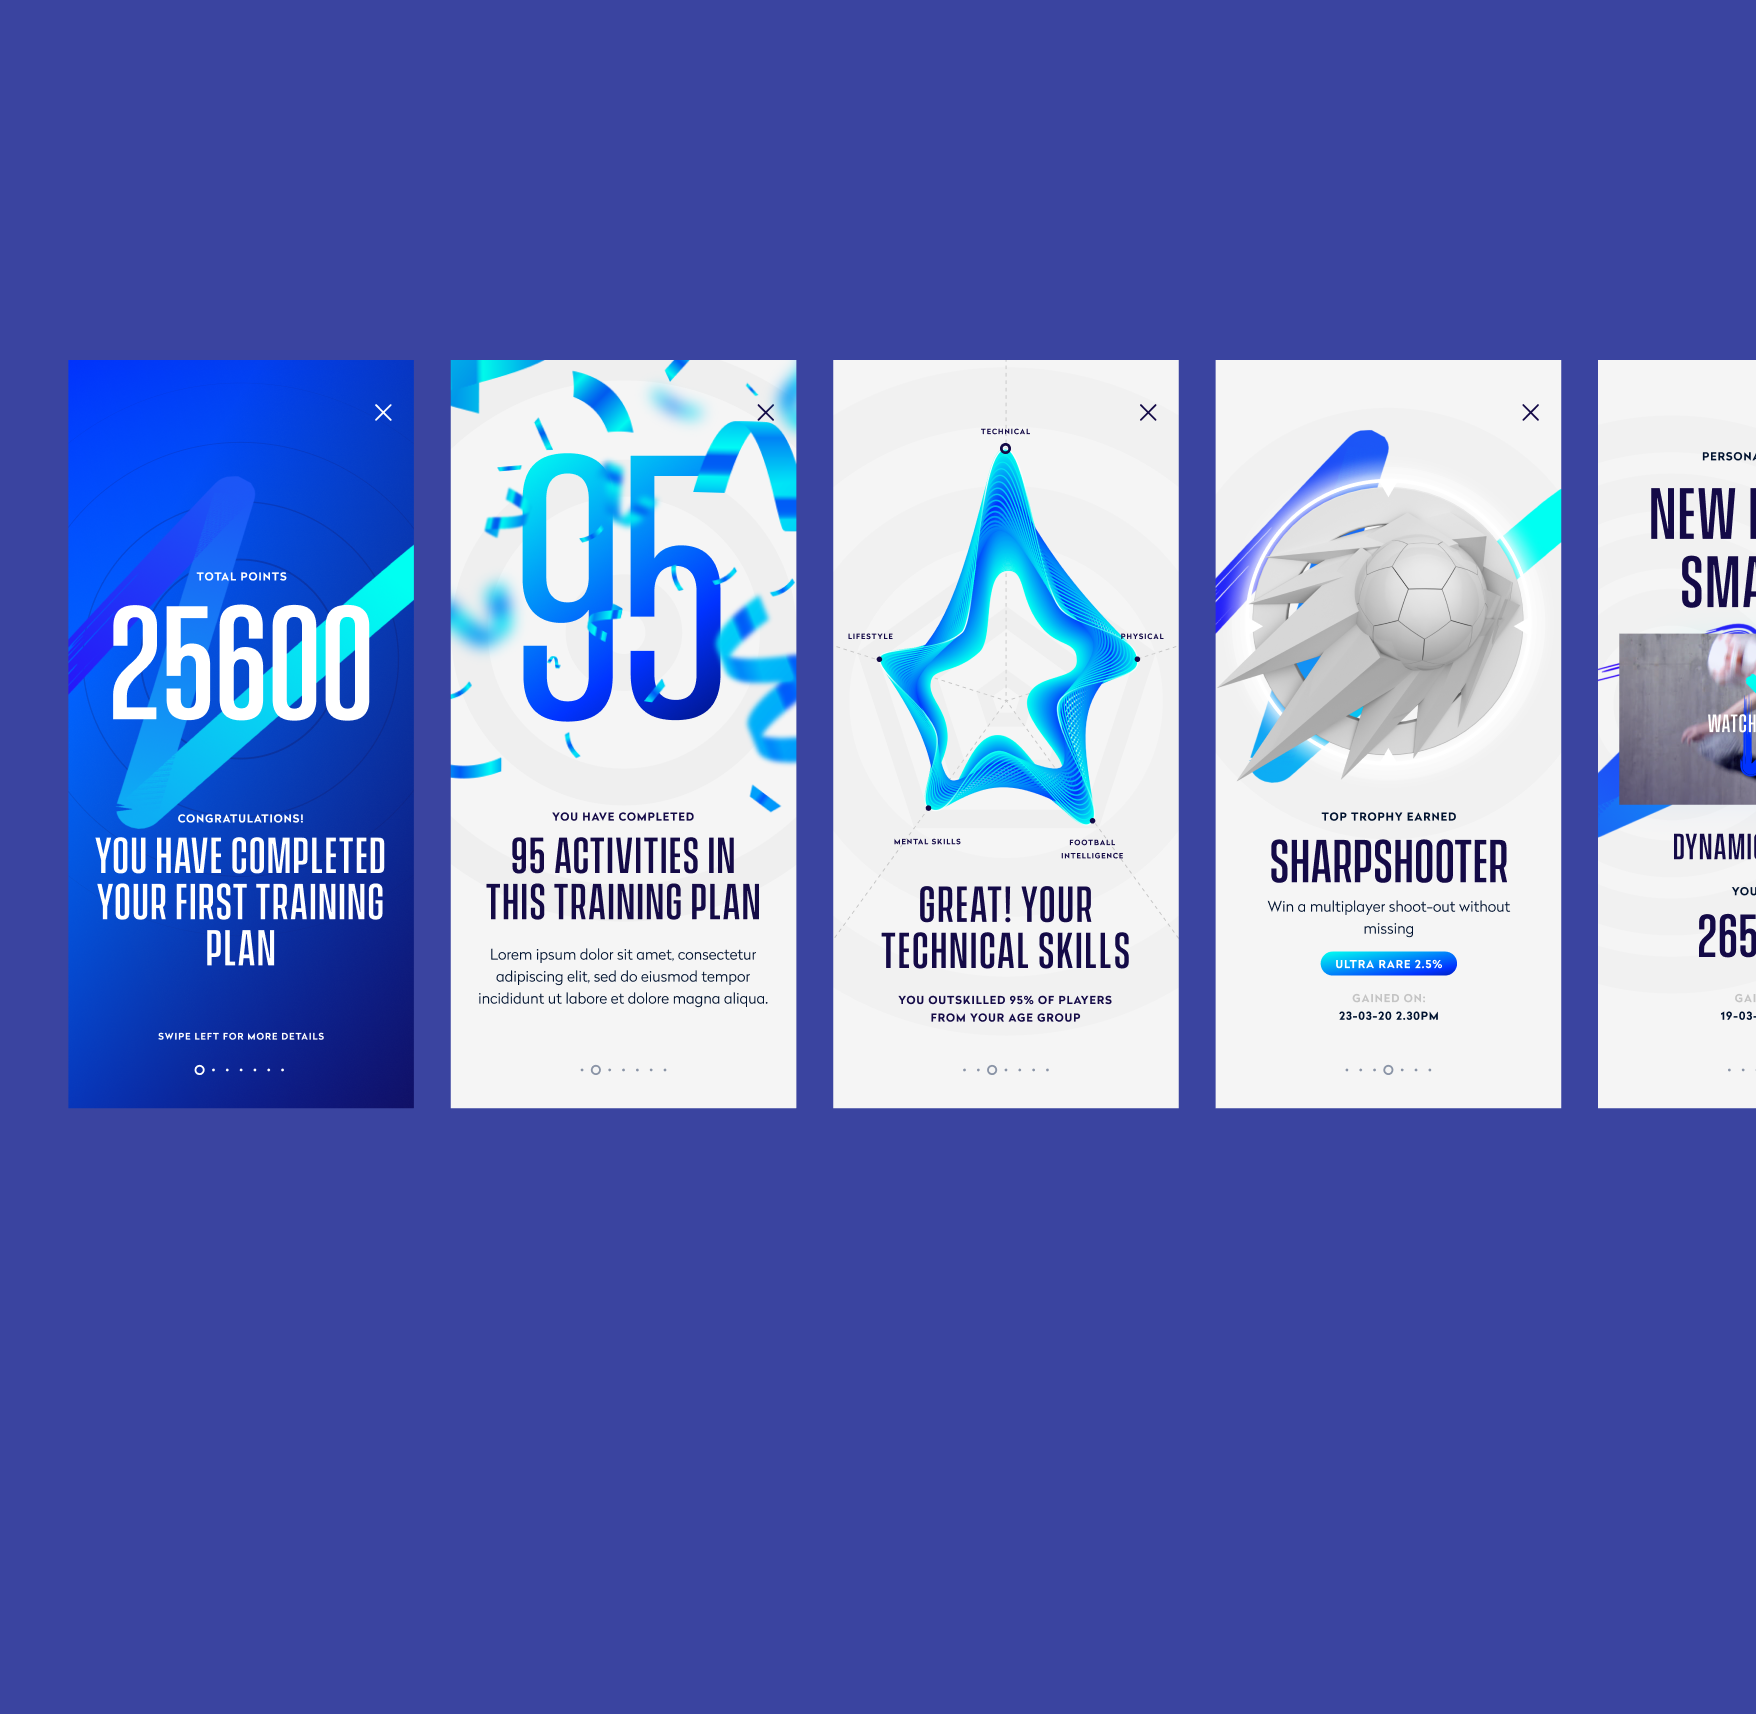
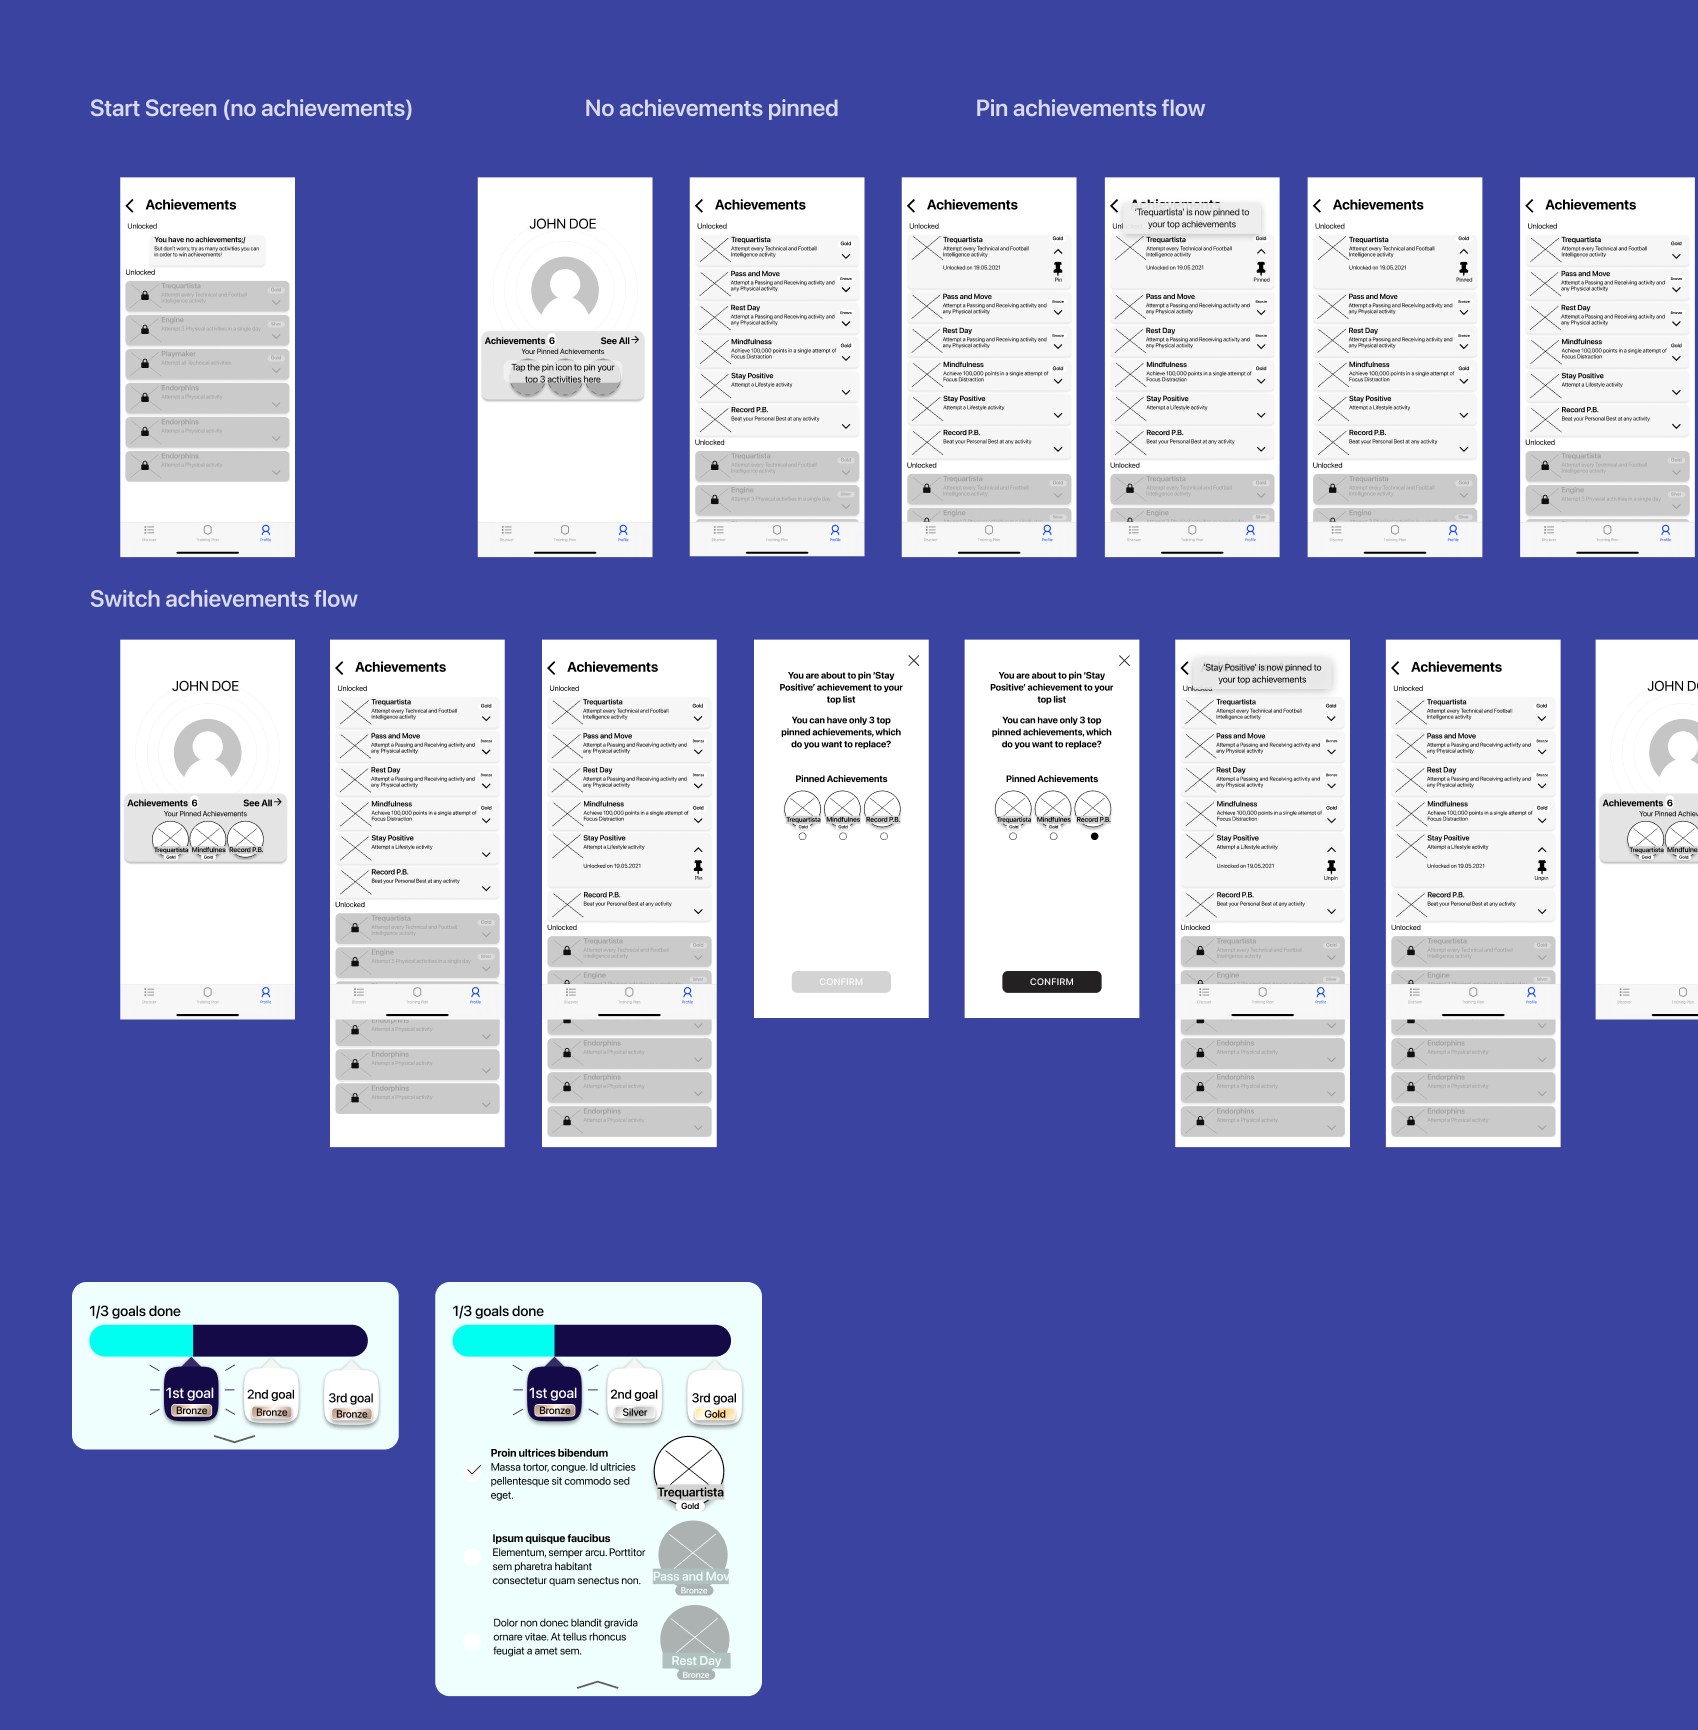
Achievements and goals mechanics are at the heart of the app to drive motivation on perfecting the player’s skill level.
Our philosophy was for players to challenge themselves and always aim a little higher.
Achievements were levelled Bronze, Silver and Gold, and available from the profile section.
Goals were kinda like missions that combined a set of achievements.
12 — DevelopmentDevelopment
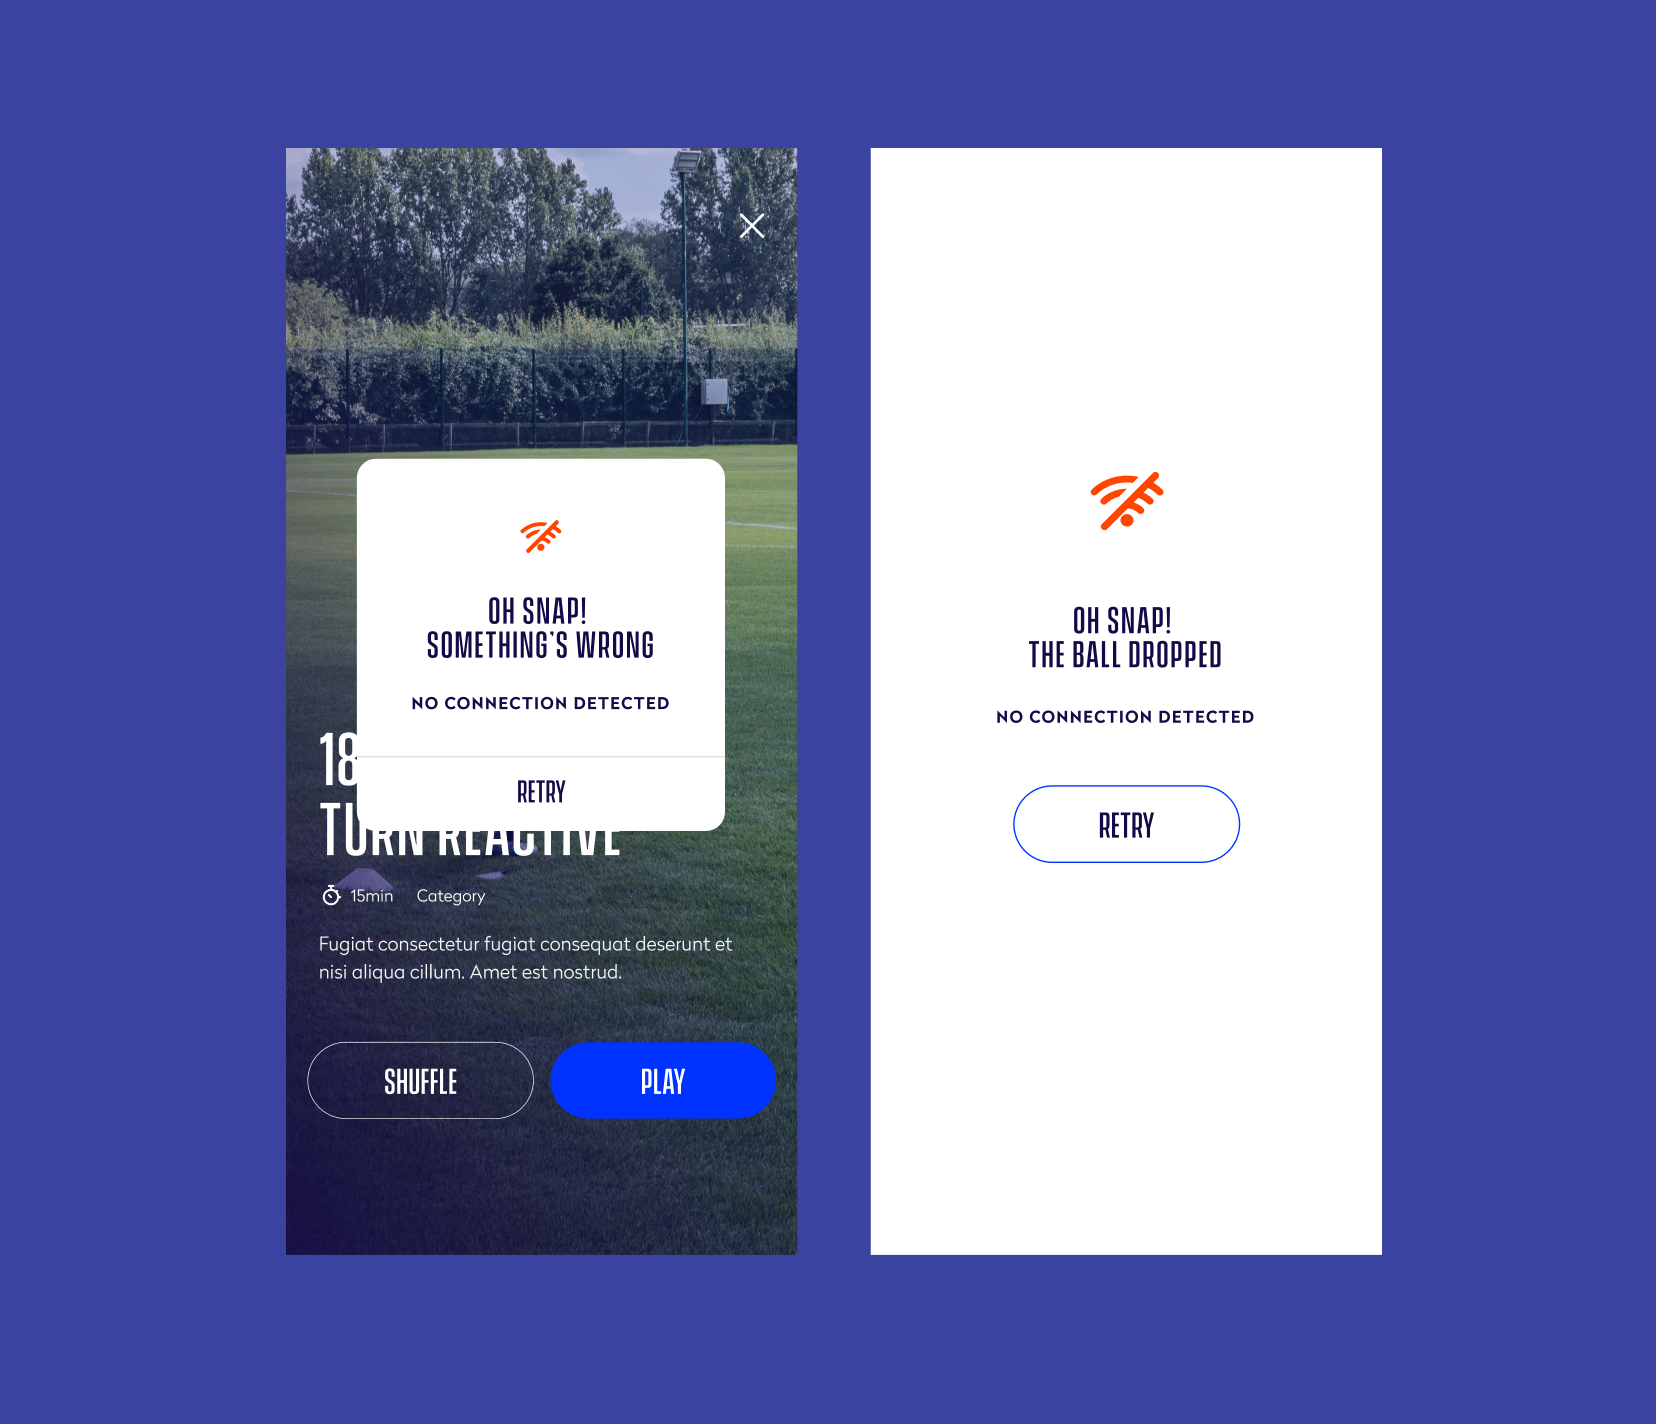
Edge cases
We worked with the development team to map and document the edge cases.
Prototyping
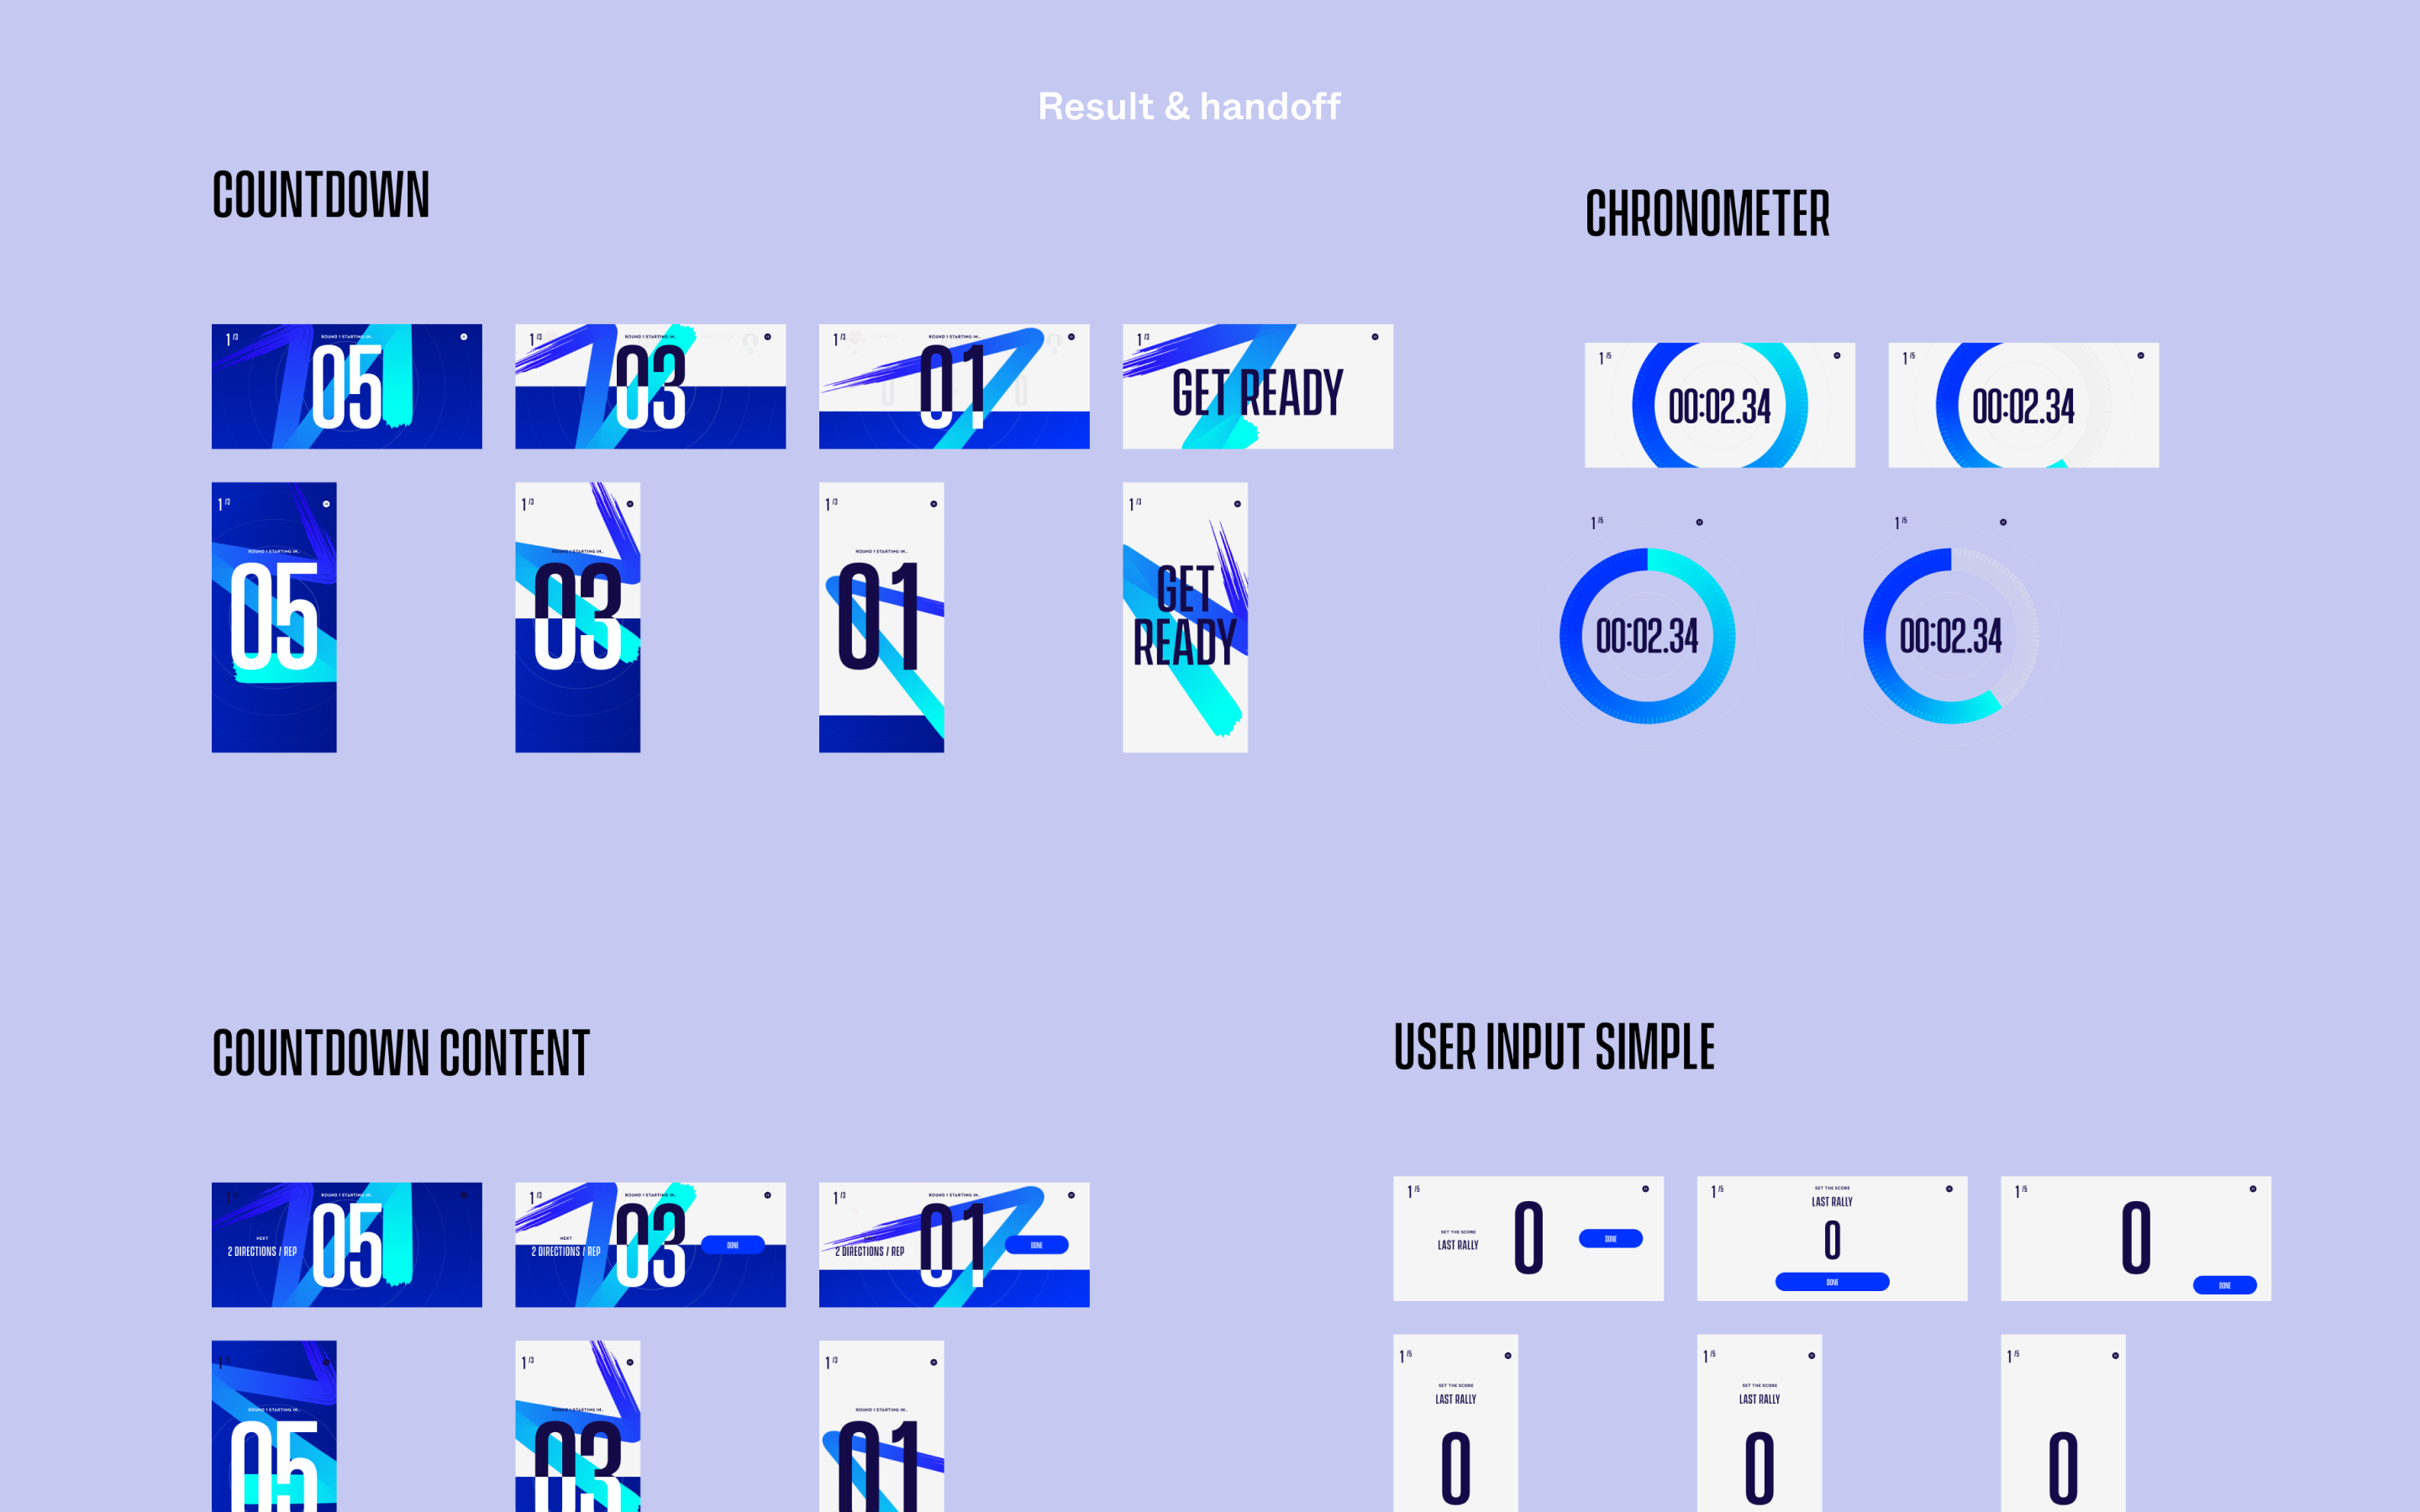
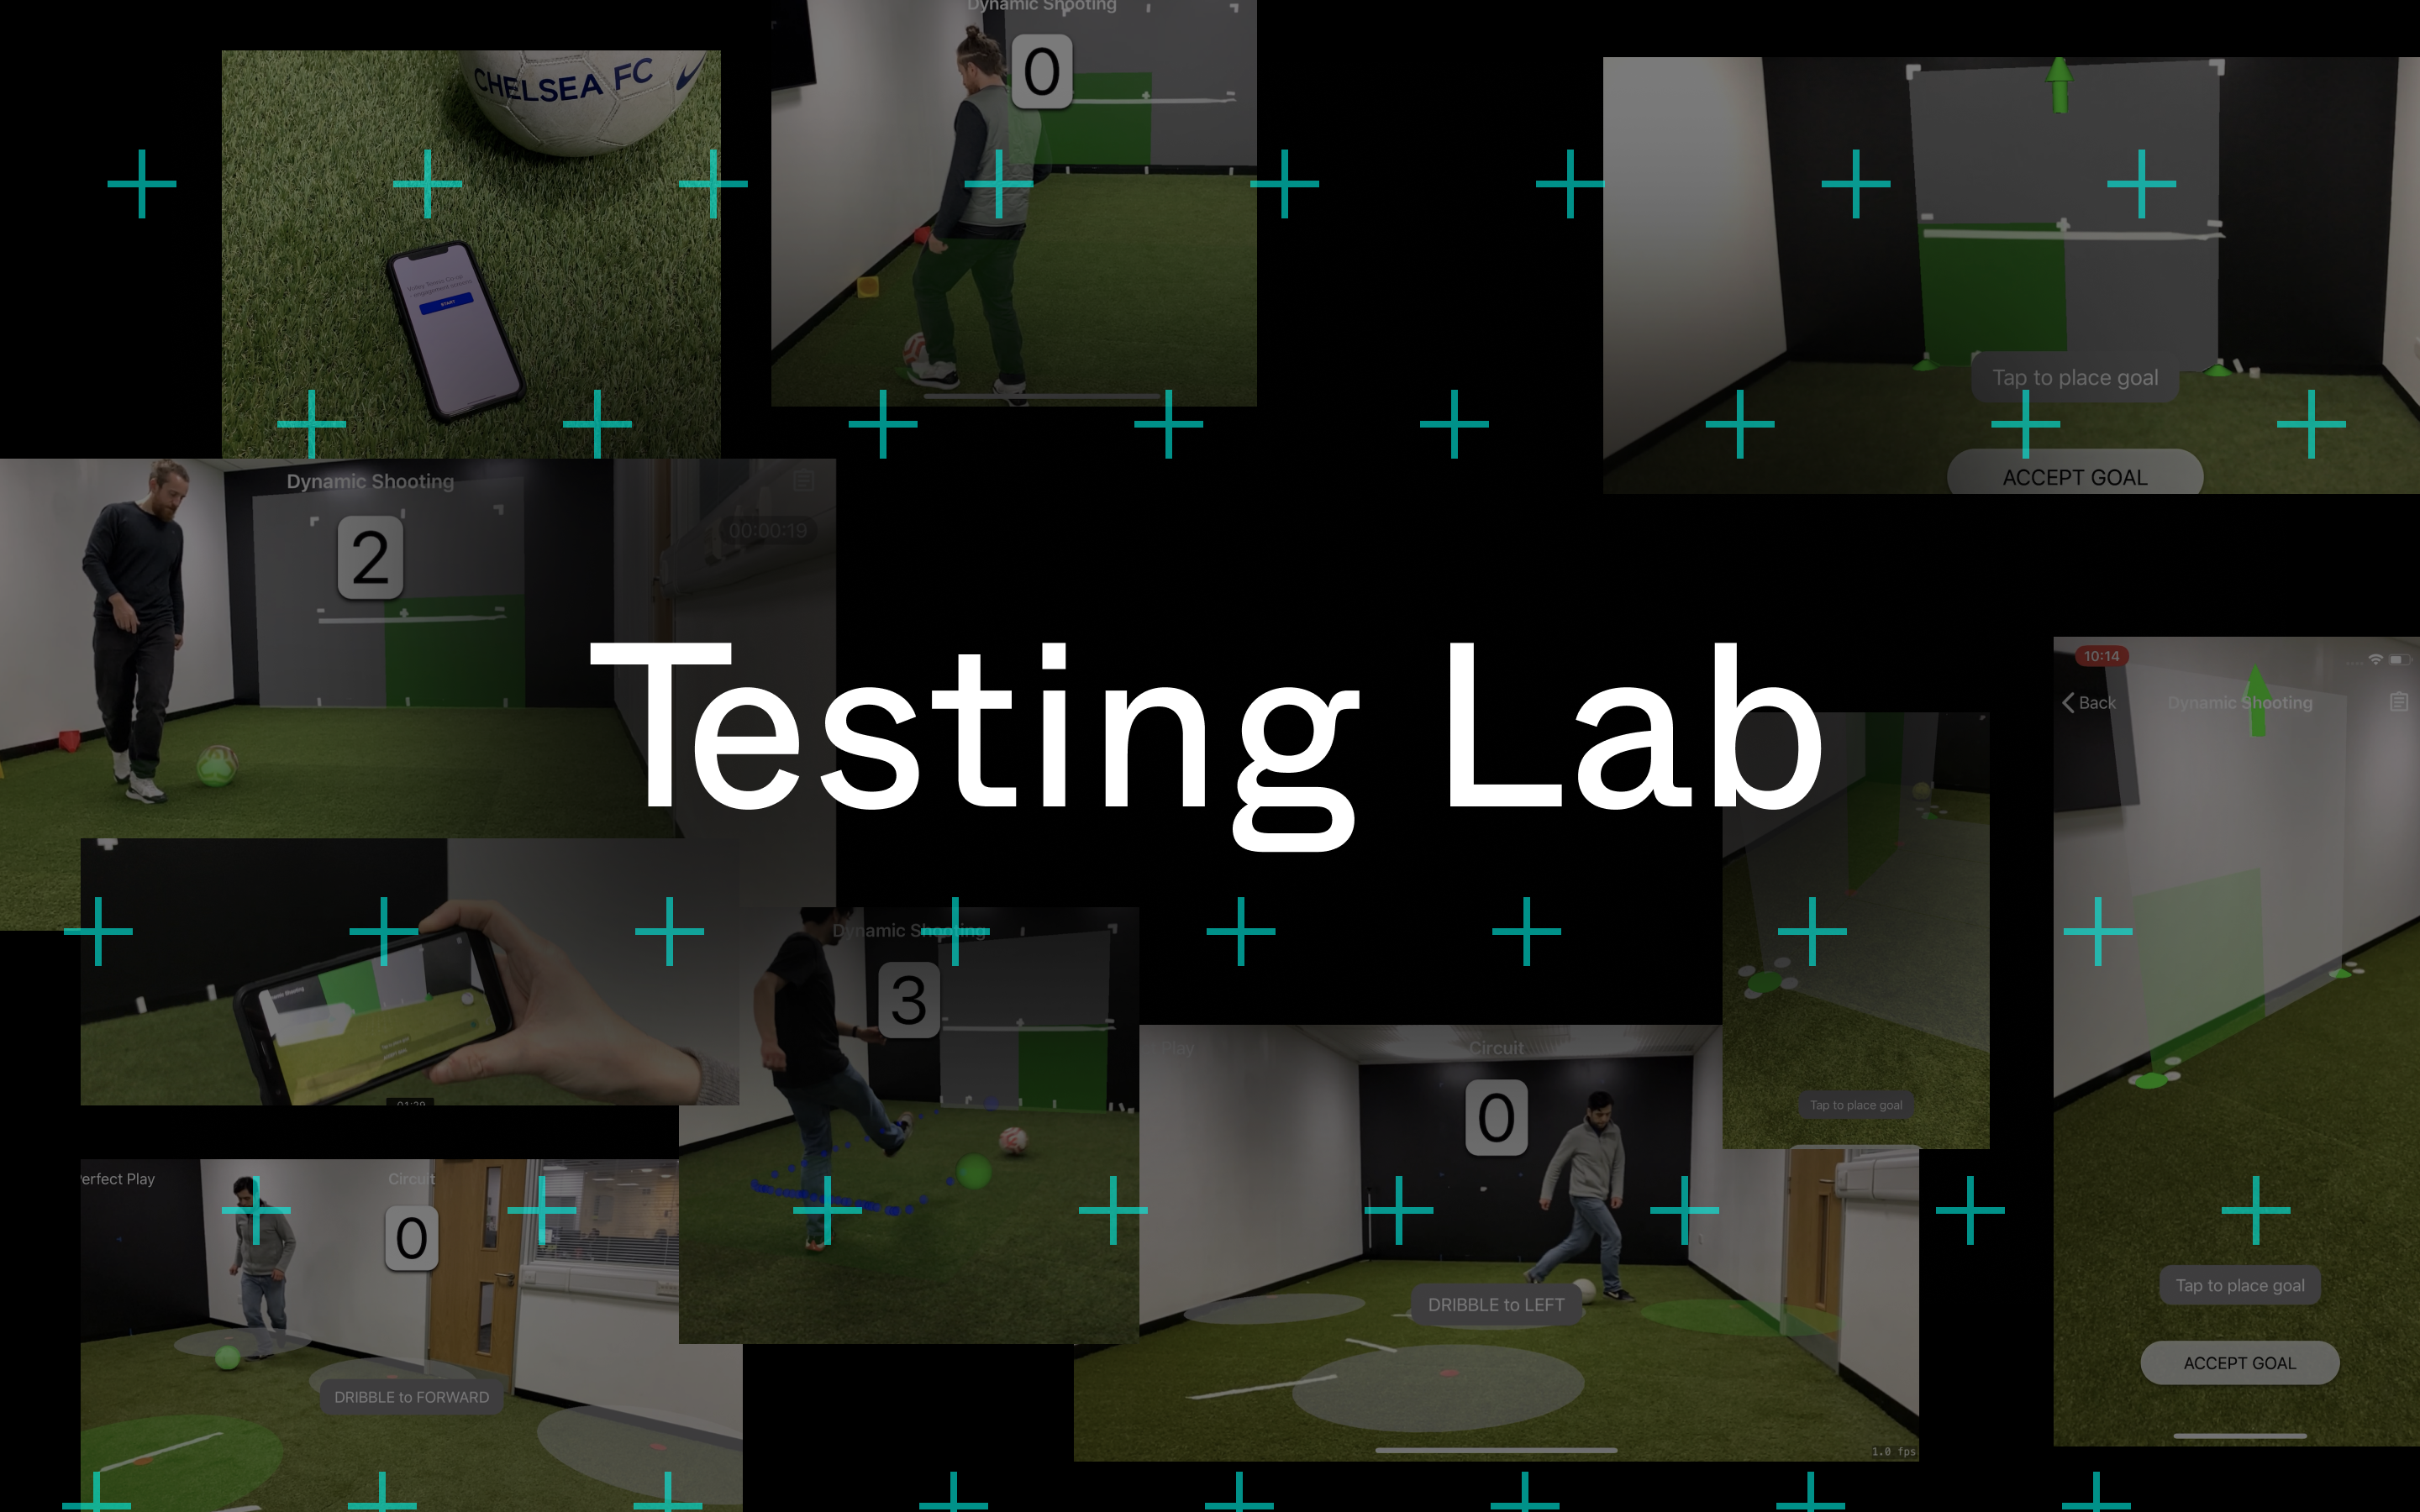
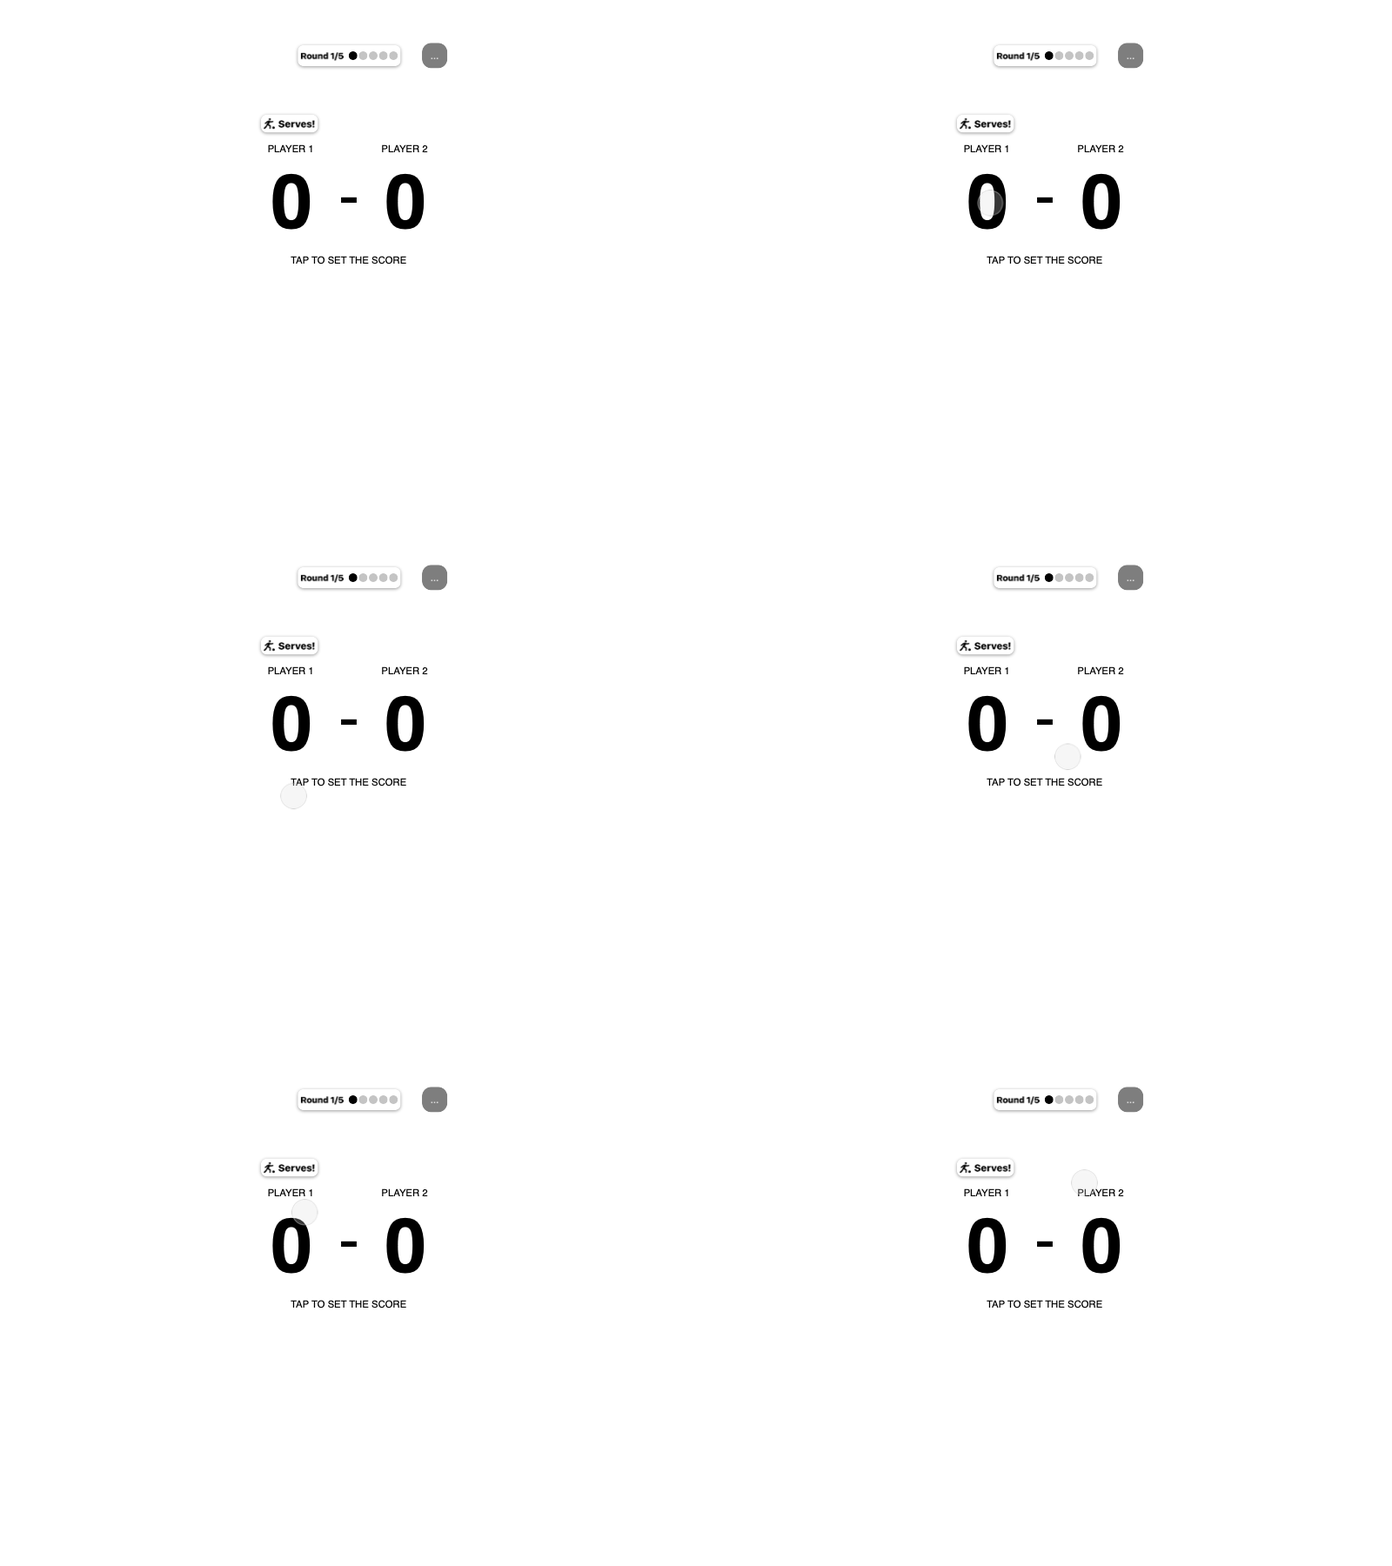
Rapid prototyping for players’ input screens was used in order to test our interaction hypotheses.
User testing
We conducted user testing sessions that gave us research and valuable insights.
On each session our design team’s tasks were to create prototype(s) of the features or versions we liked to test, and a question list, along the overall facilitation.
Launch
We conducted user testing sessions that gave us research and valuable insights.
On each session our design team’s tasks were to create prototype(s) of the features or versions we liked to test, and a question list, along the overall facilitation.
Thanks — Ruben, Matt, Steve, Nicole, Mikey, Sam M., Sam P., Dan, Cristina & all the Chelsea teams I’ve crossed paths with!
Related projects
Sport-Investment Platform
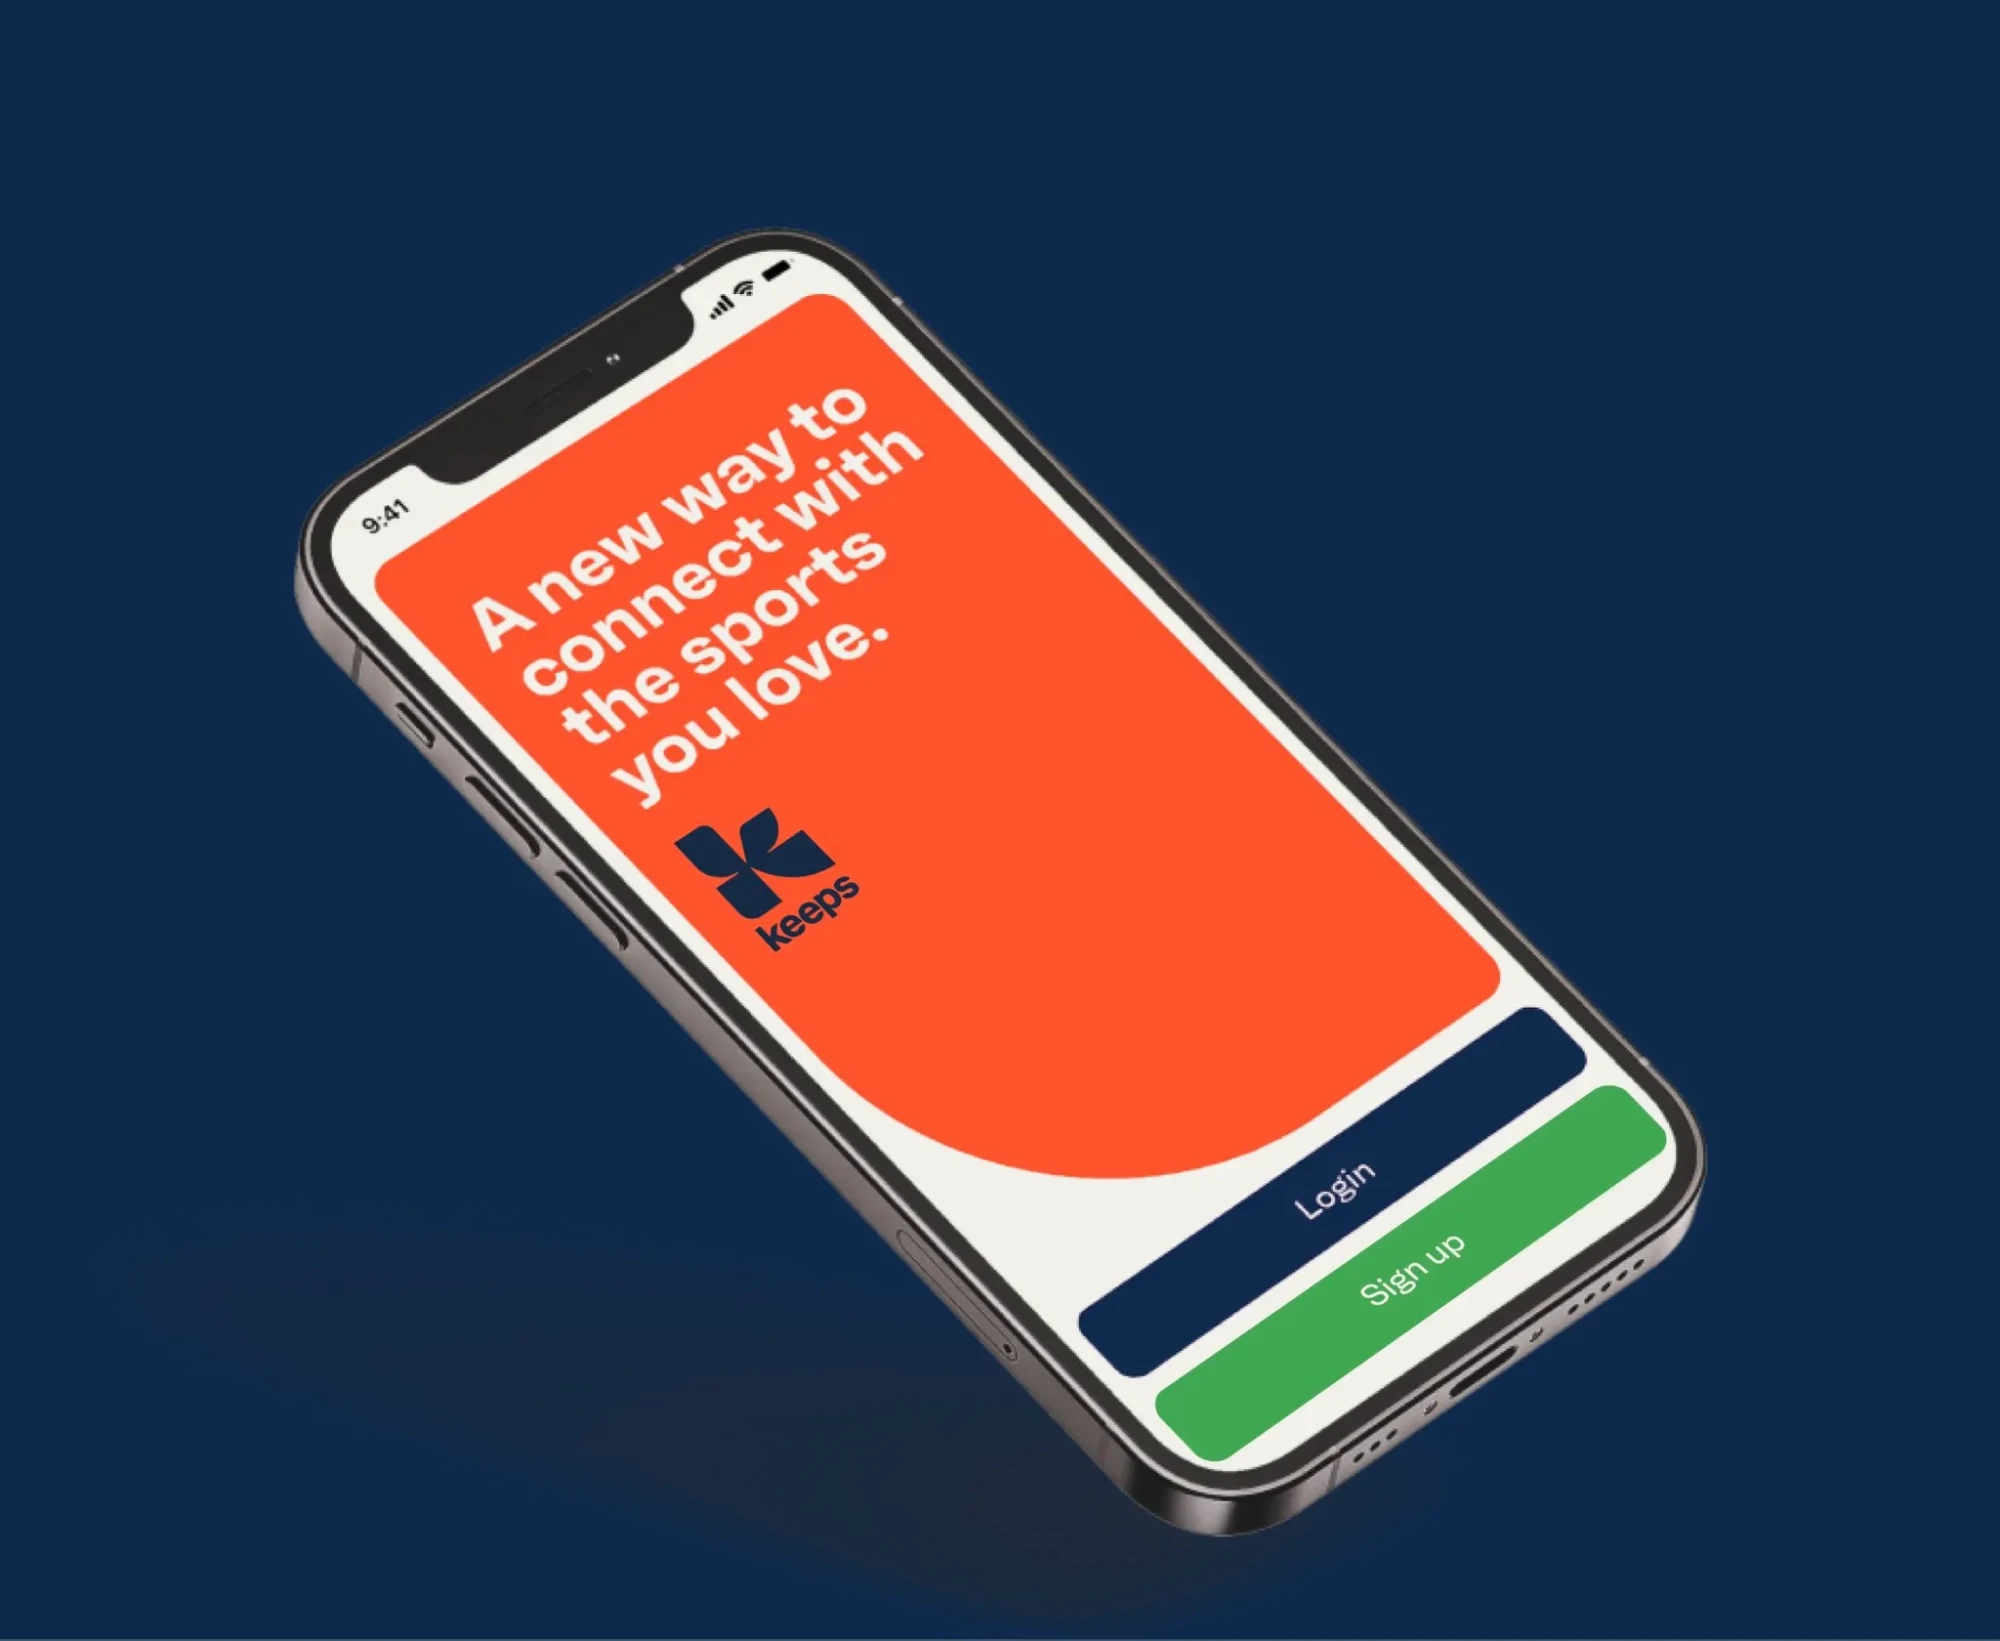
UX and a scalable design system for buying, trading and cashing out stakes in sport.
Ordo Pay
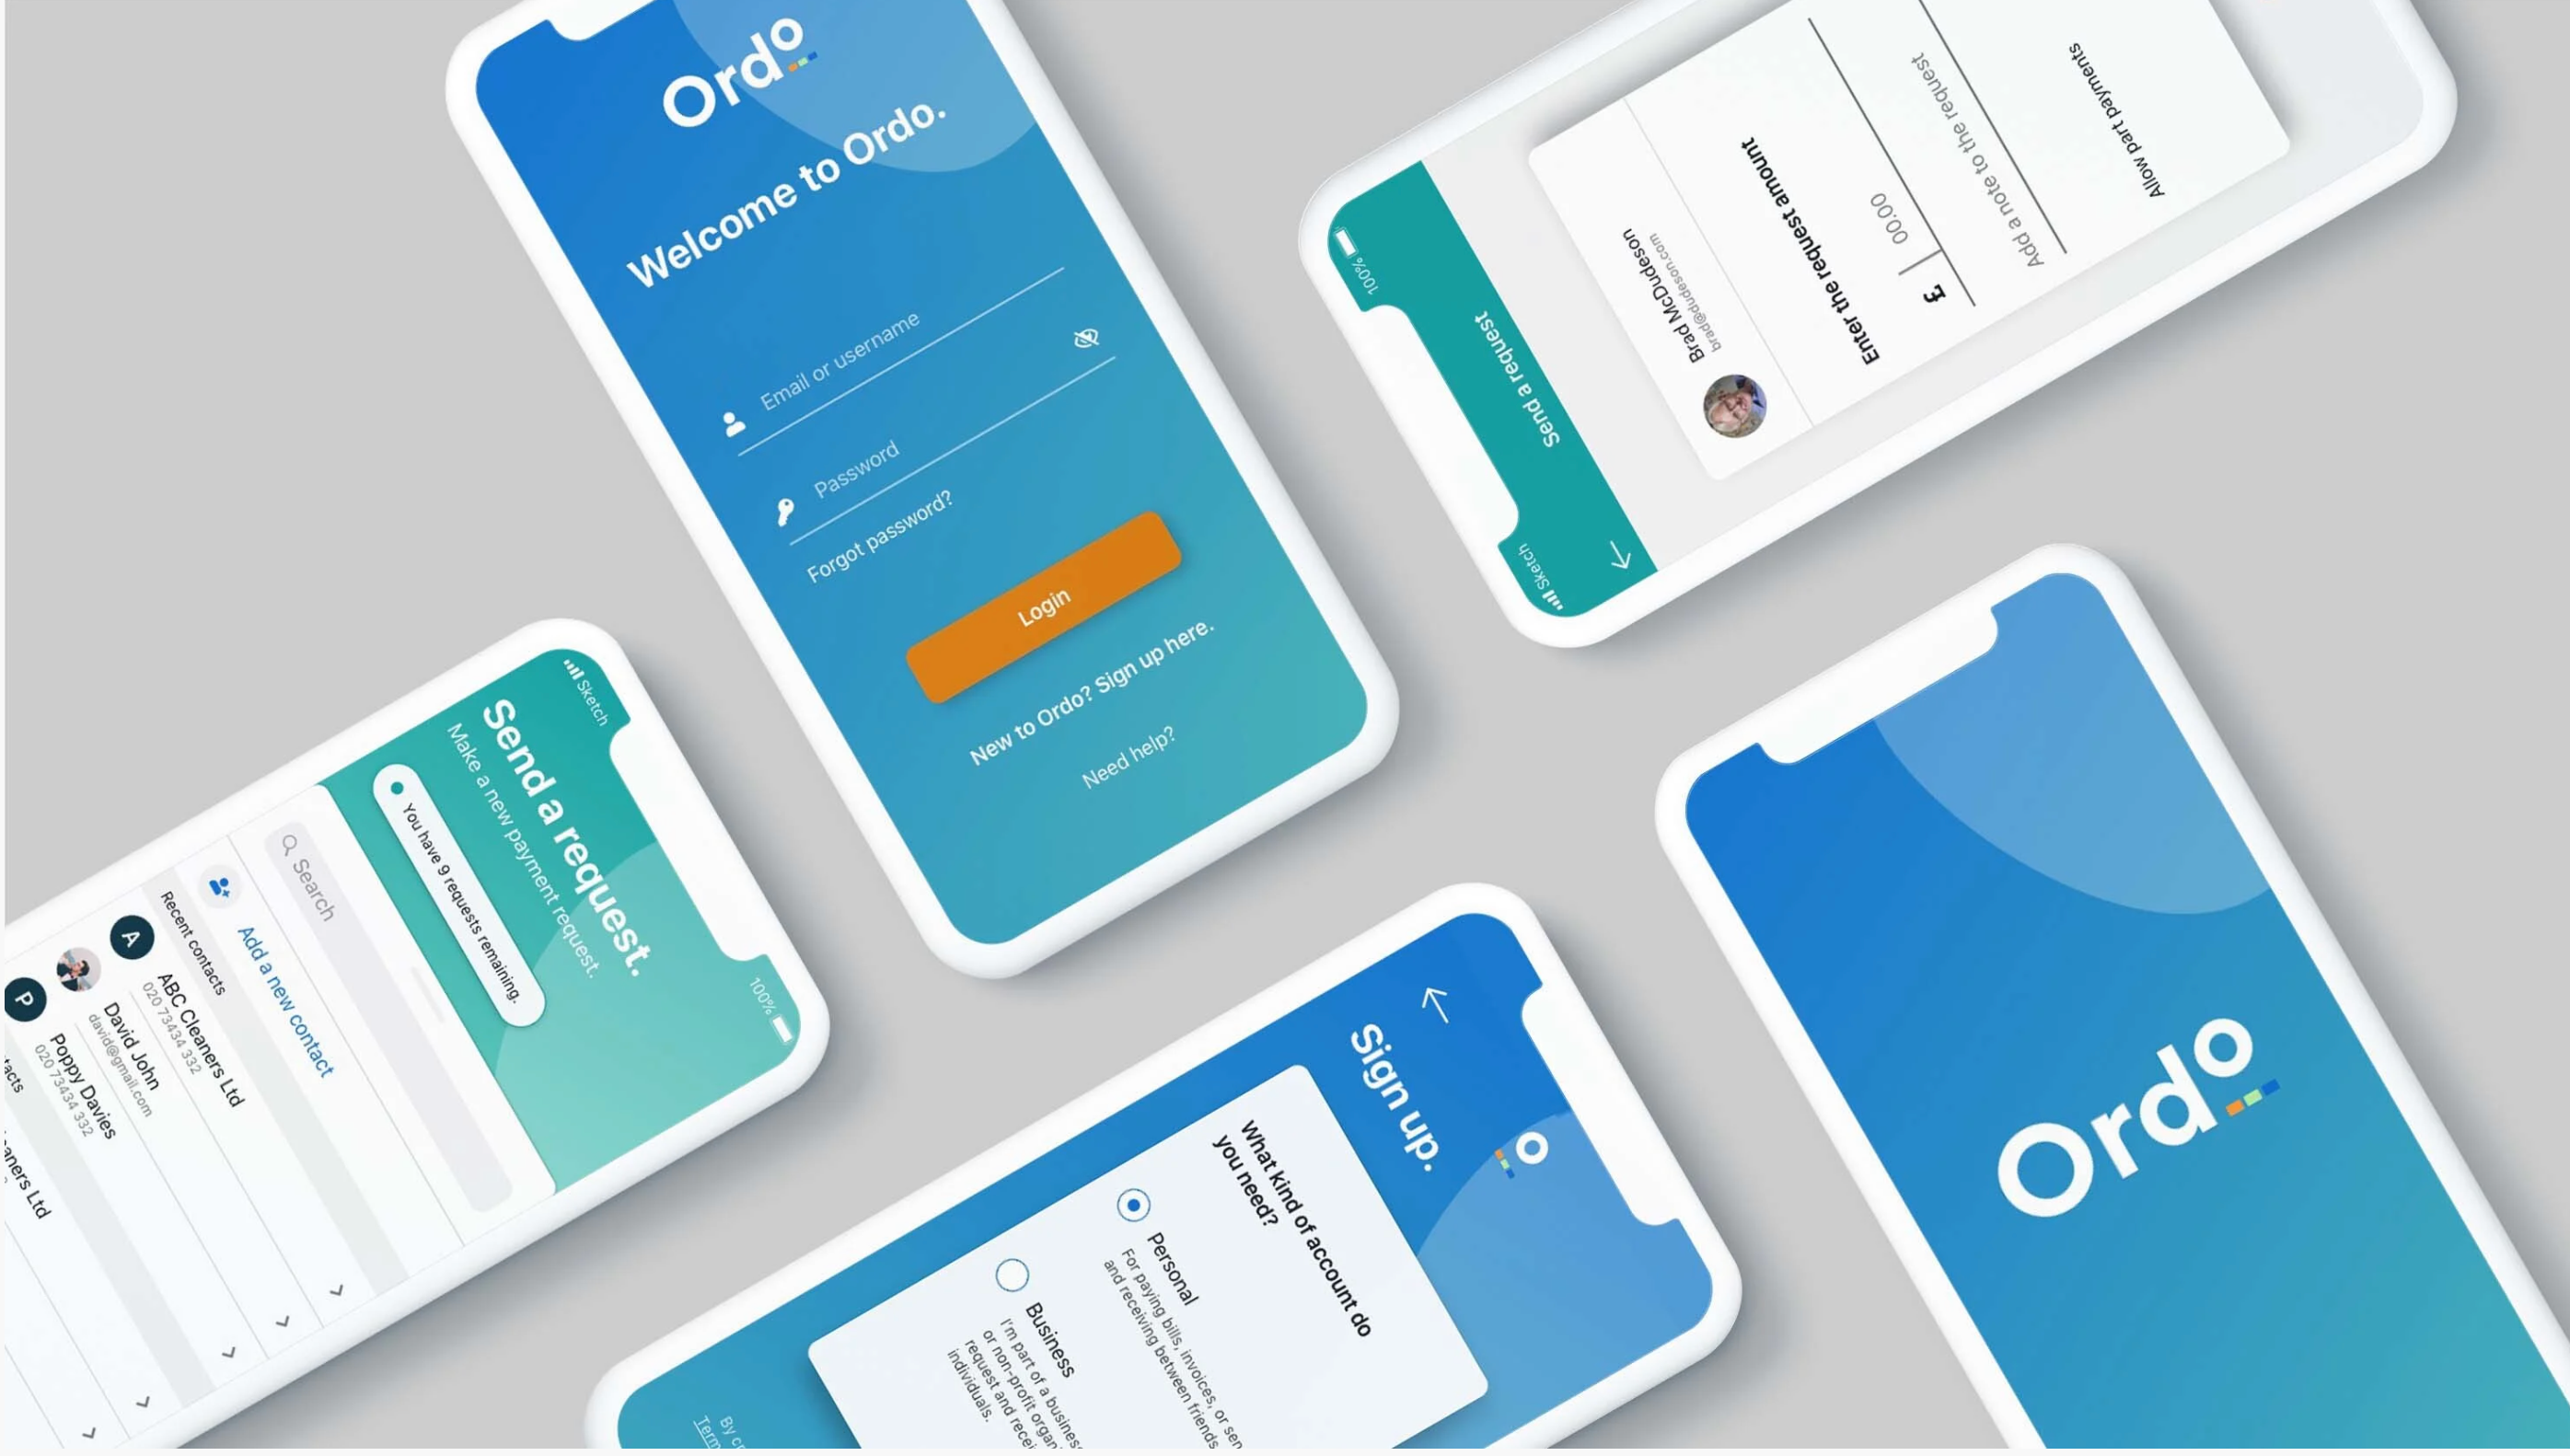
A payment-request service for the UK Open Banking era — dual-sided UX for small businesses and households.
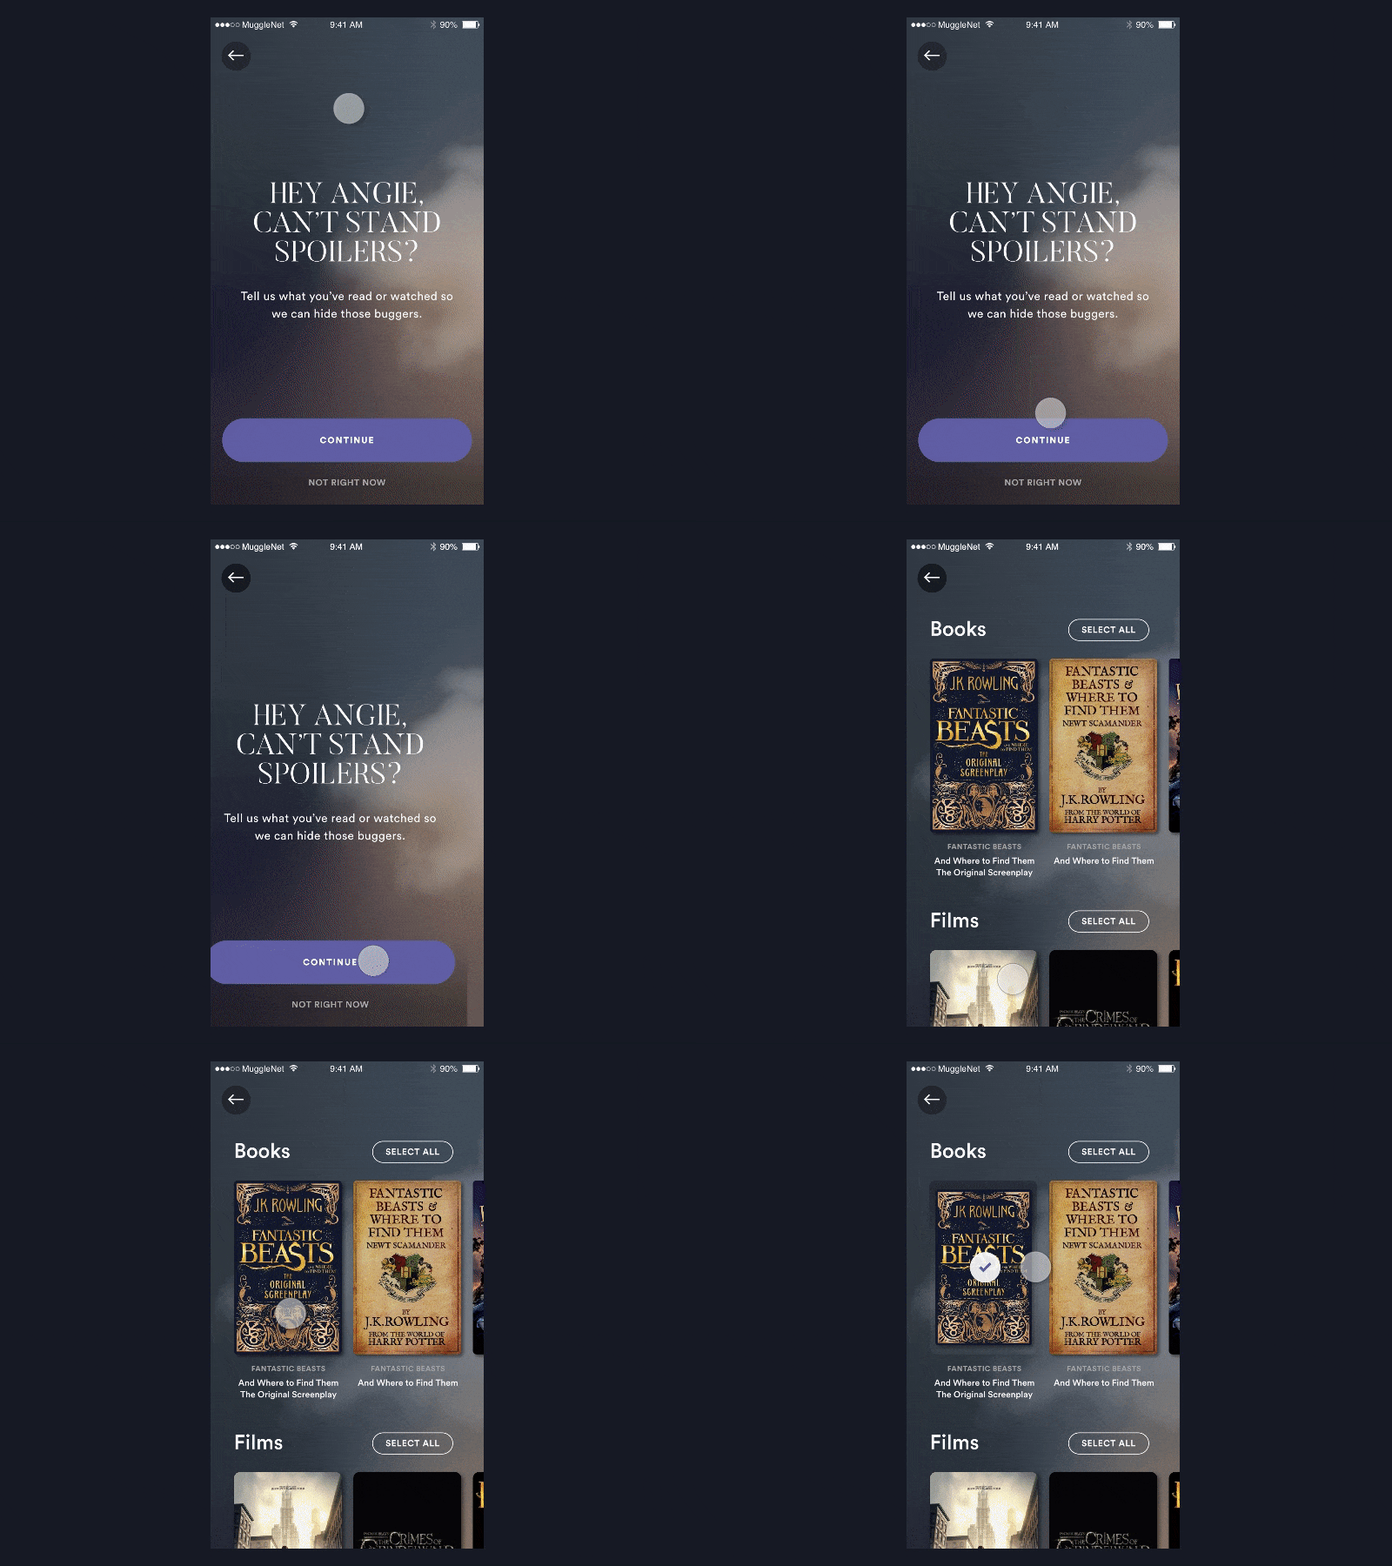
The Wizarding World App
Unifying the Harry Potter universe into one companion app — films, games, quizzes and trailers.
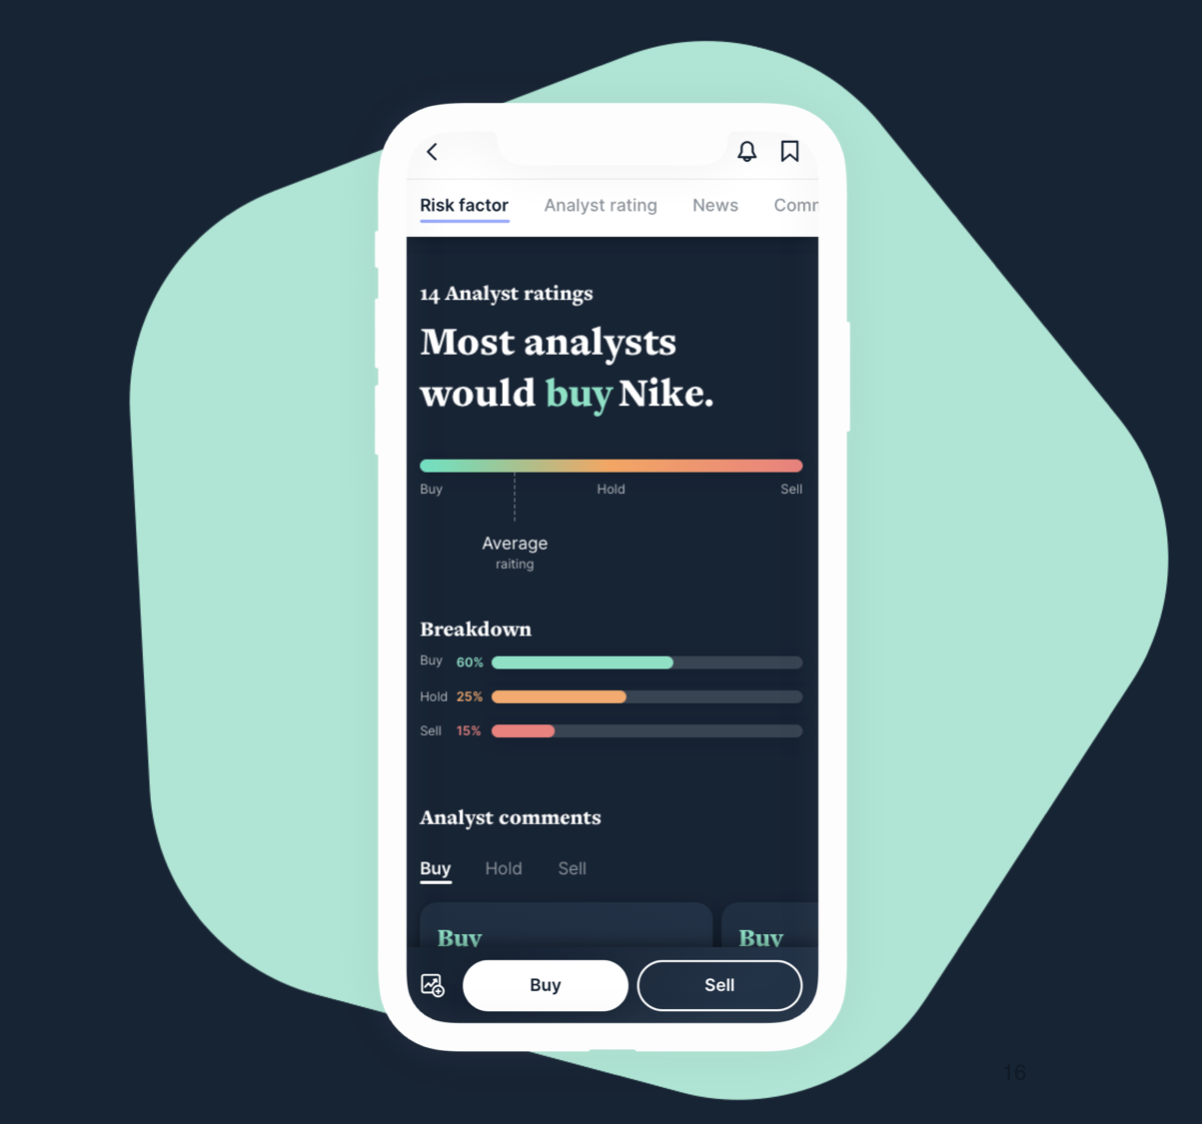
Future of Trading
Layering trading and wealth management onto Citi’s banking app — stocks, crypto, portfolios and advice.